Archived Ideas for ‘Projects’

IDEA 42: WRITE IT DOWN

Book_of_Stories

This morning my teenage son was telling me about a wrong number he received on his cell phone. The caller, apparently attempting to reach a landlord said “The toilet is backing up! I need help here!” My son asked “Is it still running?” the caller said it was, so my son said, “Do you see a little knob down underneath on the left side? Turn it all the way until the water stops.” The caller did so, and the water stopped. “OK,”  the caller said, “now what do I do?” to which my son replied, “I don’t know. You have the wrong number.”

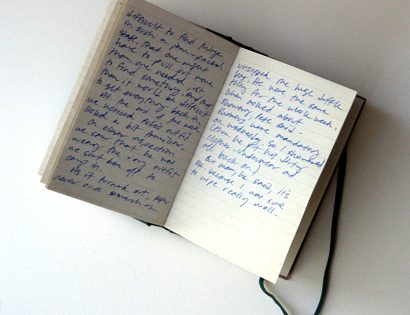
I just about choked on my Cheerios, I was laughing so hard. Let’s face it, every now and then one of your kids will say or do something that is either so funny, or so sweet it practically blows your mind. And I know we are all so very busy. But this is my plea to get you to dedicate a small notebook to writing these things down.

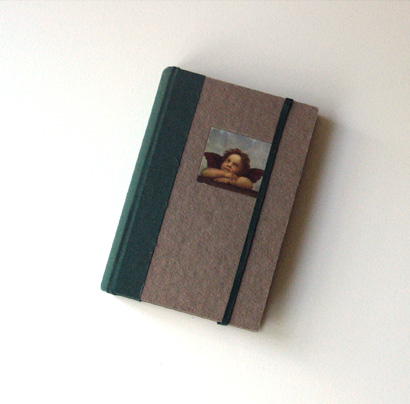
Buy a small “blank book.” This is not hard to do. We have all seen them, fallen in love with them, then couldn’t think of anything good enough to write in them, right?

If something one of your kids does strikes you as funny, write it in there.  If you can’t think of anything, (or nothing funny has happened yet), write the story of giving birth or adopting them. This book will become a personal bedtime story for the kids. You wouldn’t believe how they love to hear stories about themselves. If it’s funny, and it’s about their sibling, even better. Since it’s being written for the kids, you don’t really have to worry about the quality of writing. It’s the stories that matter. I have been recording stories in our book since the kids were quite small. Eventually it will end up being a keepsake, and possibly inspire them to do the same for their kids.

So, to my friend who’s daughter asked him, “Daddy, is that a REAL clown, or just a guy dressed like a clown?” I say: Write it down!

Book_of_Stories_cover

IDEA 38: MAKE A GINGERBREAD FAMILY TREE

Gingerbread_Family_Tree

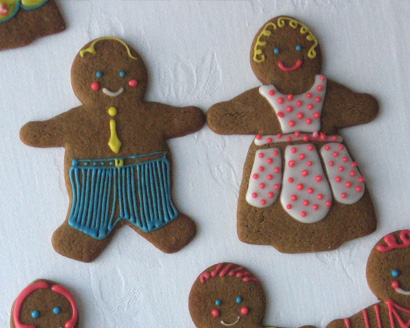
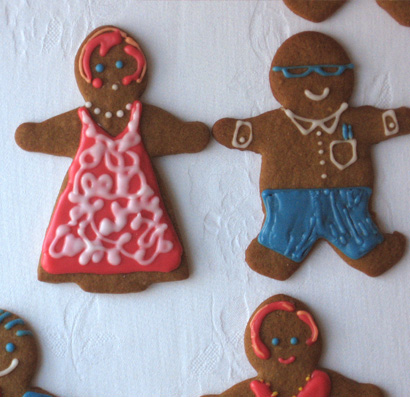
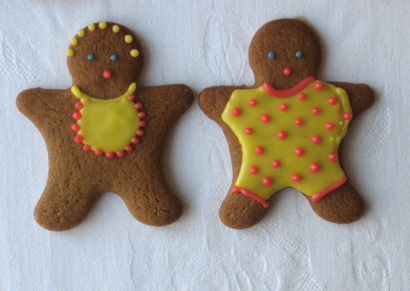
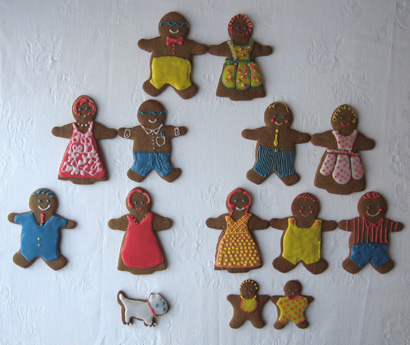
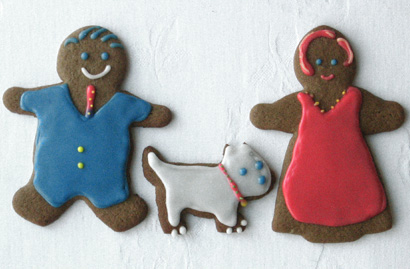
This holiday season you can be with your loved ones, even if no one is able to travel. This very sweet and inexpensive idea was inspired by my daughter who, during our holiday cookie bake this year, decided to represent each family member in gingerbread form. The resulting “Family Tree” (captured on our FaceBook page here) was such a hit that we’ve decided to give you some more details. And, as if that weren’t enough, the project was showcased on Twin Cities Live, a local Minnesota television program. Because of the show, our “Family Tree” includes the hosts, Elizabeth Ries, and John Hanson as well as Elizabeth’s Westie, Henry!
ElizJohnHenry_Gingerbread

You really could complete this project with only one cookie cutter, the gingerbread man. But since we happened to have a gingerbread girl and a mini cutter, we added dresses and babies to our group. Our little dog was hand cut-out, but if you have a dog-bone shaped cutter, that is another way to include the family pooches in the mix. Of course if you want to include the cat, fish, hamster or whatever, we encourage you to do so!

We used the gingerbread cookie recipe from a Williams-Sonoma cook book. Here’s a link to the recipe on-line. The trick with the cookie dough was to divide it into smallish hunks and chill before trying to roll out. You really need to move quickly and get the cut-out cookies onto the baking sheet before they have a chance to warm up. Bake lots of extras, then let the cookies cool completely.

As I’m sure you have realized there are lots of squeezable cookie frosting products available. And although I truly believe that you should do what works for you, I’m here to tell you that I still think the best option is to make your own. It’s much less expensive and gives you so many more color options. But also, in my not-at-all-official trial of a few of those products, I never found one as easy to control as my own. If for no other reason than, if you make your own you can vary the thickness until it’s right.

Frosting ingredients:

Powdered Sugar

milk

vanilla (optional)

food coloring

For each color, measure one cup of powdered sugar. Add about four teaspoons of milk (and 1/4 teaspoon vanilla if you like). Mix with a spoon to get a glossy-smooth mixture. Now add drops of food color. Here are the quantities we added to one cup of sugar to get our colors:

Poppy Red: 10 drops red

Goldenrod: 4 drops yellow

Blue: 8 drops blue

If your frosting gets too thin, add a little more powder. If it’s too think, add about 1/4 teaspoon milk at a time. For the large area background colors we found a little thinner frosting worked better. The frosting lines would “melt” into each other and form a smooth, even surface. When we made dots or other small designs we found having the frosting slightly thicker worked better.

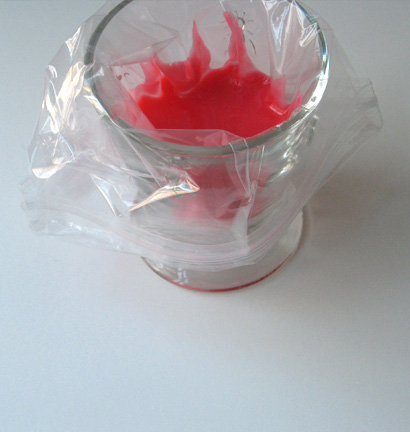
Once you get all your colors mixed in individual cereal-sized bowls, it time to make your decorating tools. Each color will require a small freezer “zip” bag. Zip open the bag and place one corner of it in a short glass. Now turn the top edges out and down, draping over the glass rim on the outside. Pour the icing as close to the corner of the bag as you can.
Frosting_fill

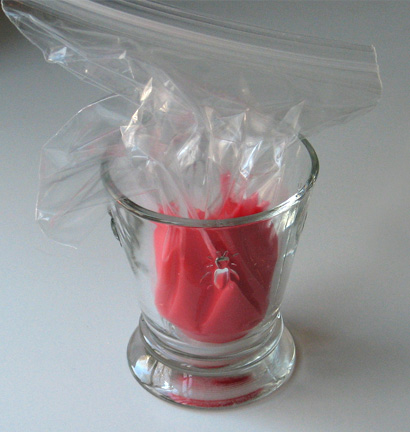
Zip the bag closed, but keep each bag in it’s own glass. This will help keep the mess to a minimum, once you’ve cut them open and need a place to set them down.
Frosting_baggie

To decorate, snip the tiny corner off the bag. Grip the closed bag ‘behind’ the icing and gently force the icing out the hole. Of course the larger the hole, the thicker your line will be. If you find you’ve made the hole too big, put a new bag in the glass, cut a good inch off the too-big corner and use that nice big hole to squeeze the whole mess into the new bag. Then you can try again.

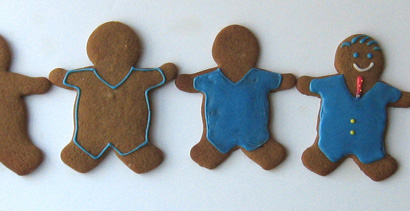
Now, pick a background color, for example John’s blue suit, and outline the shape of the suit. Now it is as easy a pie to fill in the area just like a coloring book. We found it easiest to fill in with repeated concentric shapes, starting just inside the outline and repeating the shape until they got smaller and smaller and eventually filled in. If you have mixed the icing to a glossy, viscous consistency, you will end up with a nice smooth solid shape. Wait until the background color dries completely, then add the details. This sequence shows the process.
John_process

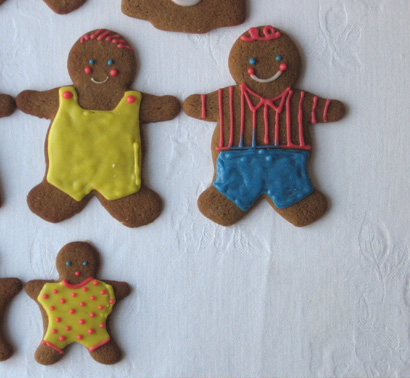
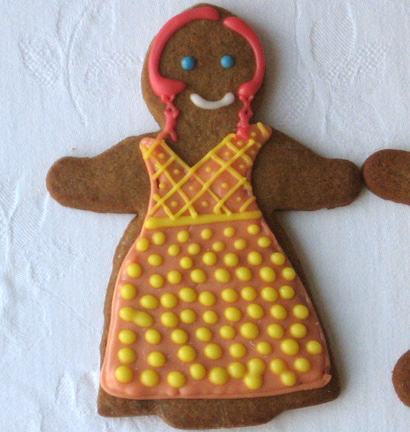
Make your family members any way you want. Here are some of ours, in case you need ideas.
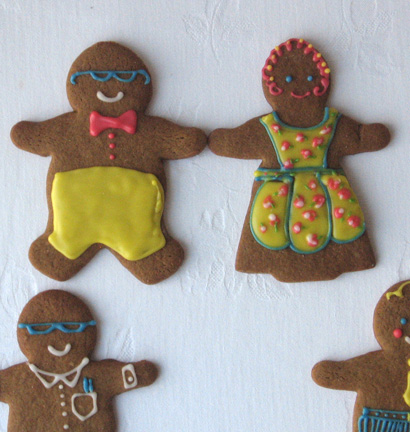
Gingerbread_Grandparents

Gingerbread_Parents

Gingerbread_In-Laws

Gingerbread_Brothers

Gingerbread_sister

Gingerbread_Babies

Of course I have to point out the ladies (my mom and I) in our BellaPamella aprons! My mom is wearing the Eunice in Kitchen Fruit and I’m sporting the Nora in Ruby Dot!
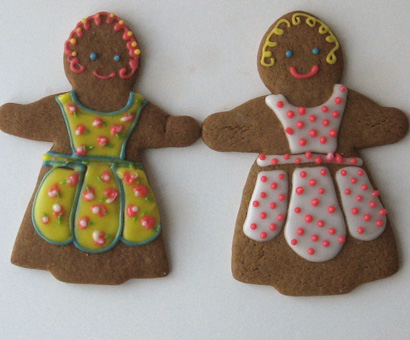
Gingerbread_aprons

Once your gingerbread family tree is finished you can display it on a platter, or bag each one up and tie it with a ribbon to hang on your tree, or theirs. Make a small paper tag with the name on it, slip the ribbon through, and you have a very special handmade gift to give. By the way, if you arrived here from the Twin Cities Live site and wish to see all the projects highlighted on that show, either click on the Twin Cities Live category to the right, or click here.
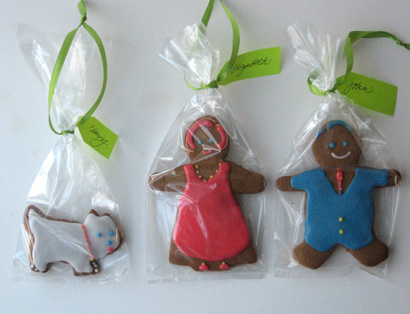
TCL_bagged_cookies

Happy Holidays! And don’t forget to have fun with your family, gingerbread and otherwise!
IDEA 37: SHOW YOUR THANKS

Thanks_writing_Cait

Whether you are hosting a big dinner, or preparing to head out of town, if there’s a Thanksgiving meal in your near future, you know how lucky you are. Thanksgiving is often one of the few times of the year most of the family is together.

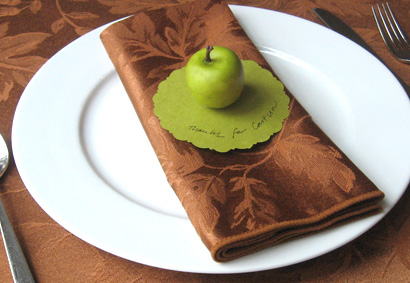
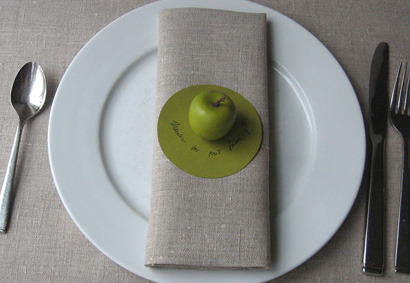
For this year’s table, why not make sweet little name place cards that do a little more than just point out where someone should sit? This simple idea combines a few things I love about Thanksgiving. It’ll make the table even more special, it’s an easy project, and doing it allows me to dwell on all the things I’m thankful for.

Thanks_Brn_setting

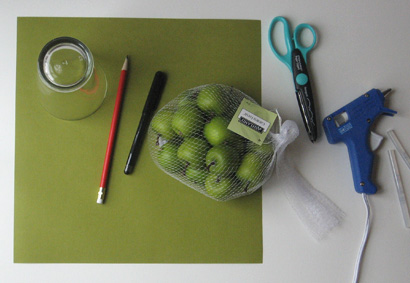
For the project you’ll need some pretty paper and tiny faux green apples from the craft store, a hot glue gun, a pencil, a black fine point pen, something about 3 1/2″ round to trace around, like a glass, and either plain or fancy scissors.

Thanks_tools

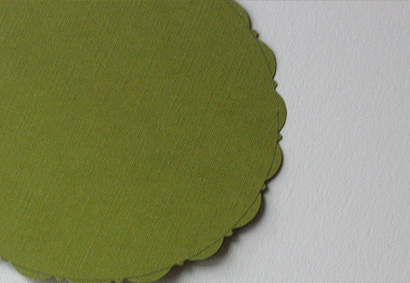
Use the glass and pencil to make 3 1/2″ circles on the pretty paper. You’ll need one per person. If there is a right and wrong side, make the circles on the wrong side. If you are using the fancy scissors, cut along the outside of the circle, so you will still see the drawn circle when it’s cut out.

Thanks_fancy_edge

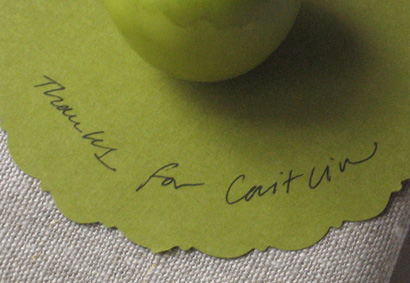
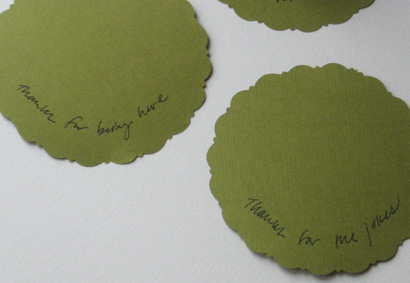
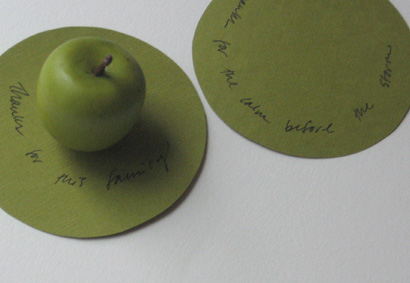
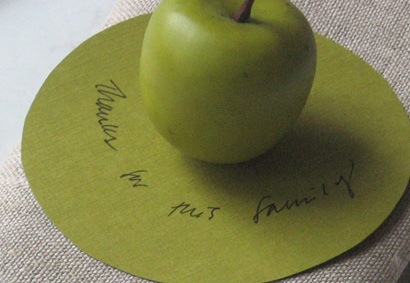
Once you’ve cut all the circles, on the top side, you may put a very light pencil line in an arc about 5/8 ” or so from the edge. (This is optional). Then, with the pen, along an arc shape, hand write “Thanks for [NAME]” for each person that will be at the table. The last step is to hot glue a tiny faux apple to the center of the circle.

If you don’t want to tell people where to sit, another idea is to name things you are thankful for. Then, like “stem gems” people can pick whatever sentiment they like! Some thoughts could be:

Thanks for being here.

or

Thanks for the happy.

Thanks for the warm.

Thanks for the calm before the storm!

Thanks for this family.

Thanks for this meal.

Thanks for the jokes.

Thanks for how I feel.

Okay, I couldn’t resist a little rhyme! Here are a few more pictures. I almost can’t decide if I like the plain or fancy cut. Do what works for your decor and make your thankful table as plain or fancy as you like! And Thanks for reading!

Thanks_fancy

Thanks_plain

Thanks_setting_family

Thanks_ECU_family

IDEA 36: MAKE A BOO! BOOK

Kid_Book_1

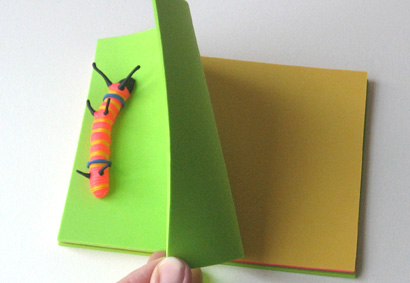
Here’s a sweet project you can do this weekend. You might even challenge yourself to use only items you already have, although it is also fun to shop for some bright colored papers. The finished size and function of the book is up to you (and/or your child). We made a photo album for your Halloween pictures, and two smaller books your child can use as his or her drawing/sketch book, or journal. Here is what you will need to make a fun book project:

Kid_Book_2

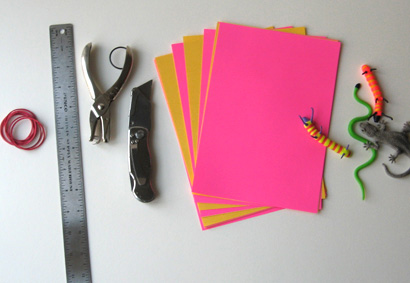
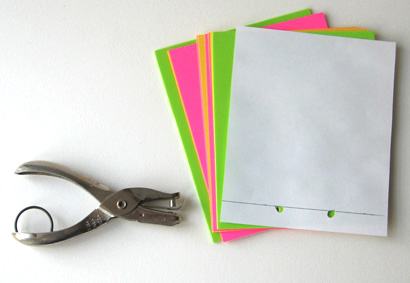
First you need the covers, you can use card stock or, for a chunky book, craft foam. For the pages just use regular paper. It can be plain white printer paper, colored paper, even lined paper for a journal. You’ll also need rubber bands, a ruler, a hole punch, a mat knife or other cutter, and a fairly rigid skinny toy. For a Halloween costume album, choose a plastic snake or bug. You’ll see later that you can even use a crayon or colored pencil.

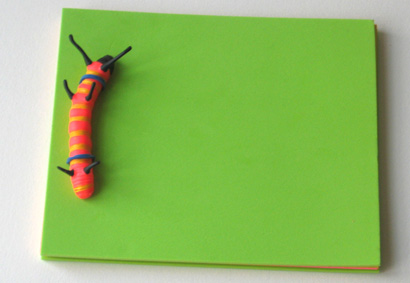
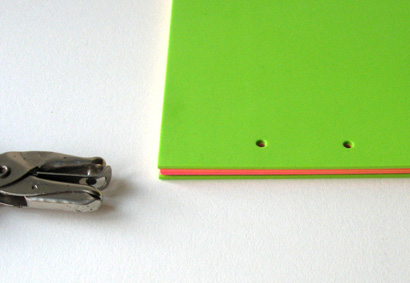
Cut the covers and all the pages to the same size. Our mini bug journal is 5″ x 6″. We used neon green craft foam for the covers (2 of them) and alternated pink and yellow paper to make the pages. Once everything is cut to size, use a plain piece of 5″ x 6″ paper to mark your hole punch placement. From the short edge (the spine edge) draw a line 5/8″ away from the edge. Then, on the line, make a mark 1 3/4″ down from the top and another 1 3/4″ up from the bottom edge. This is where you will punch your two holes. Punch them on your plain paper. Now you have the hole pattern for all pages.

Kid_Book_3

Use your pattern to punch all the pages and covers. You will probably not be able to punch the whole stack at once. Just do little stacks until they are all punched.

Kid_Book_4

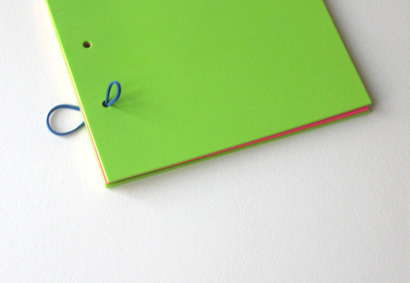
You’re almost done! Now take a rubber band and pinch it so you can “lace” it trough the bottom hole from the back of the book to the front. Don’t worry if you can’t thread it all the way through. Just do a few pages at a time until you’re through the whole stack.

Kid_Book_5

Once you’ve got it through like this, stick the object into the loop to prevent the rubber band from pulling out when you do the next step!

Kid_Book_6

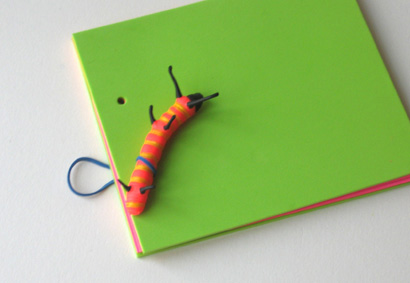
Now, just pull the rubber band tight from the back and thread it through the top hole just as you did the bottom one, back to front. Once you get it through the cover, loop it over the other end of the toy and Voila! You have a super fun and inspiring journal!

Kid_Book_8

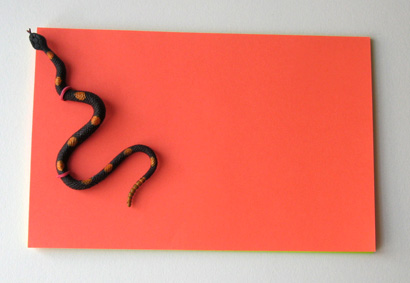
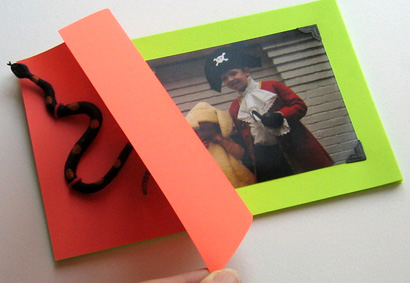
For a creepy crawly Halloween costume album we used half sheets (5 1/2″ x 8 1/2″) of orange card stock for the cover and acid green for the pages. A black and orange plastic snake, and black photo corners finished the look. Your holes will be in different places depending on the size of your object and length of your rubber band. It’s usually best to center the two holes so the top hole is the same distance from the top edge as the bottom one is from the bottom edge.

Snake_Book_1

This book is just the right size for all the photos of all the kids in their costumes. Don’t forget to add new photos each year.

Snake_Book_2

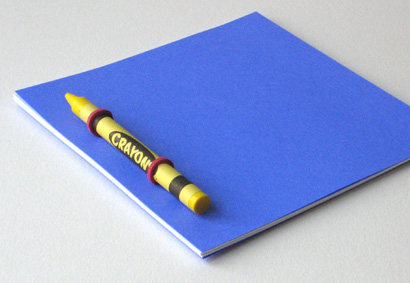
And the simplest of all, the “sketch book” uses plain white printer paper, and a crayon or colored pencil to form the binding. This little book measures 5″ x 5″.

Crayon_Book

Now, just think of all the cool little books you can make with things around the house! Happy bookbinding!
IDEA 34: CHANGING SEASONS BASKETS

Bin_tag

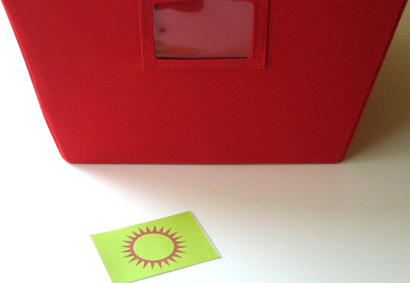
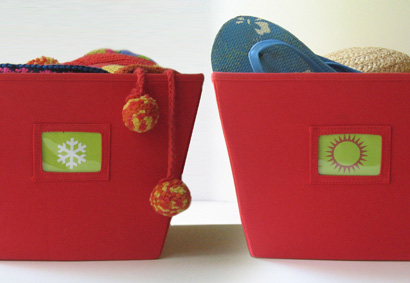
This is a pretty simple idea inspired by those nifty bins with the place to put a label in a holder on the front. I was using them for off-season gear in our closet, but the contents (of course) kept changing with the seasons. My solution: For each bin I made up two tags, one for summer, one for winter. Voila, a solution for summer, (both bins use the winter tags) a solution for winter, (switch out the tags and both bins house the summer stuff) and, in a season like this, where only half the summer stuff is put away, use one of each. (Store the extra one behind).

Changing_Seasons_bins

You can download and print these cute, visual, seasonal bin markers on card-stock, if you like. There’s extra background, so cut them to any size that works for your needs. Happy organizing!

IDEA 30: REPURPOSE THE PLAY-SET

Garden_2

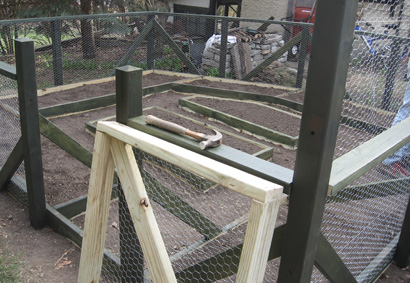
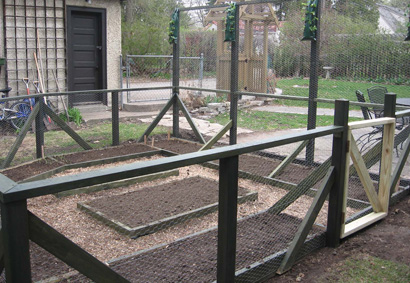
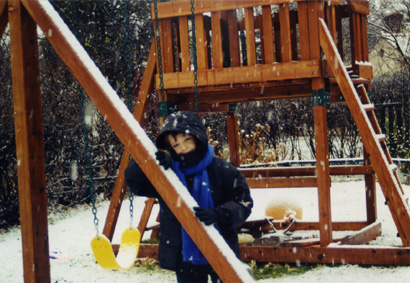
After saving up for the kids, the house and the yard, like many, our next investment was the play-set. In my neighborhood, this means one or two swings with optional monkey bar, fort, sandbox or slide, all held up by a structure made of 4×4 timbers. The whole thing cost a ton and weighed about that much too.

Garden_PL1

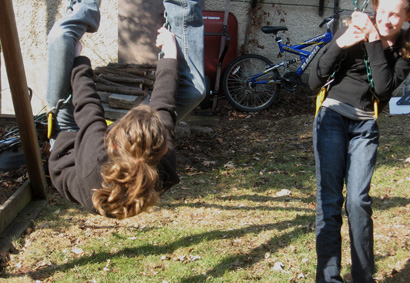
My husband lovingly put the play-set together (cheaper than having it assembled by the play-set guys) and the kids enjoyed countless hours swinging, digging and holing up in their tiny room just above our heads.

Then one day we noticed that all our kids had become teenagers. Despite my youngest child’s opposition, talk of wanting to reclaim some of the yard turned to talk of getting rid of the play-set. It was a sad notion, until close inspection revealed that the bottoms of the beams had begun to rot, and although it hadn’t created a danger yet, prudence dictated it be dismantled before anything happened. And so, I took about 100 more photos than needed of the last fun day on the play-set, and it was taken down.

Play_set_2

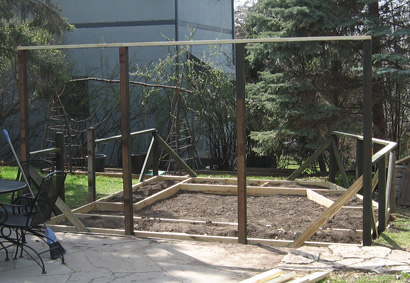
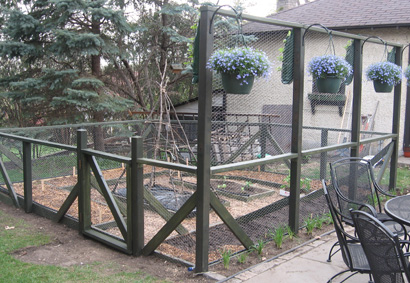
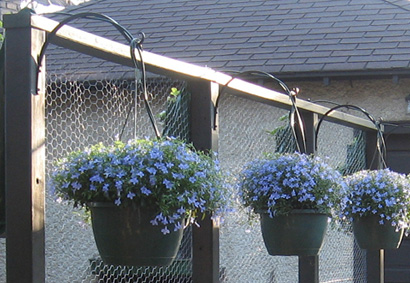
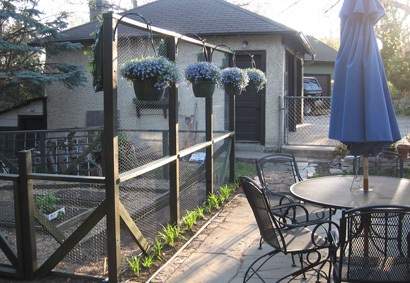
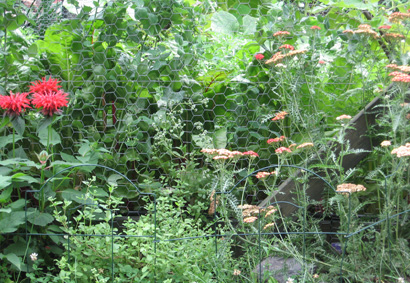
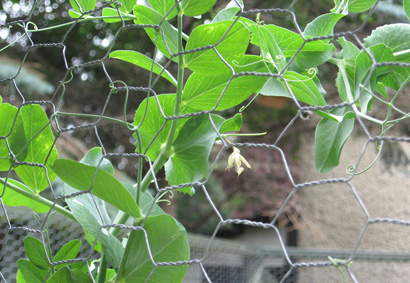
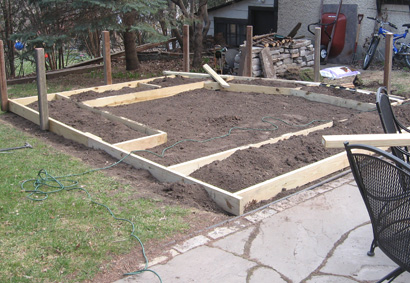
I’m not saying my husband (the gardener) had an ulterior motive, (he WAS the one who pointed out the rotten beams), but once the play-set was dismantled, he created the snappiest bunny-proof garden out of the lumber.

Garden_4Garden_5Garden_6Garden_7Garden_1

Full disclosure, he did have to buy some 2×4’s to complete the plan, but it was really nice that all those big beautiful beams did not just go to waste.

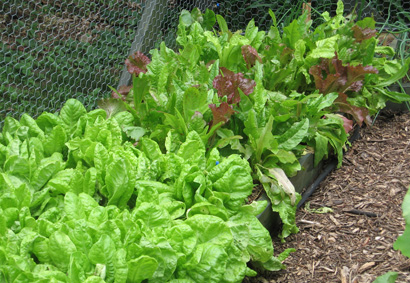
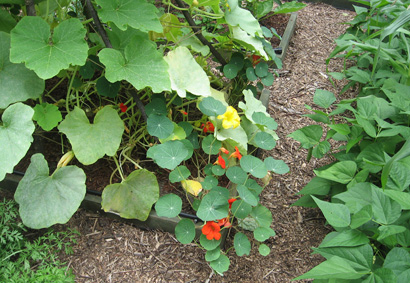
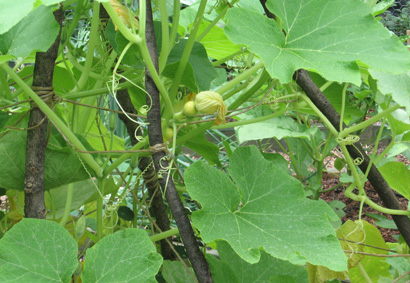
Garden_2Garden_3Garden_lettuceGarden_NasGarden_squashGarden_wire_2Garden_wire

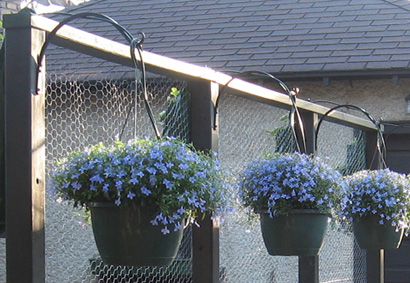
So, for any gardeners out there anticipating an empty nest, a little bit of DIY inspiration for you. Our resulting garden gives us so much beautiful bounty, we’ve never looked back.

Okay, maybe a little.

Garden_PL2

IDEA 22: CURE FOR CABIN FEVER

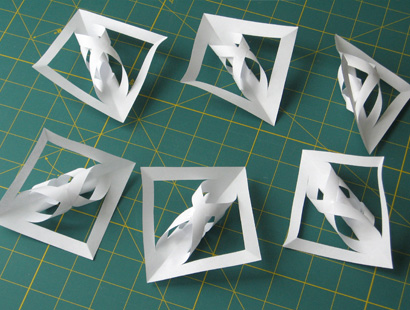
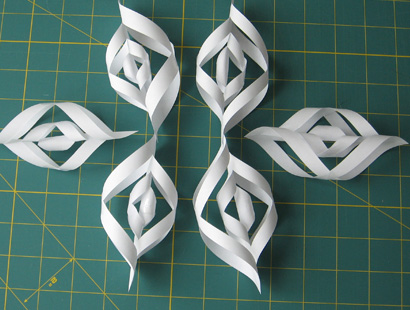
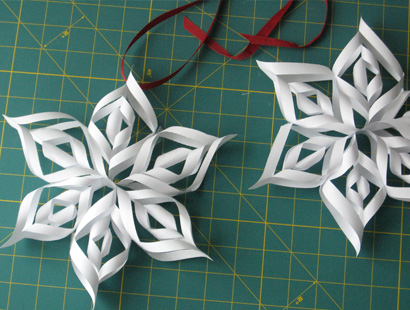
Snow_flake_1

In many places across the nation, this winter has been one of the most, well, wintery on record. Some of us are having weather we’ve never seen before. Here in Minnesota the snow came early and stayed. Well, in true BellaPamella fashion, the following suggestion (on the order of “if you can’t beat ’em, join ’em”) is to embrace the weather. Celebrate the flakes.

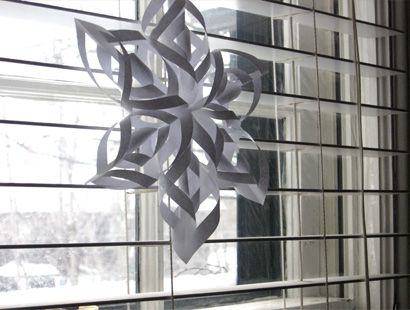
Once we take down all the holiday stuff, the house takes on a certain simplicity, and I love that. For about a month. Then I start to wonder how long winter is going to linger. This year my daughter brought home a lovely snowflake project that she taught me how to do. We hung the flakes in the window in celebration (or was it defiance?) of a bright white yard that just refuses to melt.

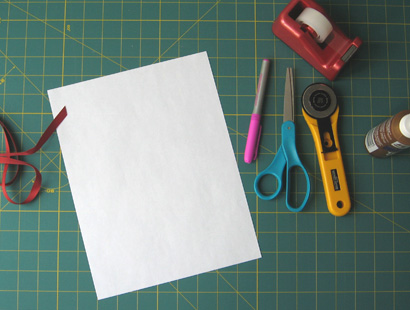
It’s one of my favorite kinds of projects because it requires only things we already have around: 8 1/2″ x 11″ white paper (printer paper is perfect), scissors or a rotary cutter and mat, tape and/or glue, and string or ribbon. We have a supply of fabric ribbon and so we used red grosgrain. You will also need a pen with a smooth, even barrel on it to form the first loop. For this size snowflake, a pen that’s a little fatter than a pencil works well.

SFP_1

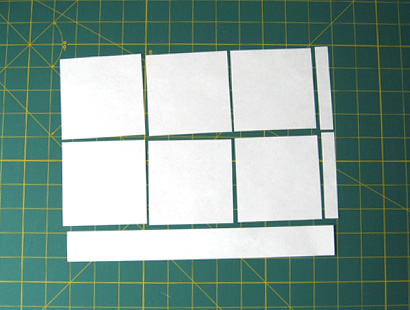
Start by cutting the paper into six 3 1/2 inch squares. Each snowflake will take one sheet of paper.

SFP_2

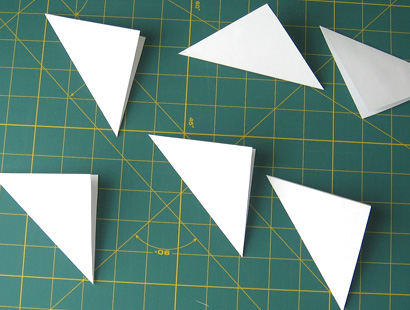
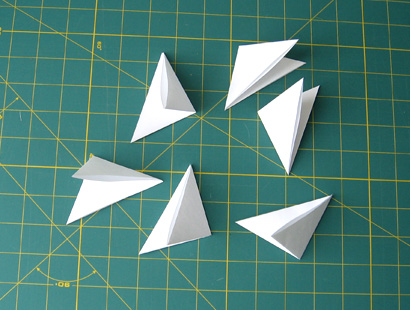
Fold each square in half diagonally, into a triangle.

SFP_3

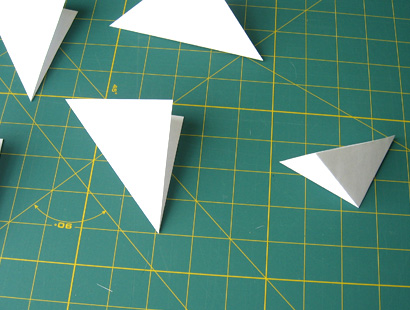
Then fold each in half again.

SFP_4

SFP_5

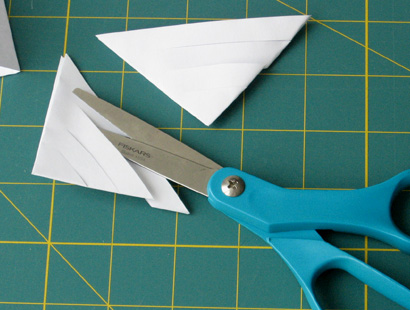
With scissors or the cutter, cut three slits on each triangle. Cut parallel to the cut edges (not the folded ones) and cut to about 1/4 inch before you reach the fold.

SFP_6

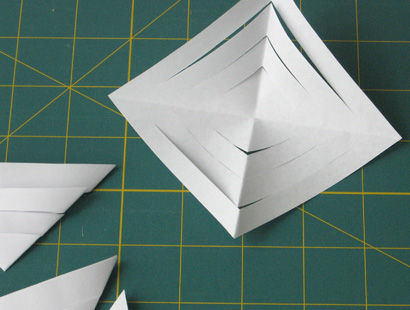
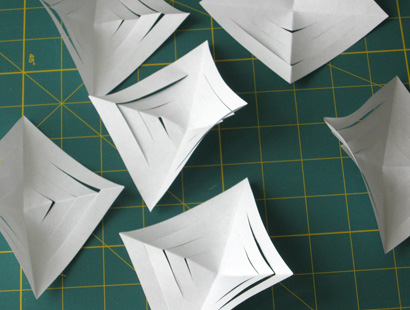
Carefully open the triangles back into squares. Each square should have six “V”s cut into it.

SFP_8

And gently smooth your finger along the middle crease to help flatten the paper. It’s best if you do the steps to each piece at the same time. You will have six squares for each snowflake.

SFP_9

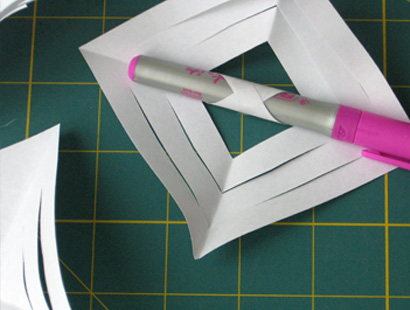
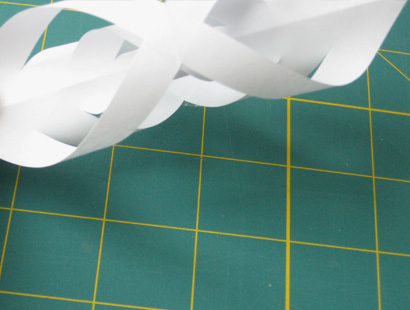
Now, wrap the two corners of the innermost square around the pen and secure it with tape.

SFP_10

When you pull the pen out it looks like this.

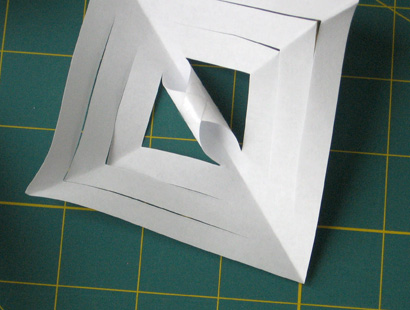
SFP_11

Turn the square over and loop the next two corners and secure with tape. This loop will be bigger than the first, AND FACING THE OPPOSITE DIRECTION AS THE FIRST.

SFP_12

Turn over again, and tape the next corners the same direction you did the first loop.

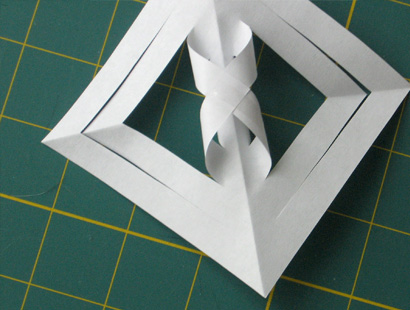
SFP_13

They now look like this.

SFP_14

Now turn them over again and tape the last two (largest) corners.

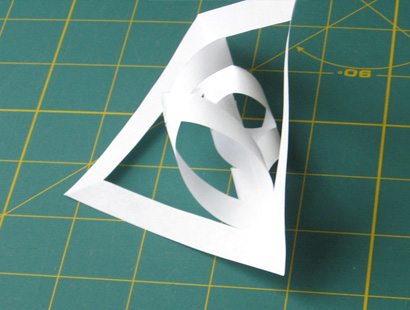
SFP_15

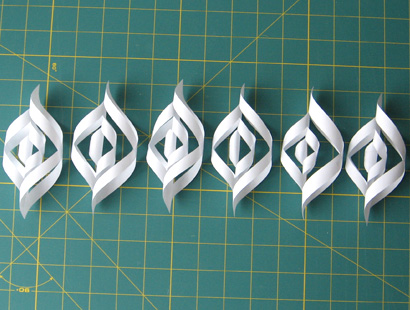
From the side, your squares should now look like this

SFP_16

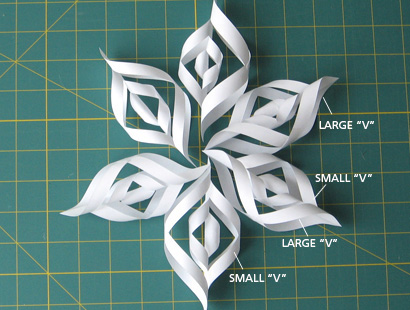
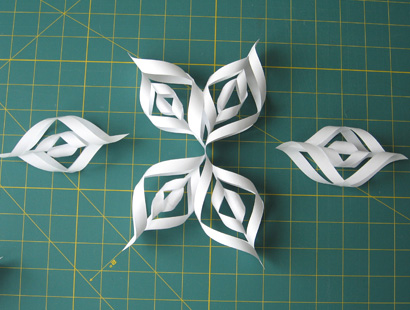
Notice how each piece has become a point of your flake. And also that each one has a large “V” on one side and a small “V” on the other side. Line up the six points with the large “V”s on the right. Now start to turn the points into a star. Make sure that each point is oriented the same way so that a large “V” is always next to a small “V”.

SFP_17

We found the easiest way to attach the points together was to first tape two “pairs” together as shown.

SFP_18

Fasten the pairs together.

SFP_19

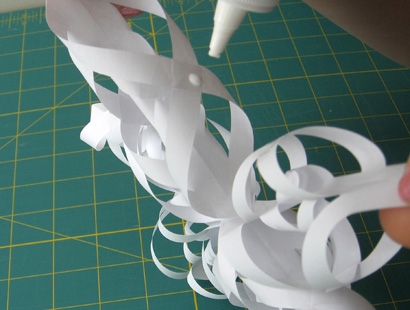
And then, tape on the last two points. You now have a full snowflake. But you will probably find if you try to hang it, gaps will form between the points that are pointing up. Hold the snowflake by it’s top point and let it hang. Where you see the gaps, put a dot of glue or a dab of glue stick, and pinch the spot together until it holds.

SFP_21

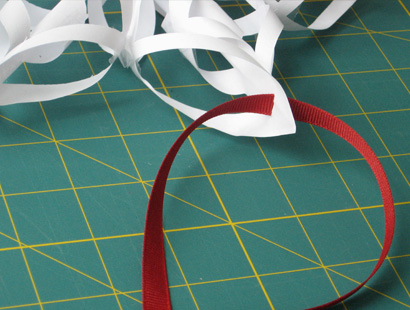
Finally, cut a small slit in the top point and lace your ribbon through.

SFP_22

Make as many snowflakes as will brighten your room and stave off the winter blues!

SFP_23

We have one snowflake hanging in each window. They make me smile every time I see them against that snowy yard. They serve as a reminder that there is beauty in all the seasons. You just have to look for it.

IDEA 21: IDENTIFY WITH SOMETHING

Paint_number

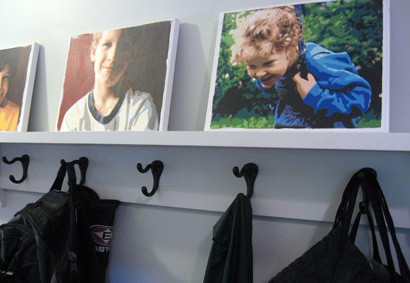
One day I discovered that you could order a Paint-by-number kit of your own photos. I sent in a picture of my daughter and the resulting painting was so beautiful and fun to do, I did the rest of our family. Now, the five portraits identify the hooks in our mudroom. Each picture sits above two hooks belonging to the person in the picture.

Of course it would have been much easier to write their names. But, that’s not the point is it?!

IDEA 13: JACK LUMINARIES


Jack_lum_day

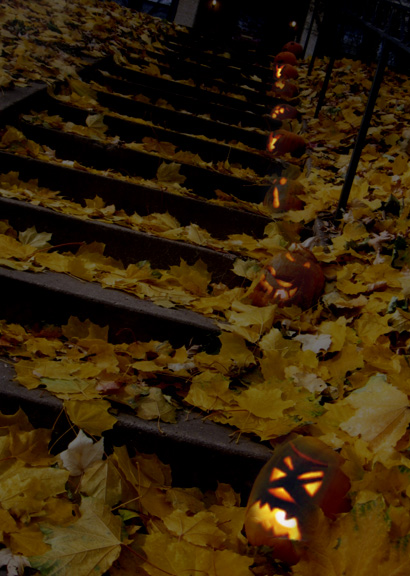
Here in Minnesota, and probably many other regions around the country, we have a lovely tradition associated with the holidays. When the snow falls, many people line their walk or driveway with luminaries, paper bags filled with sand or even a big chunk of ice formed in a milk carton, each containing a lit candle. The effect of luminaries lining the walk, especially in the snow, is absolutely magical.

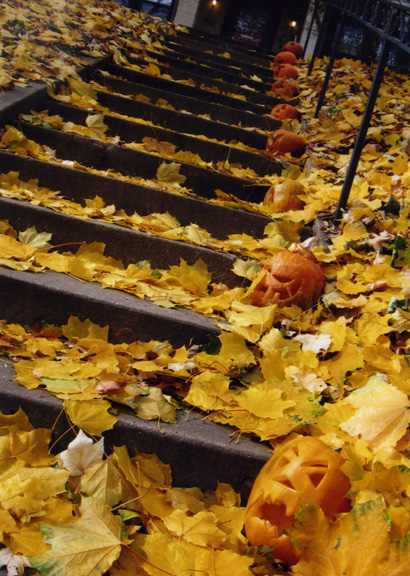
Well, this idea sparked another: Luminaries for Halloween. If your family is like ours, we love to take the fall trip to the pumpkin patch and bring back lots of plump orange pumpkins. Of course it’s fun for each person to select just one that suits their personality, have a carving party, and set them on the porch as a pumpkin version of the family who lives inside. These Jack-o-lantern luminaries could be done instead of, or in addition to that.

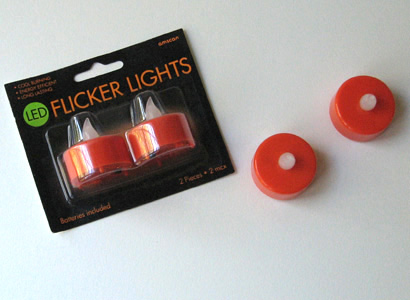
Purchase as many pumpkins as you like. They don’t have to be any certain size (you can keep them small if you like). For each pumpkin, purchase one votive candle-sized light.

Flicker_lights

These are great, and available at the party goods store as well as big box and discount stores. Since you will be lining your walk, you will most likely have lots of kids walking along beside your luminaries so you do not want to use real candles as they could pose all kinds of risks. Whenever kids (and lots of dry fall leaves) are involved, play it safe!
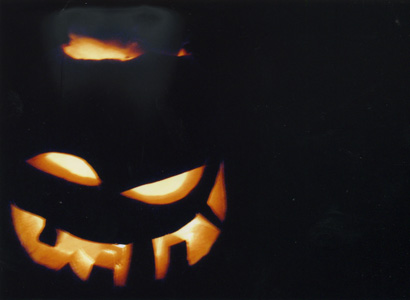
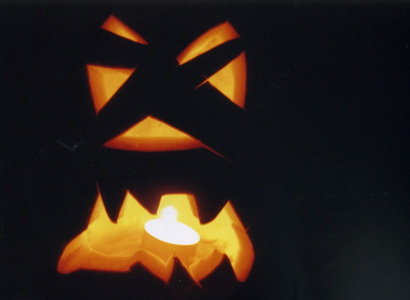
Now you and your kids get to go to town carving pumpkins. The more you carve out, the more light will show. My kids just did whatever they felt like. Here are some of them:

Jack_1

Jack_2

Jack_3

Now set them out and turn on the lights! You have not only managed to keep the kids busy for a long time, but you’ve created a stunning Halloween decoration for your home that looks great during the day, and lights up the night!
Jack_lum_nite

IDEA 11: COSTUME BOOK

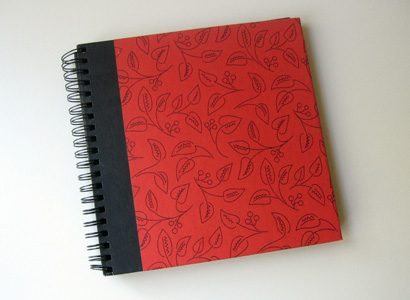
Costume book_outside

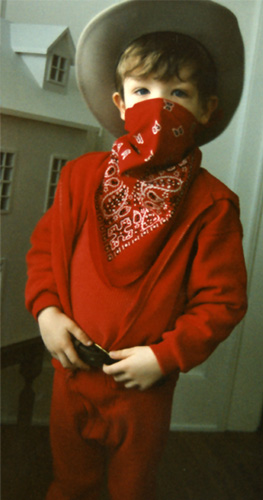
One of my favorite pictures of my son was when he was about four years old. He had on red waffle weave PJ’s, a ten gallon cowboy hat and a red bandana tied across most of his face.

Costume book_cowboy

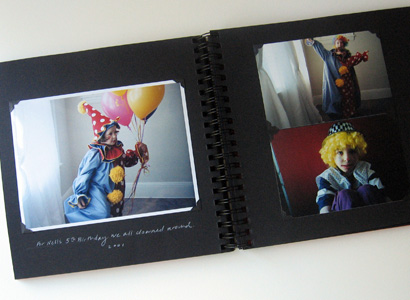
It was this picture that inspired me to begin a book of costumes. When kids dress up it’s a perfect opportunity to take pictures, and somehow putting only the costume pictures in a book made it quite simple. If these are the only pictures you manage to get into an album you are still way ahead of the game!

If you make costumes for Halloween, it’s the perfect way to “honor” all that work you did. But of course any dress-up occasion (or non-occasion) will do. Another great side note: If you have more than one child, chances are the same costume will get worn by each of them on different years. My book is loosley structured with scrapbook pages so I left room for future pictures and put the pictures of different kids in the same costume on the same page. We all get a kick out of comparing their different styles!

Costume book_inside