Archived Ideas for ‘Projects’

IDEA 64: SHARE YOUR WISDOM

Phil's-osophy_Book

If you have kids, one day they will be moving on from your nest. When this started happening at my house I found myself wondering if I had really covered all the topics. Had I sufficiently marinated them in my philosophy of life? And did any of it stick?

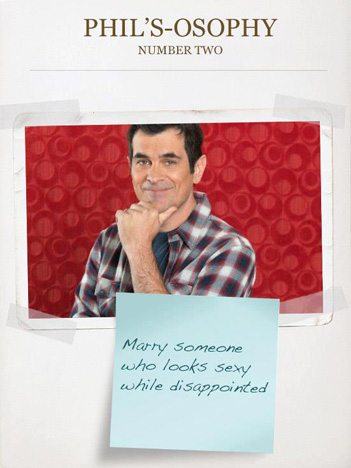
For this reason I had a bit of an epiphany while watching the episode of Modern Family called “Phil’s-osophy”. (By the way, if you are a parent, this show should be required viewing. I have often noticed that in the throes of raising a family, your first defense is a sense of humor). Anyway, in this episode, The family’s oldest daughter sets off for college. The dad, Phil, creates a book for her called Phil’s-osophy. (If you are Phil Dunphy, this title makes perfect sense). Since Phil is Phil, his words of wisdom are kind of hilarious. But, while it’s all loads of fun, that’s not my point. My point is this: Why not create your own book of philosophy to send along to college with your grad!

I just finished a small (5.75″ x 7.75″) 20 page book from My Publisher that cost only $12.99 and it was beautiful! Another very popular book making site is Snapfish. And I know there are many others. The idea is to put together a book of your own words of love and wisdom for your kids flying the coop.

Of course you don’t have to use an online publisher, although they are simple, inexpensive, and do a beautiful job with photos. You could consider making a handmade book. It all depends on your inclination, and artsy-crafty prowess.

So, in my haste to get this idea to you in time for school starting this fall, I’m writing this without my example to show you. In lieu of that, we’ll just have to take a look at a few of Phil’s pages:

Phil's-osophy_8

Phil's-osophy_3

Phil's-osophy_2

And a few more of my favorites:

The most amazing things that can happen to a human being will happen to you if you just lower your expectations.

Take a lesson from parakeets: If you’re ever feeling lonely, eat in a front of a mirror.

Watch a sunrise at least once a day.

If you’re ever in a jam, a crayon scrunched up under your nose makes a good pretend mustache.

Never be afraid to reach for the stars because even if you fall, you’ll always be wearing a Parentchute™.

IDEA 63: SUBSTITUTE TIME FOR MONEY

Tile_1

My husband and I have been doing a bathroom remodel. Not the kind you see on HGTV that starts on Saturday and finishes on Sunday. Not even the kind that involves a contractor and subs that click along and finish in four weeks (only two later than intended). No, this bathroom remodel happens on weekends, and occasional weeknights after work, and around dinner and homework. THIS remodel is taking months. So far it has been about 3 1/2 months since we took the walls down to the studs and the floor down to the beams.

But here’s the thing. Everyone that knows me knows I have been working on this bathroom for YEARS. I’ve been clipping, then downloading, then Pintresting bathroom pictures for-freakin-ever. We just couldn’t afford to remodel the bathroom and frankly, although it didn’t go with the rest of the hundred-year-old house, (it had been remodeled fifty years ago) it was functioning, and we were busy. But it made me a little crazy and so I started preparing for my fantasy bathroom.

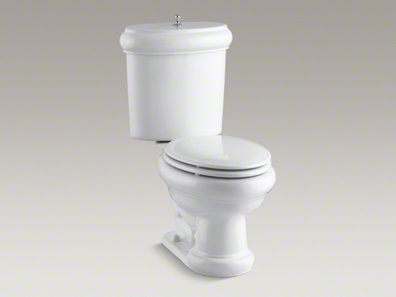
Not long after we moved into the house someone opened the bathroom door too hard and it swung in and cracked a corner off the toilet tank. I realized if there was a toilet with a tank just an inch or two narrower, the swinging door would miss the tank entirely. A search revealed the perfect toilet that not only fit the bill size-wise, but was the most awesome toilet ever, and cute as a bug and fit perfectly into my fantasy of what a bathroom in a 1912 house should look like. So we bought and installed the Worlds Cutest Toilet (Kohler Revival). This became the first piece of my new bathroom.
zaa59914

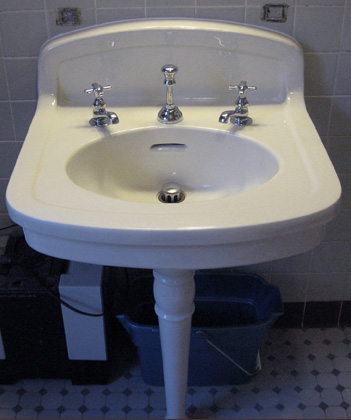
At some point, our sink died and we were still nowhere near ready to do the Big Remodel. My husband was going to put in a temporary sink, the smallest, cheapest thing available at Home Depot. But I talked him into going with me to a salvage place to see if there was a sink that would be fitting for our old house. We completely lucked into a vintage wall sink with a single, centered, porcelain leg. I couldn’t believe my luck. I was pricing out reproduction sinks of this look and the price tags were astronomical. But here was this beauty, and since it was authentic, it was a little smaller than the ones they are making for people’s now-a-days palatial bathrooms. We used that sink for the past year, and it will go back into this remodel.
Vintage_sink

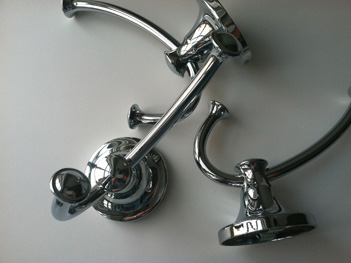
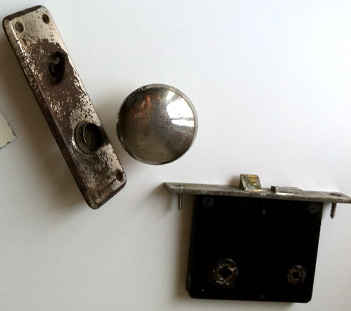
About five years ago I found towels on sale that would fit perfectly into my fantasy bathroom. I bought them and stowed them in a plastic bin in the attic. To this bin I added towel bars, ring hooks and TP holder and toilet seat. I kept my eye out for the perfect medicine cabinet, tub and lights. With the sink, I discovered a chrome plater in our town. The old pieces came back gleaming, and so I decided to do the same with the door hardware. Here’s the before hardware, which will gleam when I get it back.
Old_Chrome

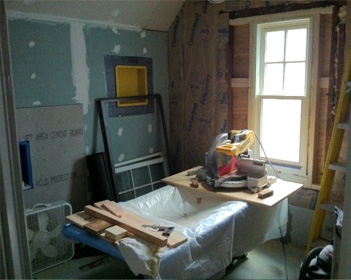
So far we (meaning my husband) have removed a radiator, soldered plumbing pipes, strung all new wiring, installed a heated floor, insulated walls, built two niches in the walls, built a bump-out for the sink to be mounted to, sheet-rocked, backer-boarded, poured many bags of leveling cement and removed the old window and installed a new one. After all these months if you glance in the door it looks very much like a project that’s just starting. I have no idea how the home improvement shows do it. There is no way this would make very entertaining TV.
Current_bathroom_project

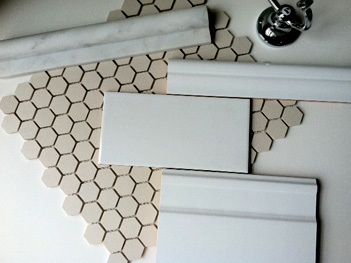
But I have been busily stockpiling all the fun stuff in my sewing room/office. Currently, I keep company with: Our toilet and sink, some boxes of hexagonal floor tile, boxes of honed marble, several chrome pieces including the wall hardware, faucets, and hooks, and many life-size printouts of various lights I was using to try to decide which one.
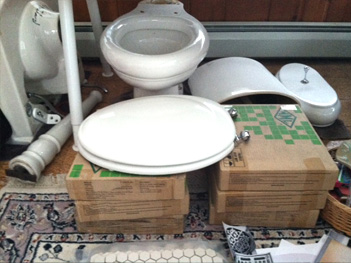
Stash

Our family has definitely had to demonstrate a bit of patience. The five of us have been traipsing down to the basement to shower and dividing teeth brushing between the basement and the main floor powder-room.

It may not be everyone’s ideal, to go this long without the family bathroom, but here’s the cool part. Doing it this way, there was no need to take out a loan. No need even to save up for it. The cost of this remodel has spread over all this long time, and we pay as we go. And that’s a perfect example of one of my guiding principles: If you don’t have the time, throw money at the problem. And if you don’t have the money, throw time at it. Life isn’t always perfect. But at least it’s not without options.

And yes. If we ever get this sucker done, I’ll post pictures of it!

IDEA 62: INITIALIZE THE TOWEL HOOKS

Initial_Hooks_all_blank

Once upon a time we had four people using a bathroom that had one towel bar. Those family members who lived on the edge simply used whatever towels were hanging on the bar and hung them back. Those more fastidious in nature used a clean towel every day and deposited it in the laundry. Neither solution was optimal. Who wants to dry off wondering where that towel has been? And who wants to launder towels that much? So, one day I hung four lovely hooks, one for each user of that bathroom.

Initial_Hooks_blank

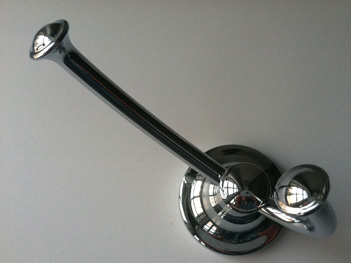
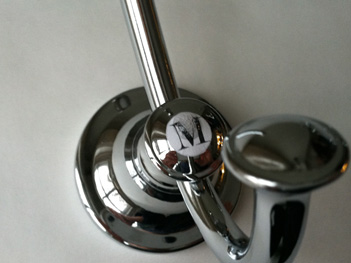
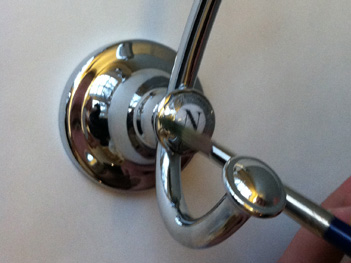
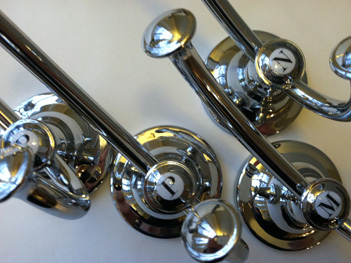
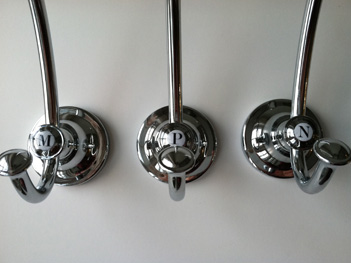
Even though we decided whose hook was whose, I often noticed my towel might be damp even if I hadn’t used it. Which led me to the obvious conclusion that people were confused about which hook was theirs. So I went on the hunt for a way to attach an initial to the lovely domed round at the center of the hook. I was inspired by the multitude of initial “buttons” available in the scrap-booking aisle. And if you happen to find hooks with a flat spot, this might be a great solution. But the flat buttons would not adhere to my domed hooks, so I made up this slightly more involved, but incredibly satisfying project.

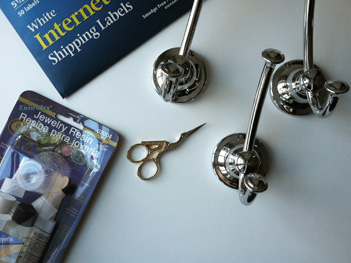
Initial_Hooks_Materials

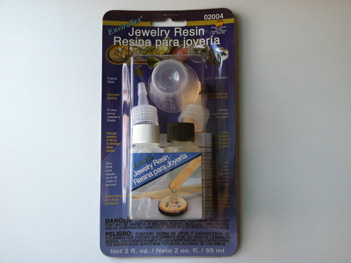
Here’s how I did it. You’ll need a printer and printing labels. I used my half-sheet shipping labels. You also need tiny scissors, like embroidery scissors and hooks that have a nice spot for an initial. Then at the craft store I bought this small “Jewelry Resin” kit.

Initial_Hooks_Epoxy

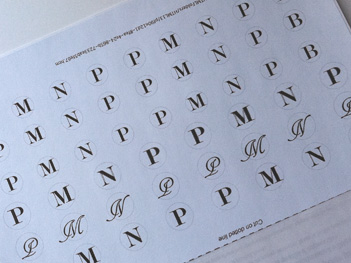
I knew the general size and typeface I wanted for my hooks, but I typed out a variety of sizes and even an alternative typeface because I wasn’t sure EXACTLY what size or type style would work best.

Initial_Hooks_Label_print

I also printed a pale circle around each letter so I would have a line to cut on.

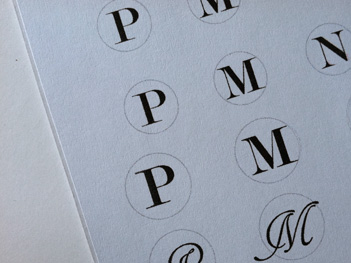
Initial_Hooks_label_CU

The absolutely trickiest part of the project is to cut the paper sticker in a smooth circle. Just take your time, use the tiniest scissors possible, and very small snips. Once you have your cutout, peel off the paper on the back and stick it to the hook. It tuned out it was good I tried multiple sizes. Because the spot was domed, the sticker had to be quite small or it creased and wrinkled when I tried to smooth it down. It took a little trial and error, but I was able to cut a very small round, and then “burnish” the edges down with the back of my thumbnail.

Initial_Hooks_Paper_Initial_CU

Next, comes the jewelry resin. Read the instructions in the kit. The one I had came with little cups that you mix the epoxy in. Once it was thoroughly mixed, I dropped the resin down onto the paper sticker using a flat wooden stick provided in the kit.

Initial_Hooks_Epoxy_drop

I dropped just a few drops, enough to make sure the paper sticker was covered. Don’t worry about the air bubbles trapped in the resin. They will find their way out by the time it dries. I made sure everything was covered down to the bottom of the dome, where there was a natural stopping point. I used a small paintbrush to help with this.

Initial_Hooks_brush

Once it looks like a thin coat of resin is covering everything, stop and leave it alone. It takes many hours for the resin to harden completely, and for all the bubbles to disappear.

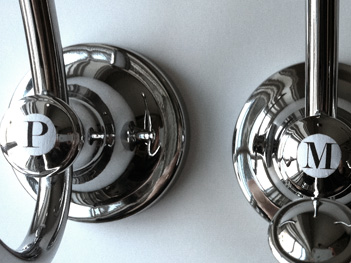
But look how pretty the finished hooks are!

Initial_Hooks_all_finishedInitial_Hooks_3_Finished

And just think how lovely it will be to know you have a clean towel without laundering seven loads of towels a week!

IDEA 61: WORLD’S SIMPLEST BIRDFEEDER

Sunflower_Bird_Feed_2

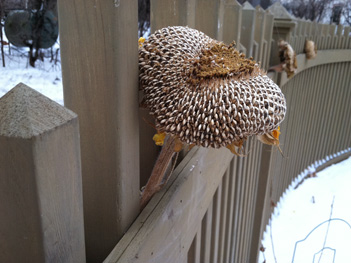
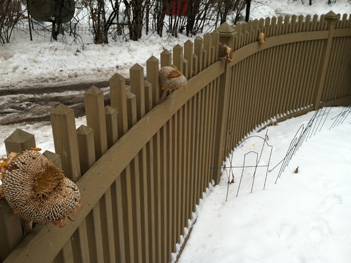
The other day I came home to see my clever husband had come up with a very BellaPamella idea. In the summer he had grown sunflowers, in part to have something for the birds to nibble on. When the season ended, the top-heavy flowers eventually flopped over, so he snipped them all and hung them in the garage to dry out.

And that’s how, here in mid-winter, he had some ready snacking for the yard birds. He simply tucked the flower heads into our fence at even intervals. The result is not just a wild bird food station, but a lovely, natural seasonal decoration for our fence!

Sunflower_Bird_Feed_1

IDEA 59: MAKE A KID ART PILLOW

Kid_Art_Butterfly_2

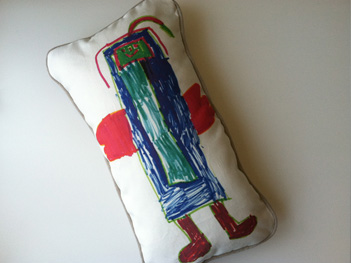
Anyone who has been keeping track of the Never-Ending-List-Of-Very-BellaPamella-Ideas knows that I love a great idea for using kid art. If you have kids, this art resource is abundant, and every once in a while you score a piece that is absolutely priceless. This fantastic idea will add to the other terrific ways to put kid art to use.

You may have already discovered this wonderful site set up to let you print your own fabric, called Spoonflower.

This site allows you to design as small as one yard of fabric and they will print it for you! I tried this once and was completely hooked. Then one day I realized, this was a perfect way to produce an amazing keepsake of my children’s art!

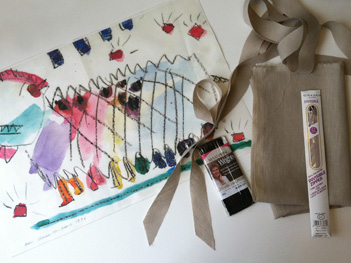
You need a scanner so you can scan your child’s art. Save it as a jpeg, and follow the instructions on the Spoonflower website to make sure your scan is the proper size. You can choose from a variety of fabric types, but for these pillows I selected Linen-Cotton Canvas.

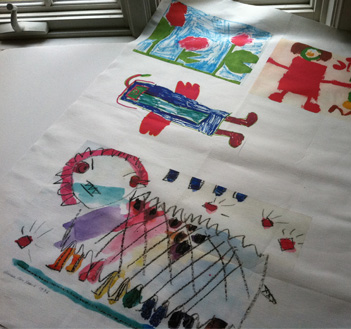
One yard of the linen-cotton Canvas is 56″ wide, so I was able to fit several pieces of art in my one yard.


Kid_Art_Fabric

Upper right is my young daughter’s “self portrait”. Then, counterclockwise, there’s some beautiful pink flowers, an angel (or is it a butterfly?) and a Chinese New Year dragon parade. And this is only half the yard.

You could also “repeat” the art and it will automatically fill the yardage. This would be perfect for curtains or bedding.

From the fabric store, I bought some simple linen in a neutral color for the backing and piping. Whatever you buy, get enough for the pillow back and to cover the store bought piping, or you can use the ready made Wright’s piping if it comes in a color that works.

Kid_Art_Materials_2

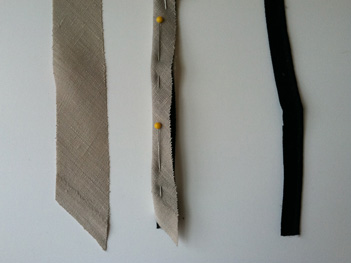
To cover piping, cut strips of your fabric on the diagonal (use a 45 degree triangle if you have one. If not, fold a piece of paper in a triangle. If you bring two consecutive edges together you’ll get a 45 degree angle. You only need this as a guide to get you started on the right angle).

Kid_Art_Piping

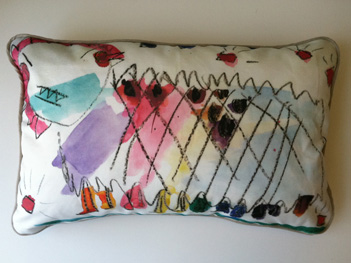
You don’t have to use piping on your pillow, you can just sew the front and back together, right sides together, and turn it inside out, stuff, and stitch the remaining edge closed. But I like to add piping and a zipper. Choose the method that closest matches your sewing prowess. The point is not necessarily the fanciness of the sewing, but the sweetness of your child’s artwork, now on a huggable pillow.

Kid_Art_Pillow

And I’m sure I don’t have to say how incredible a grandparent gift this would make. OK, now get going! I’ve given you plenty of time to get this done by next Christmas!

IDEA 54: MAKE A POSTCARD DIARY

Postcard_memoir_1

This sweet and very BellaPamella idea came from my dear friend April, with whom I have shared virtually every aspect of raising our collective children.

It’s no secret the family vacation is one of my favorite subjects. And the older my kids get, the more I treasure those special trips. So here’s a way to create a lasting memory of the trip, and keep the kids entertained all at the same time.

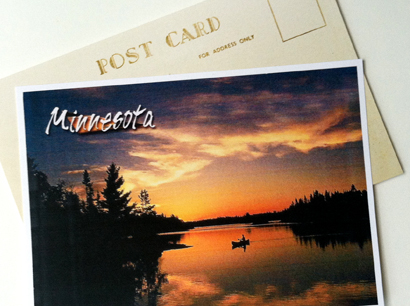
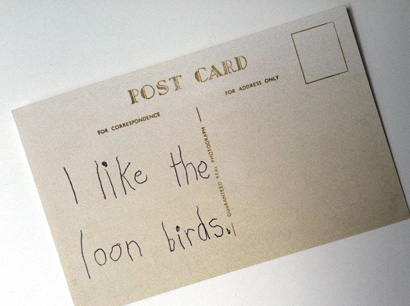
Next time you take a trip with your family, each stop you make, allow the kids to pick out a postcard. On the back of the postcard have them write their thoughts. It really doesn’t matter if it’s a gas station in the middle of Kansas or a wild animal preserve in Australia, your child will have an opinion about it that may surprise you.

Postcard_child

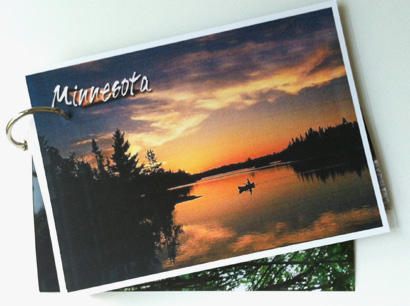
Along the way, or when you return, punch the cards with a paper punch and slide them all onto a binder ring (available at any drugstore, or of course, office supply).

Postcard_bookVoila! The perfect memoir of your trip, seen through the eyes of your children. (And yes, it’s okay for you to add your own thoughts on postcards too). Happy travels!
IDEA 50: DO A LOW BUDGET “REMODEL”

bathroom_hooks

I have a feeling I’m not the only one out here completely mesmerized by HGTV and all the home improvement shows. There’s just nothing quite like watching someone take a sledge hammer to a corroded bathroom wall and within minutes transform a nightmare into a dream space. Like everyone else watching, I have a few rooms of my own that could definitely use the treatment. But also, like most people watching, I have neither the funds nor where-with-all to do anything about it. Well, not yet, anyway.

When my parents came to visit for the holidays and my mom asked me what I really wanted, my answer of a new bathroom didn’t exactly fit what she had in mind. But she gave me a couple days of hers and my dad’s time and some very clever solutions. It inspired me to remind us all something that former generations knew by necessity. That you don’t always have to tear things down and start fresh, sometimes some good old fashioned elbow grease is just the ticket.

So here’s how it went down:

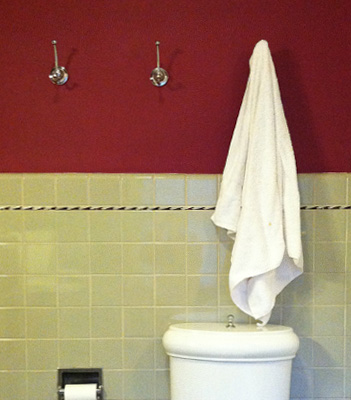
Our upstairs bathroom is shared by four members of the family. It is a 1950s dream, complete with all kinds of tiles, including a little border of gray and burgundy “wave” tiles. When we moved into this 1912 house eighteen years ago, I painted the walls above the tile a deep cabbage red. Over the years the deep red paint seemed to sweat, causing the walls to develop an odd sort of drip texture which went ignored, along with the cracked sink and a tub that was so old, it refused to come clean.

Add to this the fact that there was no counter space or drawers so my teenage daughter and I became experts at balancing small items all around the edges of the sink. You’d be amazed how many make-up and hair products will fit, as long as no one knocks into them. My husband complained, but it had pretty much become just one of those idiosyncrasies of living in an old house. Oh, and since there was only one towel bar we alternated between periods of all of us using the same towel and then discovering it, and over-compensating by throwing every towel in the wash after only one use.

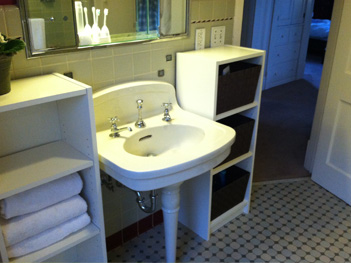
Last year the faucet in the cracked sink went kaput, so we were forced to replace it, and rather than diving in to do the whole project, we found a dandy specimen from the original era of the house at a salvage yard and installed it. The bathroom got de-cluttered for about a week, but it wasn’t long before the miscellaneous items returned to the edges of the new sink.

So, my mom and I gave ourselves two days, one to plan and shop and one to work. We bought mostly cleaning supplies, and found two perfect-size matching small shelf units. We got four beautiful “robe hooks” so each person has their own dedicated towel hook.

I think the real ah-ha came when my mom donned gloves and washed the red walls from top to bottom. I had planned on a coat of stain blocker paint to try to cover the red, and a new paint job, but simply washing the walls made them look brand new. The shower/tub got the cleaning of it’s life while my dad assembled the shelves.

Bathroom_shelves

With some very basic lightweight basket inserts from the home improvement store, the two little units are incredibly efficient. There are surfaces to work on, and they actually stay clear because it’s so easy to drop everything back into the basket when you’re done.

We all know that eventually the bathroom will get the big remodel. But in truth, it will probably be years before that happens. And I can’t think of a better gift than working side by side with my parents AND getting a groovy bathroom out of the deal. I say, we should still watch home improvement shows and continue to collect ideas for our future rooms. But in the meantime, try applying just a tad of elbow grease to the problem. For the results, you can’t beat the cost!

IDEA 49: GO GREEN THIS HOLIDAY

Brown_wrap_group

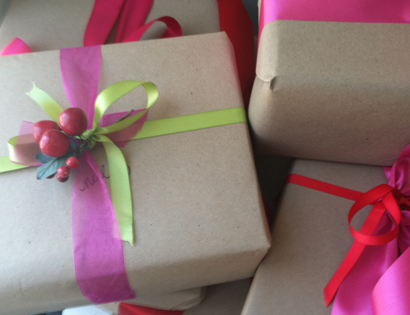
Do you ever get just a little bugged by the amount of holiday wrapping that ends up either in the fireplace or the trash? Does it kind of gnaw on you to have to add extra money to your holiday budget to buy gift wrap and ribbons? I’ll admit it. Both those things kind of bother me. So, here’s something I’m doing this year.

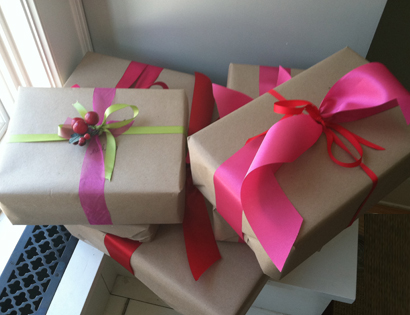
If you read the last post, you saw the groovy brown paper roll I keep for oodles of practical purposes. And I just wrapped up a bunch of gifts in that simple paper. I got the boxes from a stash in the attic (three of these are shoe boxes), and used fabric ribbons, also from my stash. I like to use satin or grosgrain ribbon because I re-use them year after year. Yes, really I do. I leave a lot of them cut quite long, and don’t necessarily cut them again. And on Christmas morning the ribbons go in a basket and the brown paper will go in the fireplace. If you’re halfway decent at gift wrapping you could even leave off the tape. But I won’t hold it against you if you don’t.

The other thing I collect is little fake berry bunches from the craft and floral store. These get tucked in the bow and also saved year after year. And both the embellishments and ribbons are always purchased either off-season or after the holiday at drastic discounts. One thing I like about buying off-season is you can pick up less-expected looking ornamentation. Another is that I can find things at my leisure, rather that settling for whatever I can find at the last minute.

Brown_wrap_close

That’s it. Just a quick simple idea from an self-described cheapskate!

IDEA 48: KID ART GIFT WRAP

Kid_art_giftwrap_3

If you’ve been a BellaPamella fan long enough, you remember the “famous” BellaPamella Kid Art Calendar. (See more here).

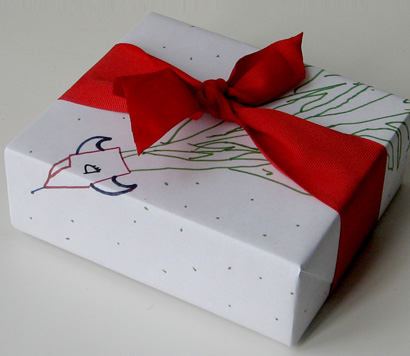
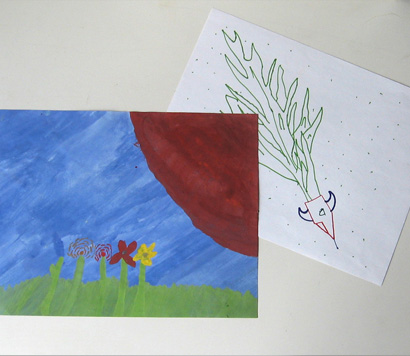
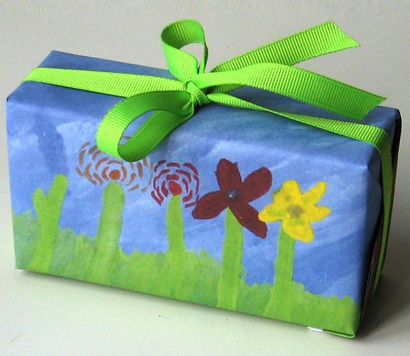
Kids churn out such a quantity of beautiful work, I’m always thinking about new ways to use it. This idea is absolutely the perfect thing, especially for gifts to grandparents: Use some of that fabulous art as wrapping paper. Even if your gift is a box of chocolates, how much more fun is it to wrap the box in art made by your kids, and sent from the whole family? It’s not just original and cool, it gives kids a chance to make a contribution.

Kid_art_giftwrap_4

Of course this idea is pretty self explanatory. The hardest part is deciding whether you want to use your favorite ones. But I’ve found kids have a bottomless capacity to crank out pictures, often of the same theme.

Kid_art_giftwrap_2

I keep a collection of ribbons in a bin. There are great sales on rolls of grosgrain or satin ribbon to be found at the craft or fabric store. I buy a few rolls whenever I’m inspired. Then these can be used to tie up your packages. Fabric ribbon is so beautiful. And yes, I do save the ribbons once the packages are open. It seems silly to save the “disposable” kind of ribbon. But save the fabric ribbon, plop it back in your bin for use another time and it not only makes you feel a tad more environmentally friendly, your ribbon bin stays full.

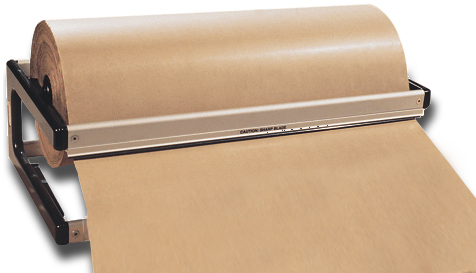
If you find the artwork your kids are producing isn’t big enough, try giving them a large piece of paper to decorate just for this purpose. But don’t tell them it’s for wrapping paper or that could affect their designs. The fun part is that it doesn’t look like regular wrapping paper. At our house a large paper roll is a staple. A big roll of paper from the paper warehouse lasts for years. Sometimes it’s white. Right now the roll holder is filled with brown paper and I use it for everything. Try tearing off a sheet the size of the table and give the kids fat brushes and bright tempera paints and see what you get. You can then cut off as much as you want and wrap lots of gifts.

Sometime maybe I’ll do a whole blog entry on why your house needs a big paper roll dispenser. Years ago I asked for it for my Christmas present from my husband and I can’t think of a gift I use more. Come to think of it, there’s something to put on your wish list this year. Meanwhile, happy wrapping!

paper_roll

IDEA 46: MAKE YOUR YARD A MULTI-TASKER

Hanging_strawberries

On the radio one day I heard a master gardener suggest that if you live in the city and want to put something on a trellis, why not plant strawberries. The idea being, then you can have a snack every time you go out the back door. She must share a gene with my husband Mark who has made an art form out of using common growing things in an unorthodox way.

Bean_blossom_wall_cu

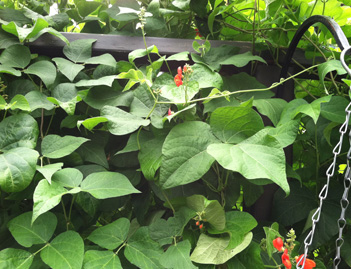
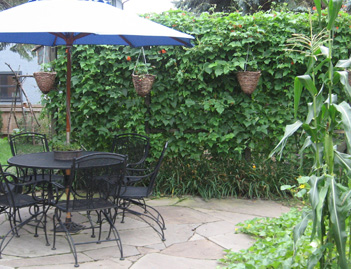
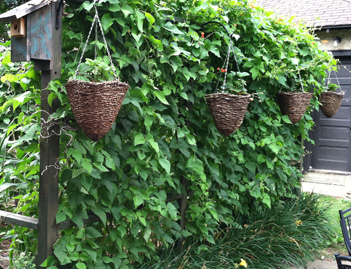
We thought our patio could use a sun/wind/privacy screen, but really didn’t want to build a wall or fence. Mark made a frame for a large piece of chicken wire and planted a mess of beans at the bottom. Very quickly our patio had a living fresh green backdrop.

Bean_garden_wall

Bean_blossom_wall

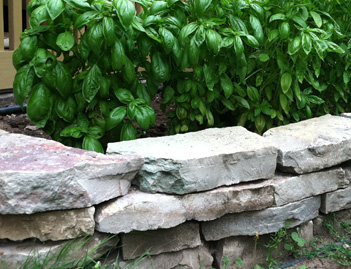
He planted basil in a stone wall nearby. This is a place that would normally be reserved for flowers, or something decorative. The basil is decorative, but it has also keeps us in fresh pesto all summer.

Basil_patio

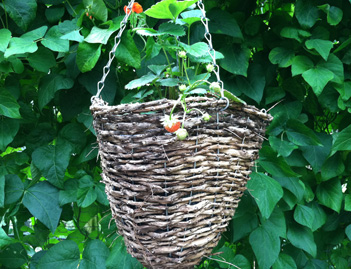
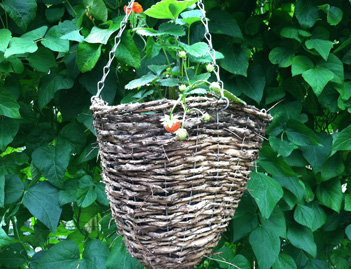
In our hanging baskets that last year housed Lobelia blooms, this year are brimming with strawberries.

Hanging_strawberries

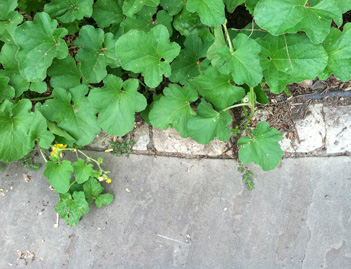
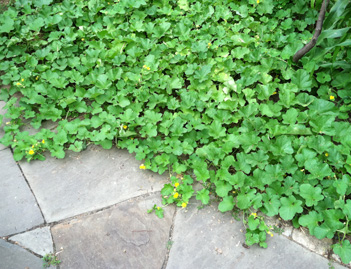
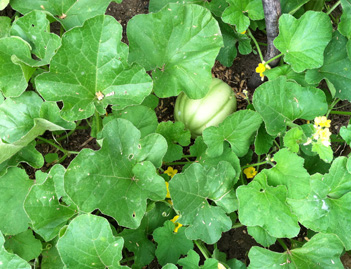
A sweet melon patch not only greens up the patio edge but provides a passel of mini cantaloupes.

Melon_patio_2Melon_patiomelon

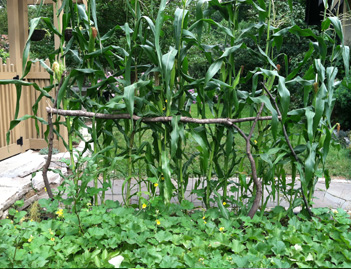
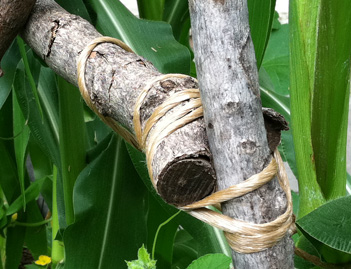
But maybe my favorite Mark innovation this year was the single row of corn forming an architectural element for the outside space. Held upright by one of his now signature tied stick trellises, the corn was well past knee hi by the 4th of July and heading on in toward an elephant’s eye.

Corn_trellis_backtrellis_joint

Of course, he likes to plant flowers too.

BellaPamella_redleaf_Mom_daughter