Archived Ideas for ‘01 January’

IDEA 92: START THE YEAR OFF YOUR WAY

New_Years_Ornament

Do you find yourself having misgivings about the New Year’s holiday?

Has the prudent-you always felt a little uncomfortable sharing the roads with who knows how many party-hearty individuals?

Has the traditional-you felt the holiday tree and decorations needed to stay up through New Year’s Eve, especially when entertaining, but even when you weren’t?

Will the career-girl-you be back to work the day after New Year’s Day, meaning the opportunity to take down the tree will be pushed to the nearest weekend opening, which could easily be the end of January—if not February?

Does the lazy, cozy, introverted-you just not relish the thought of a big party? (Either to throw, or attend)?

Well, here’s a thought for next year (or tonight):

Light a fire in the fireplace (if you have one).

Put on music.

Open a bottle of red wine.

Grill filet mignon on the grill (yes, in the snow).

And “Take down Christmas”.

Now, instead of hastily gathering everything up to stash away, or worse, just feeling let down that the season has ended, take your time. The decoration boxes will be a little more organized, and you won’t have to worry about getting to it once back at work, (or whatever makes up your busy life).

I highly recommend you try it, if not now, next New Year’s Eve. It will make the chore different, like a tradition. And it will be lovely to wake up on the first day of the new year to a clean, vacuumed house with everything tucked back in their boxes, and your still beautiful tree stuck in a snow-bank in the back yard for the birds to enjoy till spring. Now, that’s a BellaPamella idea if I ever heard one.

New_Years_Tree

IDEA 80: RECYCLE WITH STYLE

Spats_CU2

Here’s a super-quick January Saturday idea, the quickest DIY ever.

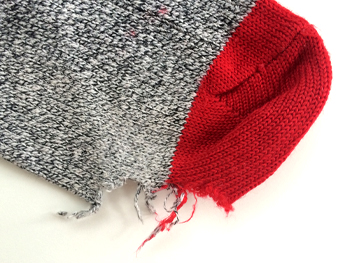
My husband has all these cute chunky hiking-type socks. And typically he gets a lot of sock blow-outs.

Spats_hole

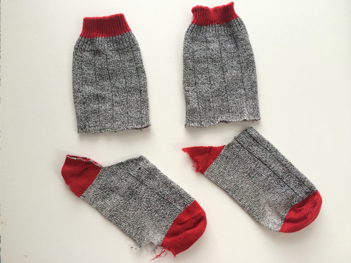
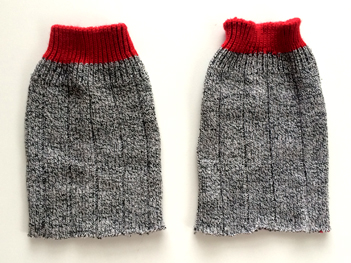
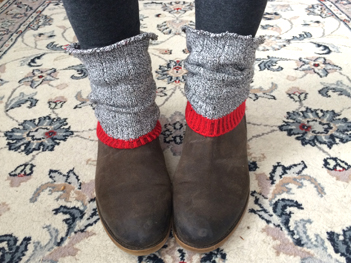
What do do with them? Cut them straight off by cutting straight across the vamp, then along the upper edge of the heal.

Spats_cut_twoSpats_two

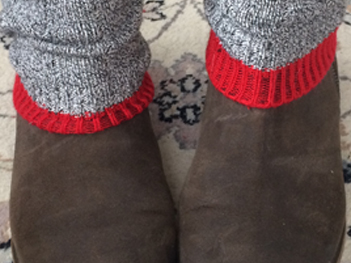
Then pull them on over your short boots or shoes. You can wear them either way, right side up or like this, upside down.

Spats_Done

Voila! Instant spats!

IDEA 75: STAY INSPIRED

Inspire_hat_lady

Stay inspired. Now, there’s a New Year’s resolution worth making.

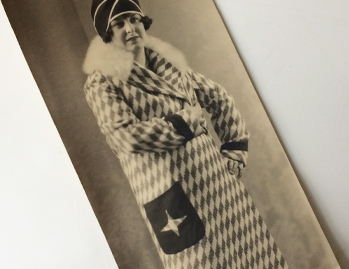
This thought was INSPIRED by this thin strip of a photo that was staring back at me as I was searching out wood trim at a salvage yard. If you’re lucky enough to have the kind of salvage place we do here in Minneapolis, you know around every corner you’ll find another pile of stuff, old hardware mixed with the occasional lampshade and, in this case, a dozen yellowed darkroom photos of ladies modeling coats.

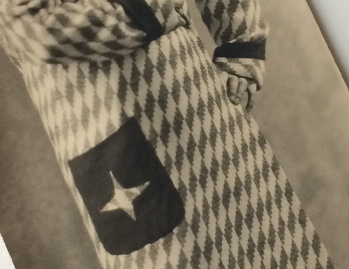
Most people in their right mind, especially those on a mission to find wood trim, would not give a second glance to the coat ladies. But something about them drew me in immediately. I was particularly intrigued by this sassy brunette in her large-diagonal-diamond-patterned-fur-collared-coat and amazing hat. I couldn’t figure out the pocket, except to assume a piece of the same diamond fabric is appliquéd on top for flair, even though it gives the appearance that the pocket has a star shaped hole right through it.

Inspire_pocketInspire_coat_pocket

I wondered what colors the outfit was in, and if this very average looking woman was considered a beauty that would make every woman want that coat.

I decided since the photo was narrow, I would use it for my bookmark. Now, every night when I escape to a book for a few minutes before falling asleep, I can contemplate my new friend.

Is this a big plan? No.

It’s a very small reminder that in all the fray of raising a family, holding down a job and/or just making your way through life, you will benefit greatly if every once in a while you simply allow yourself to be inspired by some small thing, even if no one else gets it.

Inspire_bookmark

IDEA 67: TEACH SAVING

Ice_cream_Saving_2

Now that my kids are quite grown (are they ever ALL grown?), it occurs to me that when it came to teaching saving we did two things right.

The first I got from my own parents: Open a savings account for each child. Once the child is old enough to get the concept of money, tell her about her account and show her the balance. Then when your child receives money, tell them that whatever they put in their savings account, you will match. A child that receives $20.00, and is told that if they put 10 of it in the bank, you will put in 10 to make 20, will usually do it and be happy spending the other 10. We did this with all three kids. (The matching in our family continues until the child collects an actual paycheck). By that time the savings account has grown enough for them to want to keep and protect it. Not to mention they now have a long established habit of putting some of their money in the bank. When you think about it, it’s not unlike a 401K contribution that’s matched by your employer. Why not get them into the swing of things early?

My other saving tip didn’t start out about saving at all. It started out about fairness. When some tasty treat would come into the house (like a package of cookies or carton of ice cream), it became impossible for it to last more than a day. Why? Because each child figured he’d better get his before the other two devoured it. Treats disappeared at a frenzied pace because no one wanted to be the one left with an empty carton. So one day I brought home three identical packages of cookies. I put a child’s name on each one and put them in the cupboard. Then I told them they could do with them what they wanted but they were not to touch anyone else’s, and they would not get another package for two weeks. I was amazed how long those cookies lasted. Who knew those kids had so much restraint? But without the threat of poachers they were able to consume the treats at a normal pace. And, the little “lucky strike extra”? Another lesson in saving was born.

IDEA 59: MAKE A KID ART PILLOW

Kid_Art_Butterfly_2

Anyone who has been keeping track of the Never-Ending-List-Of-Very-BellaPamella-Ideas knows that I love a great idea for using kid art. If you have kids, this art resource is abundant, and every once in a while you score a piece that is absolutely priceless. This fantastic idea will add to the other terrific ways to put kid art to use.

You may have already discovered this wonderful site set up to let you print your own fabric, called Spoonflower.

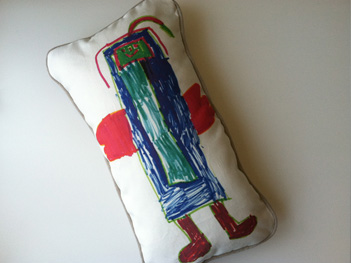
This site allows you to design as small as one yard of fabric and they will print it for you! I tried this once and was completely hooked. Then one day I realized, this was a perfect way to produce an amazing keepsake of my children’s art!

You need a scanner so you can scan your child’s art. Save it as a jpeg, and follow the instructions on the Spoonflower website to make sure your scan is the proper size. You can choose from a variety of fabric types, but for these pillows I selected Linen-Cotton Canvas.

One yard of the linen-cotton Canvas is 56″ wide, so I was able to fit several pieces of art in my one yard.


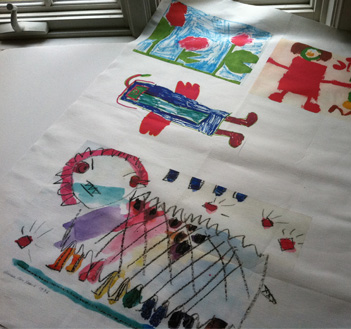
Kid_Art_Fabric

Upper right is my young daughter’s “self portrait”. Then, counterclockwise, there’s some beautiful pink flowers, an angel (or is it a butterfly?) and a Chinese New Year dragon parade. And this is only half the yard.

You could also “repeat” the art and it will automatically fill the yardage. This would be perfect for curtains or bedding.

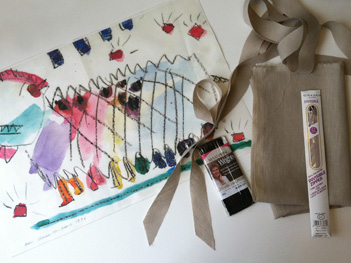
From the fabric store, I bought some simple linen in a neutral color for the backing and piping. Whatever you buy, get enough for the pillow back and to cover the store bought piping, or you can use the ready made Wright’s piping if it comes in a color that works.

Kid_Art_Materials_2

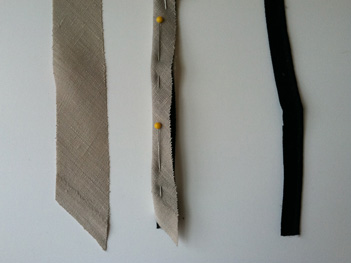
To cover piping, cut strips of your fabric on the diagonal (use a 45 degree triangle if you have one. If not, fold a piece of paper in a triangle. If you bring two consecutive edges together you’ll get a 45 degree angle. You only need this as a guide to get you started on the right angle).

Kid_Art_Piping

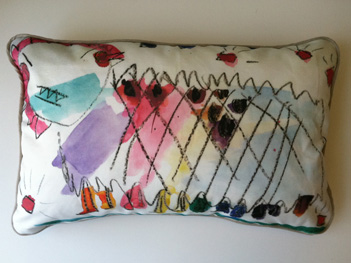
You don’t have to use piping on your pillow, you can just sew the front and back together, right sides together, and turn it inside out, stuff, and stitch the remaining edge closed. But I like to add piping and a zipper. Choose the method that closest matches your sewing prowess. The point is not necessarily the fanciness of the sewing, but the sweetness of your child’s artwork, now on a huggable pillow.

Kid_Art_Pillow

And I’m sure I don’t have to say how incredible a grandparent gift this would make. OK, now get going! I’ve given you plenty of time to get this done by next Christmas!

IDEA 50: DO A LOW BUDGET “REMODEL”

bathroom_hooks

I have a feeling I’m not the only one out here completely mesmerized by HGTV and all the home improvement shows. There’s just nothing quite like watching someone take a sledge hammer to a corroded bathroom wall and within minutes transform a nightmare into a dream space. Like everyone else watching, I have a few rooms of my own that could definitely use the treatment. But also, like most people watching, I have neither the funds nor where-with-all to do anything about it. Well, not yet, anyway.

When my parents came to visit for the holidays and my mom asked me what I really wanted, my answer of a new bathroom didn’t exactly fit what she had in mind. But she gave me a couple days of hers and my dad’s time and some very clever solutions. It inspired me to remind us all something that former generations knew by necessity. That you don’t always have to tear things down and start fresh, sometimes some good old fashioned elbow grease is just the ticket.

So here’s how it went down:

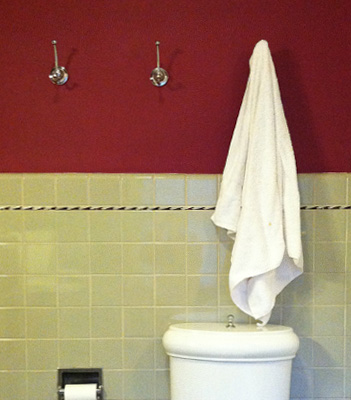
Our upstairs bathroom is shared by four members of the family. It is a 1950s dream, complete with all kinds of tiles, including a little border of gray and burgundy “wave” tiles. When we moved into this 1912 house eighteen years ago, I painted the walls above the tile a deep cabbage red. Over the years the deep red paint seemed to sweat, causing the walls to develop an odd sort of drip texture which went ignored, along with the cracked sink and a tub that was so old, it refused to come clean.

Add to this the fact that there was no counter space or drawers so my teenage daughter and I became experts at balancing small items all around the edges of the sink. You’d be amazed how many make-up and hair products will fit, as long as no one knocks into them. My husband complained, but it had pretty much become just one of those idiosyncrasies of living in an old house. Oh, and since there was only one towel bar we alternated between periods of all of us using the same towel and then discovering it, and over-compensating by throwing every towel in the wash after only one use.

Last year the faucet in the cracked sink went kaput, so we were forced to replace it, and rather than diving in to do the whole project, we found a dandy specimen from the original era of the house at a salvage yard and installed it. The bathroom got de-cluttered for about a week, but it wasn’t long before the miscellaneous items returned to the edges of the new sink.

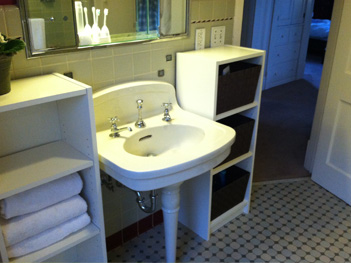
So, my mom and I gave ourselves two days, one to plan and shop and one to work. We bought mostly cleaning supplies, and found two perfect-size matching small shelf units. We got four beautiful “robe hooks” so each person has their own dedicated towel hook.

I think the real ah-ha came when my mom donned gloves and washed the red walls from top to bottom. I had planned on a coat of stain blocker paint to try to cover the red, and a new paint job, but simply washing the walls made them look brand new. The shower/tub got the cleaning of it’s life while my dad assembled the shelves.
Bathroom_shelves

With some very basic lightweight basket inserts from the home improvement store, the two little units are incredibly efficient. There are surfaces to work on, and they actually stay clear because it’s so easy to drop everything back into the basket when you’re done.

We all know that eventually the bathroom will get the big remodel. But in truth, it will probably be years before that happens. And I can’t think of a better gift than working side by side with my parents AND getting a groovy bathroom out of the deal. I say, we should still watch home improvement shows and continue to collect ideas for our future rooms. But in the meantime, try applying just a tad of elbow grease to the problem. For the results, you can’t beat the cost!
IDEA 39: SHORE UP YOUR DRAWERS

Drawer_1

You could spend this month trying to keep all those resolutions you made. Or you could forget that, and just work on getting your kitchen drawers organized. I just love a well-organized drawer. It makes me feel just a little bit in control of things.

So, edit your stuff if you have too much. Buy a couple of drawer dividers. And have at it. Here are some photos of my drawers. I think my newer pot-holders were in the wash, and several of my food storage containers were in the freezer, but I took a “come-as-you-are-party” approach to these photos. They’re not bad. And real is good.

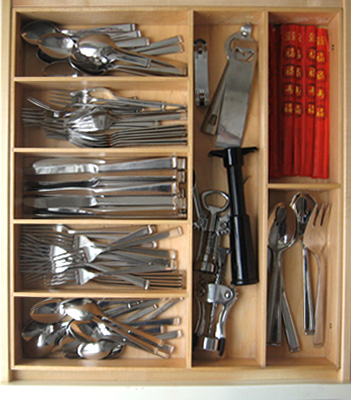
This drawer may have been my inspiration for it all. Years ago, when we put new cabinets in the kitchen, I got real live built-in dividers for the silverware drawer. (Previously I had used the plastic unit that you just pop into a drawer, with empty space around it, which collected other stuff). The fact that this drawer has remained organized all these years I think is a testament to how the right organization device will take care of itself. There’s a reason someone coined the phrase, “A place for everything, and everything in it’s place”!

Drawer_2

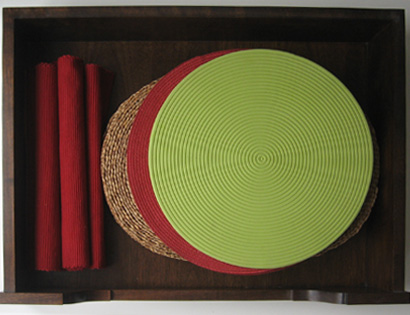
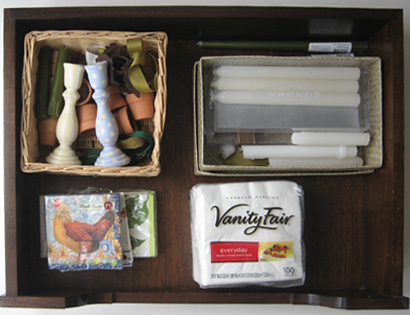
There are four drawers in my “peninsula” which house stuff to set the table:

Place mats

Drawer_9

Candles, candle holders, napkin rings and paper napkins. The box that the candles are in a woven box with a lid. Very sweet.

Drawer_8

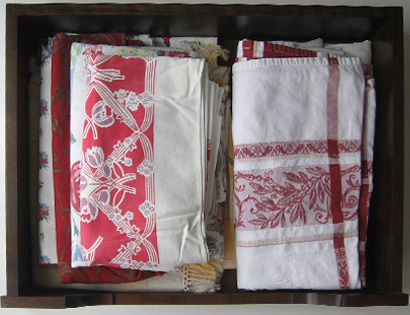
Table cloths

Drawer_11

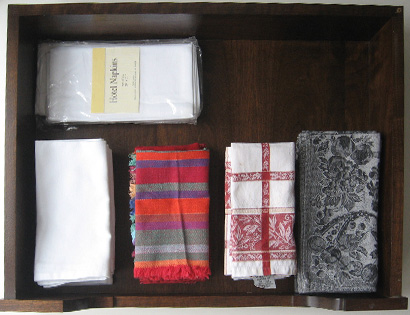
Fabric napkins

Drawer_10

The drawers below my main counter are arranged by task.

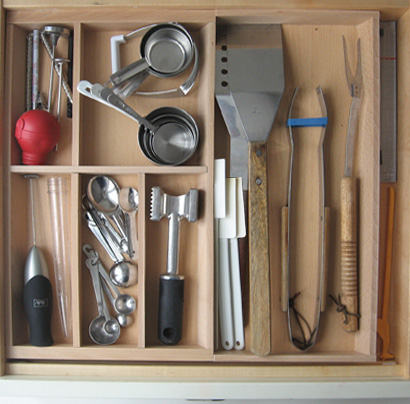
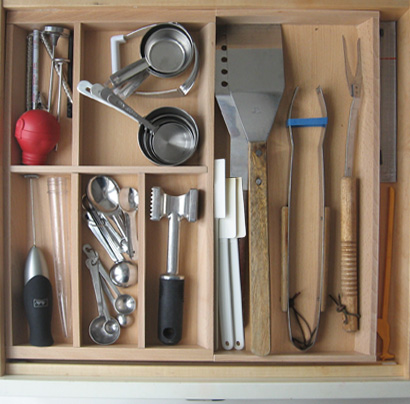
Baking, grilling and roasting: measuring cups and spoons, rubber spatulas, grilling utensils. Hint: use a heavy rubber-band (like the one found on broccoli in the produce section) to keep the grilling tongs from taking over the whole drawer. This drawer has adjustable dividers from IKEA. (Classy AND inexpensive!)

Drawer_1

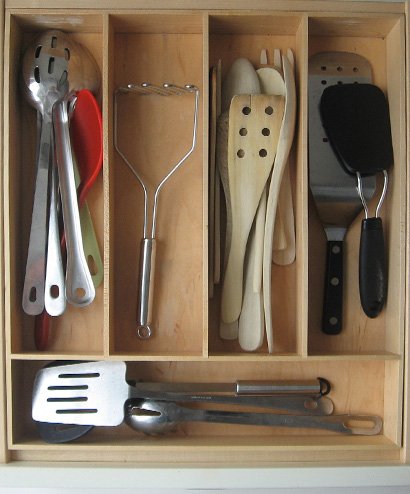
This drawer is at the stove: Stirring spoons, wooden utensils, flipper, spatulas, etc.

Drawer_4

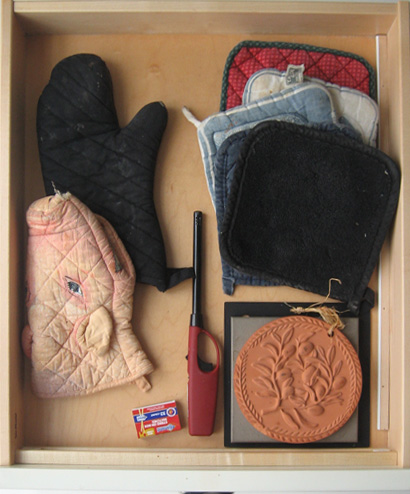
A second drawer at the stove: Hot pads, oven mitts, trivets and matches and stove lighter.

Drawer_5

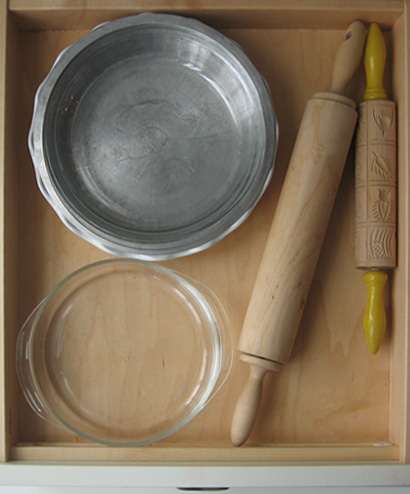
Pie plates and tins, and of course rolling pins.

Drawer_3

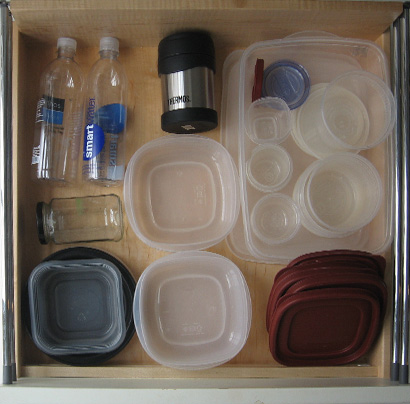
Food storage. I find this drawer is also a good place to keep empty water bottles for re-use.

Drawer_7

If you’ve been inspired, try fixing up even one drawer per weekend. In no time your entire kitchen will be organized!

IDEA 21: IDENTIFY WITH SOMETHING

Paint_number

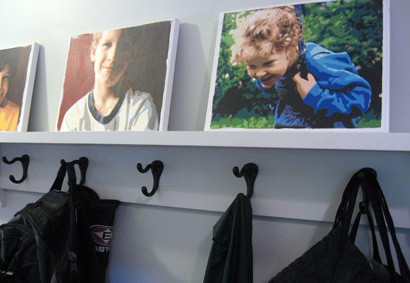
One day I discovered that you could order a Paint-by-number kit of your own photos. I sent in a picture of my daughter and the resulting painting was so beautiful and fun to do, I did the rest of our family. Now, the five portraits identify the hooks in our mudroom. Each picture sits above two hooks belonging to the person in the picture.

Of course it would have been much easier to write their names. But, that’s not the point is it?!

IDEA 20: JUNK DRAWER RESCUE

Kitchen_Drawer_org_2

Here’s a test for you: Open your kitchen junk drawer. Now, does it make you feel all happy and on top of things? Or is it just another reminder of the myriad of things that need your attention? My theory is that something as simple as organizing your junk drawer can have a halo effect on your general well being that will last you until spring.

So, how does one even begin this horrendous task? And even if you do, how will it STAY organized? We all know, the more people in your family, the quicker the organized junk drawer turns into chaos.

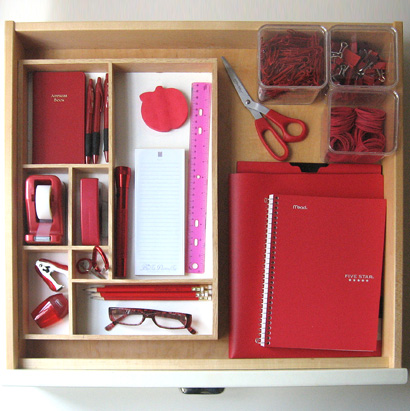
I’m at the time in my life that I need glasses, “readers” at every turn throughout the day. I tried to house a pair in the kitchen junk drawer for those moments when I needed to read a recipe, or the microscopic print on the back of a package. And inevitably they would end up on top of my head where they would travel to various parts of the house so that next time I opened the drawer they would not be there. So one day I bought a pair of red glasses. This is a color that looks fab in my kitchen, but not very good on my face. Amazingly, whenever I would begin to take the red glasses to another part of the house I would either stop and deposit them in the drawer, or, if I happened to see them, say, sitting on my desk, I’d bring them back to their place. And thus was born an inspiration. Like most junk drawers, ours was full of the miscellaneous bits and pieces people find and stash but never have a use for. What it did NOT EVER have was a working writing utensil, paper, tape, scissors, you get the idea. The junk drawer was a place you went to look for something, and never found it.

Try this and see if it makes life just a little better: First of all, empty the junk drawer and wipe it clean. If it doesn’t have dividers you may want to purchase an insert at one of those “get organized” stores. Now, (this is the fun part), whenever you are out at the grocery, drugstore, office supply or big box store, start collecting red stuff. Yes, you can choose a different color if you like. The point is that everyone in the family knows that that particular color stuff goes in the drawer. If you use the scissors, they go back. If you find them around the house, bring them back. You would be amazed at how this simple rule helps keep the drawer full of its useful stuff.

House_Key_org

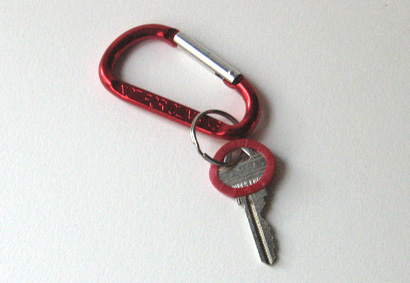
So, what did I find in red? Pens and pencils, scissors, tape dispenser, stapler and staple remover, paperclips, rubber bands, those gripper clips (great for closing chip bags) a ruler, flashlight, address book, key ring (and red plastic marker for spare house key), post-its, folder to hold rosters and school directories,  lined paper notebook, and last but not least…my glasses!