Archived Ideas for ‘Organization’

IDEA 92: START THE YEAR OFF YOUR WAY

New_Years_Ornament

Do you find yourself having misgivings about the New Year’s holiday?

Has the prudent-you always felt a little uncomfortable sharing the roads with who knows how many party-hearty individuals?

Has the traditional-you felt the holiday tree and decorations needed to stay up through New Year’s Eve, especially when entertaining, but even when you weren’t?

Will the career-girl-you be back to work the day after New Year’s Day, meaning the opportunity to take down the tree will be pushed to the nearest weekend opening, which could easily be the end of January—if not February?

Does the lazy, cozy, introverted-you just not relish the thought of a big party? (Either to throw, or attend)?

Well, here’s a thought for next year (or tonight):

Light a fire in the fireplace (if you have one).

Put on music.

Open a bottle of red wine.

Grill filet mignon on the grill (yes, in the snow).

And “Take down Christmas”.

Now, instead of hastily gathering everything up to stash away, or worse, just feeling let down that the season has ended, take your time. The decoration boxes will be a little more organized, and you won’t have to worry about getting to it once back at work, (or whatever makes up your busy life).

I highly recommend you try it, if not now, next New Year’s Eve. It will make the chore different, like a tradition. And it will be lovely to wake up on the first day of the new year to a clean, vacuumed house with everything tucked back in their boxes, and your still beautiful tree stuck in a snow-bank in the back yard for the birds to enjoy till spring. Now, that’s a BellaPamella idea if I ever heard one.

New_Years_Tree

IDEA 83: ANTICIPATE

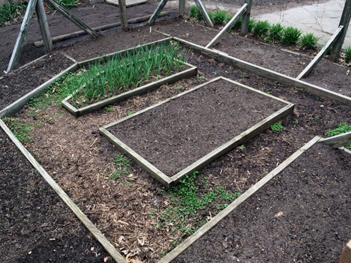
April_Garden_beds

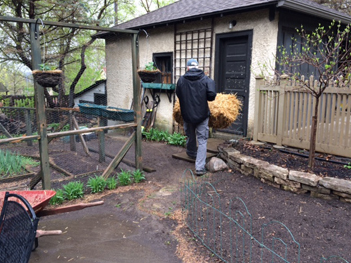
My husband, the gardener of the household, calls April in Minnesota the “cruelest of all months”.

Your natural clock tells you it’s time to plant, but history tells us we are better off waiting, than subjecting a plethora of tiny growing things to a surprise freeze or snow shower.

But that does not keep him (and most Minnesotans who are so inclined) form tidying up the gardens in anticipation of our short but much beloved growing season.

While a cursory glance around the yard doesn’t look like much, his appreciation and care for what is to come has made me much more aware of the coming beauty. The garden that’s been buried in snow all winter is now completely tidied up. It’s all dirt and wood chips, with the exception of two green things: The garlic bed, planted last fall is brimming with new green shoots that apparently were at work all winter under a cozy blanket of snow. And the wood-chip path is being taken over with soft green clover. I asked him why he left the clover when he cleared out everything else. And, while I would think most gardeners would consider this a weed, he appreciates the clover for the soft bed it forms for bare feet. Much preferable to wood-chips on the tootsies.

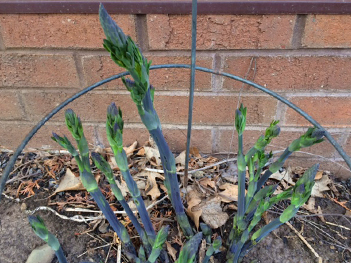
Elsewhere in the yard, a very young False Indigo has been guarded by a wire form. If he hadn’t lovingly cleared out around it, I may never have noticed. And I would never have known that at this young stage, a False Indigo looks exactly like asparagus poking up into the world.

April_False_Indigo

Teeny-tiny Forget-Me-Nots are up in force, but so small they’re easy to miss.

April_Forget-Me-Nots

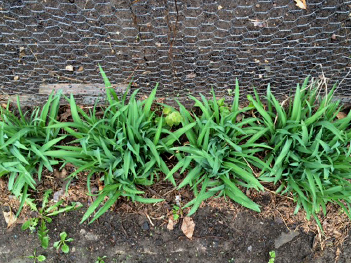
Just outside the vegetable garden, fresh green Stella d’oro daylilies are preparing for the show.

April_Stellas

Before the red Asiatic lilies appear, the foliage makes a pretty green star pattern.

April_Lilies

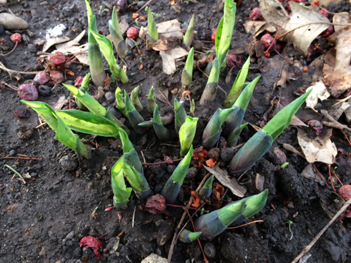
And it wouldn’t be a Minnesota yard without a host of different hosta varieties peeking up.

April_Hosta

In all the brownness, our bright pink Magnolia tree tries to hold its own.

April_Magnolia_budApril_Magnolia

And the April rain reveals that all the loving preparation has it’s own beauty.

April_brown_yard

In the coming months, the garden will begin bursting with vegetation. The gate will be dripping with a bean vine so prolific, it makes you want to laugh. This place will get so lush and beautiful, coming home every evening will be a celebration.

And, once again, we’ll all be reminded why we put up with Minnesota winters.

April_Summer_Beauty

IDEA 62: INITIALIZE THE TOWEL HOOKS

Initial_Hooks_all_blank

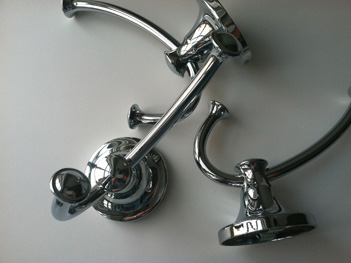
Once upon a time we had four people using a bathroom that had one towel bar. Those family members who lived on the edge simply used whatever towels were hanging on the bar and hung them back. Those more fastidious in nature used a clean towel every day and deposited it in the laundry. Neither solution was optimal. Who wants to dry off wondering where that towel has been? And who wants to launder towels that much? So, one day I hung four lovely hooks, one for each user of that bathroom.

Initial_Hooks_blank

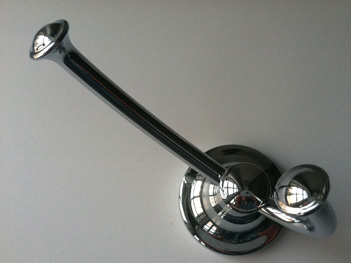
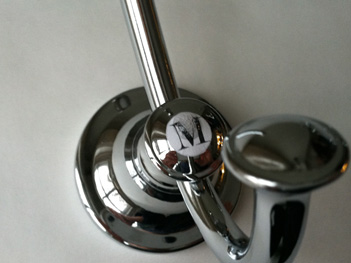
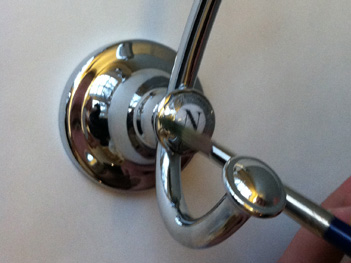
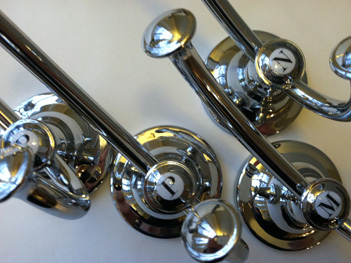
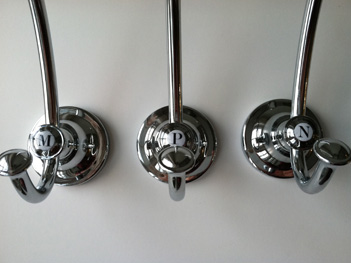
Even though we decided whose hook was whose, I often noticed my towel might be damp even if I hadn’t used it. Which led me to the obvious conclusion that people were confused about which hook was theirs. So I went on the hunt for a way to attach an initial to the lovely domed round at the center of the hook. I was inspired by the multitude of initial “buttons” available in the scrap-booking aisle. And if you happen to find hooks with a flat spot, this might be a great solution. But the flat buttons would not adhere to my domed hooks, so I made up this slightly more involved, but incredibly satisfying project.

Initial_Hooks_Materials

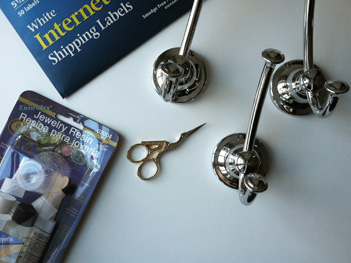
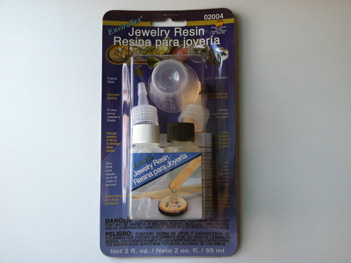
Here’s how I did it. You’ll need a printer and printing labels. I used my half-sheet shipping labels. You also need tiny scissors, like embroidery scissors and hooks that have a nice spot for an initial. Then at the craft store I bought this small “Jewelry Resin” kit.

Initial_Hooks_Epoxy

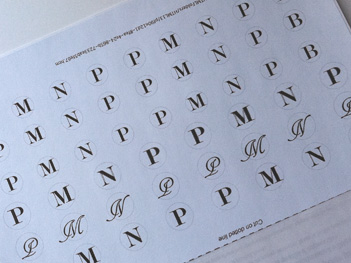
I knew the general size and typeface I wanted for my hooks, but I typed out a variety of sizes and even an alternative typeface because I wasn’t sure EXACTLY what size or type style would work best.

Initial_Hooks_Label_print

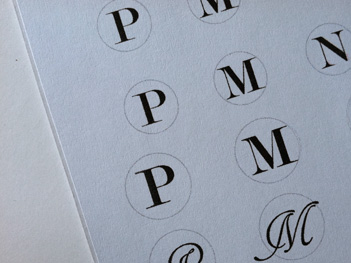
I also printed a pale circle around each letter so I would have a line to cut on.

Initial_Hooks_label_CU

The absolutely trickiest part of the project is to cut the paper sticker in a smooth circle. Just take your time, use the tiniest scissors possible, and very small snips. Once you have your cutout, peel off the paper on the back and stick it to the hook. It tuned out it was good I tried multiple sizes. Because the spot was domed, the sticker had to be quite small or it creased and wrinkled when I tried to smooth it down. It took a little trial and error, but I was able to cut a very small round, and then “burnish” the edges down with the back of my thumbnail.

Initial_Hooks_Paper_Initial_CU

Next, comes the jewelry resin. Read the instructions in the kit. The one I had came with little cups that you mix the epoxy in. Once it was thoroughly mixed, I dropped the resin down onto the paper sticker using a flat wooden stick provided in the kit.

Initial_Hooks_Epoxy_drop

I dropped just a few drops, enough to make sure the paper sticker was covered. Don’t worry about the air bubbles trapped in the resin. They will find their way out by the time it dries. I made sure everything was covered down to the bottom of the dome, where there was a natural stopping point. I used a small paintbrush to help with this.

Initial_Hooks_brush

Once it looks like a thin coat of resin is covering everything, stop and leave it alone. It takes many hours for the resin to harden completely, and for all the bubbles to disappear.

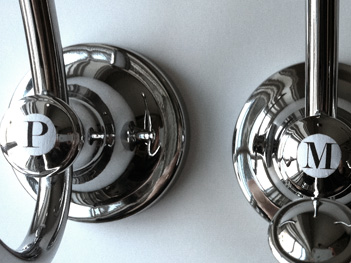
But look how pretty the finished hooks are!

Initial_Hooks_all_finishedInitial_Hooks_3_Finished

And just think how lovely it will be to know you have a clean towel without laundering seven loads of towels a week!

IDEA 56: EXPRESS YOURSELF

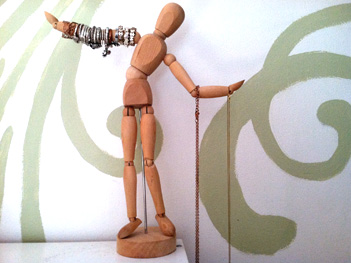
Ring_holder

One of my favorite national magazines just did a contest. People sent in their ideas for using something that was meant for another purpose as an organizational tool. Of course I didn’t hear of the contest until it was in print. But if I had, I would have sent in this great idea my daughter had.

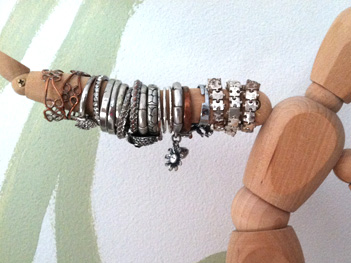
Most art supply stores have these posable figures meant to aid an artist doing figure drawing. My daughter fell in love with one and bought it for her room. Now she uses the perfect, posable arms to hold her rings and necklaces.

And, thus, she has begin to discover the art of “home dec”. She’s found not just a handy way to organize and display her rings, but something that does it in a personal way, that speaks to the artist within her.

Ring_holder_CU

IDEA 51: SWEET JEWELRY BOX

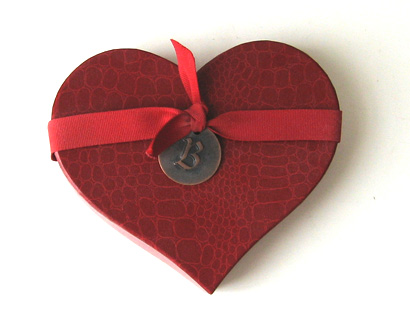
Valentine_chocolate_box

The beautiful heart shaped boxes that valentine candy comes in have always appealed to me. Years when I didn’t have a Valentine, I would have no qualms about searching for the perfect, small, heart shaped box of chocolates for myself. And over the years I have kept many of the empty boxes. They are simply too beautiful (and in some cases too sentimental) to throw away.

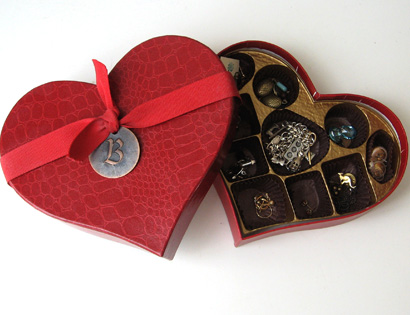
So here’s what I consider a perfectly delicious idea: Turn one or more of those pretty boxes into a jewelry box! If the inside is fitted with a plastic tray like the one shown, it provides perfect little compartments to house pairs of earrings.

Valentine_jewelry_box

You can have just one, or stack two or three in graduating sizes. One for earrings, one for rings, etc. You get the idea. And if you don’t have a heart-shaped box that you’ve saved? What a great excuse to go out right now and buy one!

Charlie_apron

IDEA 50: DO A LOW BUDGET “REMODEL”

bathroom_hooks

I have a feeling I’m not the only one out here completely mesmerized by HGTV and all the home improvement shows. There’s just nothing quite like watching someone take a sledge hammer to a corroded bathroom wall and within minutes transform a nightmare into a dream space. Like everyone else watching, I have a few rooms of my own that could definitely use the treatment. But also, like most people watching, I have neither the funds nor where-with-all to do anything about it. Well, not yet, anyway.

When my parents came to visit for the holidays and my mom asked me what I really wanted, my answer of a new bathroom didn’t exactly fit what she had in mind. But she gave me a couple days of hers and my dad’s time and some very clever solutions. It inspired me to remind us all something that former generations knew by necessity. That you don’t always have to tear things down and start fresh, sometimes some good old fashioned elbow grease is just the ticket.

So here’s how it went down:

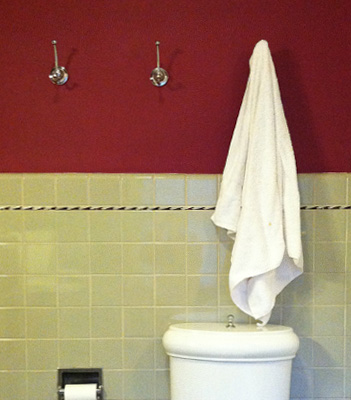
Our upstairs bathroom is shared by four members of the family. It is a 1950s dream, complete with all kinds of tiles, including a little border of gray and burgundy “wave” tiles. When we moved into this 1912 house eighteen years ago, I painted the walls above the tile a deep cabbage red. Over the years the deep red paint seemed to sweat, causing the walls to develop an odd sort of drip texture which went ignored, along with the cracked sink and a tub that was so old, it refused to come clean.

Add to this the fact that there was no counter space or drawers so my teenage daughter and I became experts at balancing small items all around the edges of the sink. You’d be amazed how many make-up and hair products will fit, as long as no one knocks into them. My husband complained, but it had pretty much become just one of those idiosyncrasies of living in an old house. Oh, and since there was only one towel bar we alternated between periods of all of us using the same towel and then discovering it, and over-compensating by throwing every towel in the wash after only one use.

Last year the faucet in the cracked sink went kaput, so we were forced to replace it, and rather than diving in to do the whole project, we found a dandy specimen from the original era of the house at a salvage yard and installed it. The bathroom got de-cluttered for about a week, but it wasn’t long before the miscellaneous items returned to the edges of the new sink.

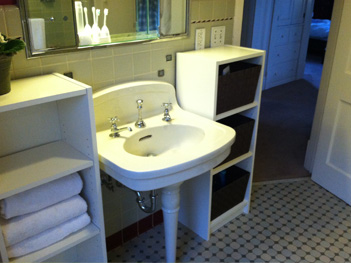
So, my mom and I gave ourselves two days, one to plan and shop and one to work. We bought mostly cleaning supplies, and found two perfect-size matching small shelf units. We got four beautiful “robe hooks” so each person has their own dedicated towel hook.

I think the real ah-ha came when my mom donned gloves and washed the red walls from top to bottom. I had planned on a coat of stain blocker paint to try to cover the red, and a new paint job, but simply washing the walls made them look brand new. The shower/tub got the cleaning of it’s life while my dad assembled the shelves.
Bathroom_shelves

With some very basic lightweight basket inserts from the home improvement store, the two little units are incredibly efficient. There are surfaces to work on, and they actually stay clear because it’s so easy to drop everything back into the basket when you’re done.

We all know that eventually the bathroom will get the big remodel. But in truth, it will probably be years before that happens. And I can’t think of a better gift than working side by side with my parents AND getting a groovy bathroom out of the deal. I say, we should still watch home improvement shows and continue to collect ideas for our future rooms. But in the meantime, try applying just a tad of elbow grease to the problem. For the results, you can’t beat the cost!

IDEA 47: GIVE “OLD SCHOOL” A CHANCE

Grocery_List_thickness

Are you constantly asking, “is there’s an app for that”?

Technology is currently on such a high, it’s pretty certain you’re caught up in at least some of it. And it’s often thrilling. How cool is it that you can do your banking at the coffee shop in between shopping for a car and emailing your mom?

So I want to be clear. I love technology. But sometimes I find the ‘old school’ way to work better. So I use a mix of both. Even though I can have a to-do list on my phone, sometimes I need to keep a paper one on my desk. Even though my computer has an address book, my actual desktop also sports a rolodex. (Really!)

Everyone owes it to themselves to create the personal combination of preferences that works for them, with no apologies. Even your “OS” has “preferences”, because even the most tech-minded thinking knows: people are different.

Grocery_List_buy

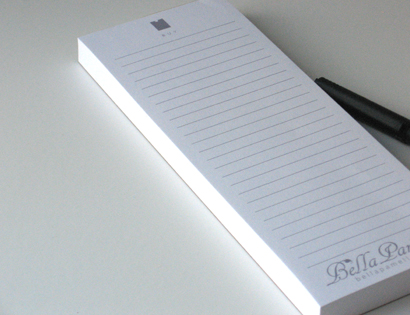
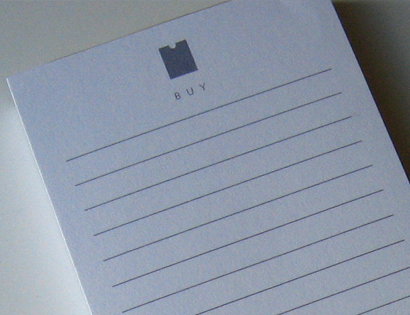
In tossing around this idea, I decided to create a BellaPamella shopping list. It’s a chunky 1/2 inch thick pad of long, narrow paper. At the top is a graphic of a grocery bag and one word: BUY. And I wondered, would people like such a simple tool? So, before I go deciding to sell BellaPamella shopping list pads, let’s see if there’s interest. The first ten people to contact me and ask for one will receive a free custom made BellaPamella shopping list pad in the mail. You don’t even have to include your mailing address unless you hear you are one of the ten, (in which case we will need it in order to send it to you). And we will NOT use, give away or sell your email or mailing address.

If I get a huge outpouring, I will be happy to offer the BellaPamella grocery list pad on the site. So, how bout it? Wanna try a little Old School?

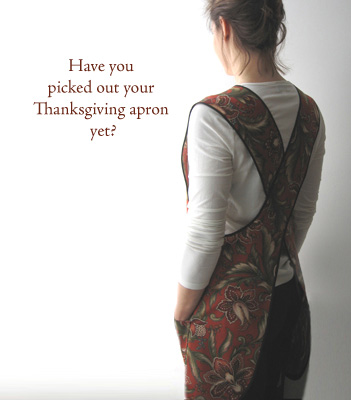
Oh, and I’m sure I don’t have to remind you of another sweet “Old School” item: The apron!
Apron_Thanksgiving

IDEA 43: MAKE A TIMELESS CAPSULE

Transfer_Video_3

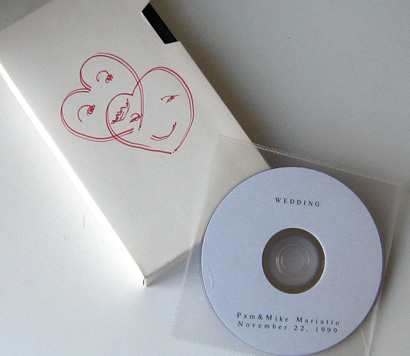
Is there a VHS videotape of your wedding somewhere in a box in your attic? How about some “Super-8” film reels from when you were a kid? If your house is typical, you have a few of these treasures, and you have no idea where they are.

Lately I’ve been noticing the shops offering to transfer my stuff to a current medium. And it got me thinking. How many of these things do I really have? I’m not about to transfer all the cartoons my kids used to watch, but I have only one wedding video. I have another cassette containing my fifteen minutes of fame (in my 30’s) on a local TV show. And a small hand-full of other things.

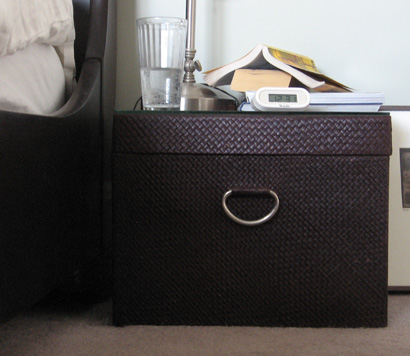
I decided it was time to collect and transfer these few precious things. But here’s the key: I won’t be putting them back in a box in the attic. I chose a basket/box with a lid that I also use as a bedside table. In here I’ve stashed the originals and the transferred DVDs. When the next new technology comes along I will have everything in one spot, hiding in “plain sight” so to speak, under a piece of glass that protects the lid of my bedside basket. In addition to this I’m keeping a file on my external hard drive, but that’s getting a bit technical, isn’t it?

You can choose any box or container you like. Maybe you’d prefer an interesting old box on the living room coffee table. But the point is to have something you keep out, not stash away in the attic. That way, you can add things as you collect them and you’ll actually be able to find them when the new media switches again. And you know it will!

Bedside_Basket

BELLAPAMELLA_BRIDE


IDEA 39: SHORE UP YOUR DRAWERS

Drawer_1

You could spend this month trying to keep all those resolutions you made. Or you could forget that, and just work on getting your kitchen drawers organized. I just love a well-organized drawer. It makes me feel just a little bit in control of things.

So, edit your stuff if you have too much. Buy a couple of drawer dividers. And have at it. Here are some photos of my drawers. I think my newer pot-holders were in the wash, and several of my food storage containers were in the freezer, but I took a “come-as-you-are-party” approach to these photos. They’re not bad. And real is good.

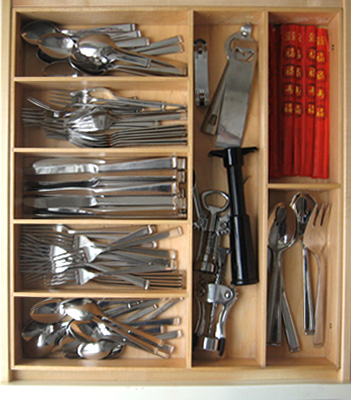
This drawer may have been my inspiration for it all. Years ago, when we put new cabinets in the kitchen, I got real live built-in dividers for the silverware drawer. (Previously I had used the plastic unit that you just pop into a drawer, with empty space around it, which collected other stuff). The fact that this drawer has remained organized all these years I think is a testament to how the right organization device will take care of itself. There’s a reason someone coined the phrase, “A place for everything, and everything in it’s place”!

Drawer_2

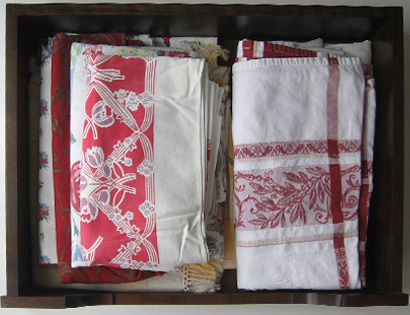
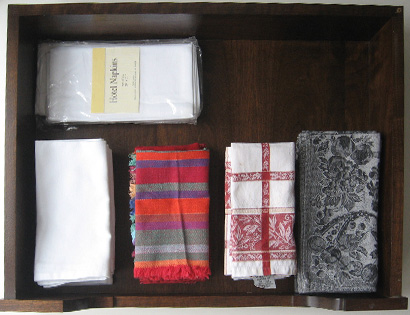
There are four drawers in my “peninsula” which house stuff to set the table:

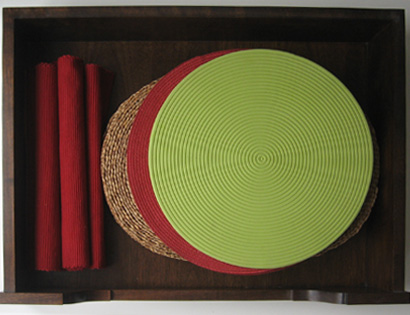
Place mats

Drawer_9

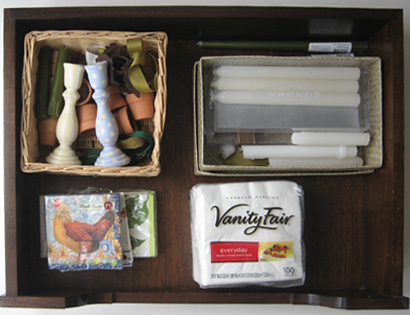
Candles, candle holders, napkin rings and paper napkins. The box that the candles are in a woven box with a lid. Very sweet.

Drawer_8

Table cloths

Drawer_11

Fabric napkins

Drawer_10

The drawers below my main counter are arranged by task.

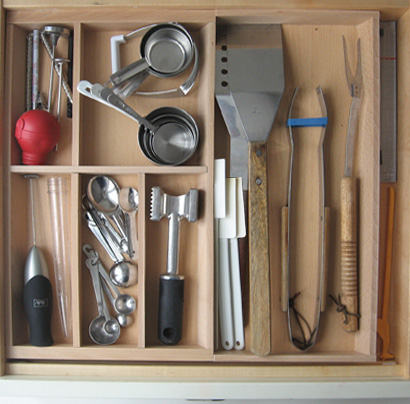
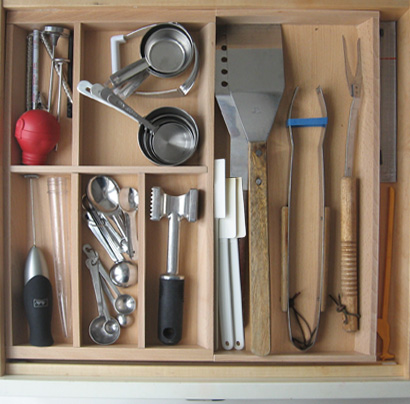
Baking, grilling and roasting: measuring cups and spoons, rubber spatulas, grilling utensils. Hint: use a heavy rubber-band (like the one found on broccoli in the produce section) to keep the grilling tongs from taking over the whole drawer. This drawer has adjustable dividers from IKEA. (Classy AND inexpensive!)

Drawer_1

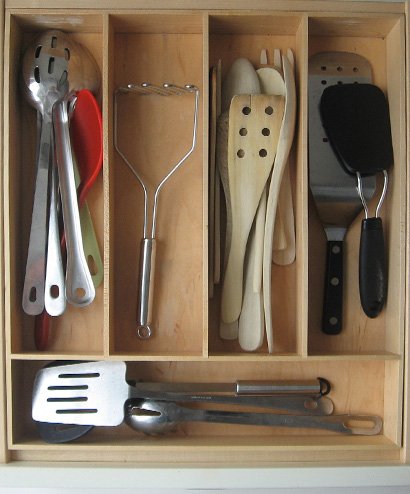
This drawer is at the stove: Stirring spoons, wooden utensils, flipper, spatulas, etc.

Drawer_4

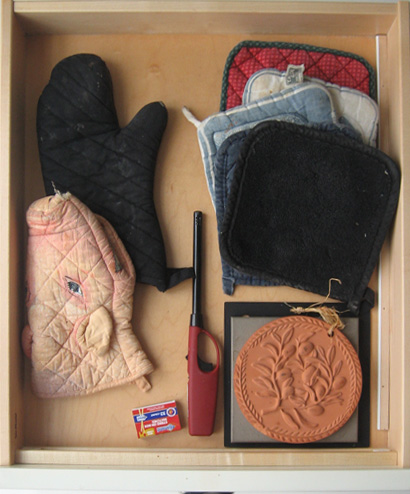
A second drawer at the stove: Hot pads, oven mitts, trivets and matches and stove lighter.

Drawer_5

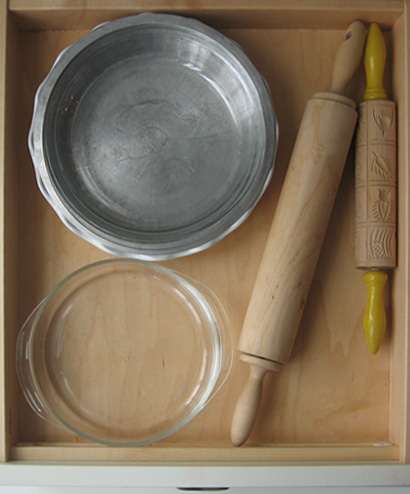
Pie plates and tins, and of course rolling pins.

Drawer_3

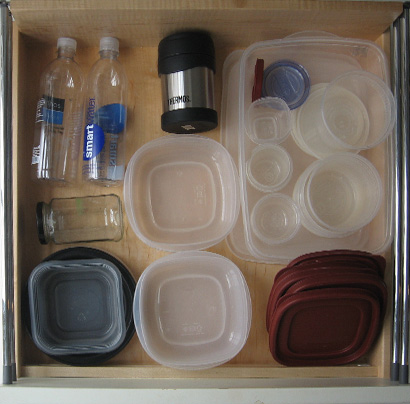
Food storage. I find this drawer is also a good place to keep empty water bottles for re-use.

Drawer_7

If you’ve been inspired, try fixing up even one drawer per weekend. In no time your entire kitchen will be organized!

IDEA 35: SCHOOL PORTRAIT BINDER

School_pics_notebook

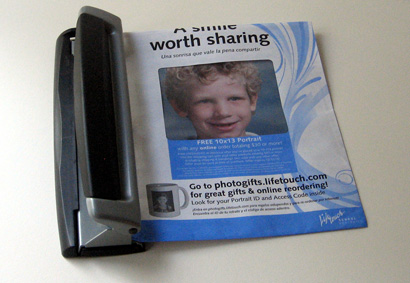
One of the classic mementos of childhood is the annual school portrait that comes home in a big envelope. If you are organized, you will be able to locate the envelope when it comes time to send the pictures to the rellies, such as in the holiday card. But how many of you can put your finger on the photos from last year, or the year before?

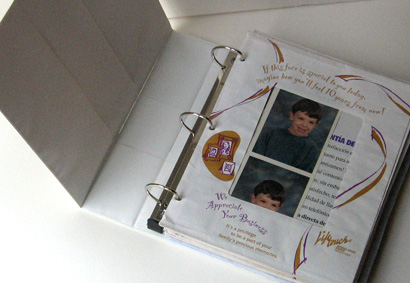
Miraculously, I have a full set of my own school portraits from my childhood, and I’ve always been grateful that these precious artifacts survived in tact. Possibly because of this, I decided I needed a solution to house all my kids’ school photos. Here’s what works for me. As soon as we get the school pictures I simply three-hole punch the edge of the envelope where the flap is. (Making sure to shake the photos away from that edge first).

School_pics_holepunch

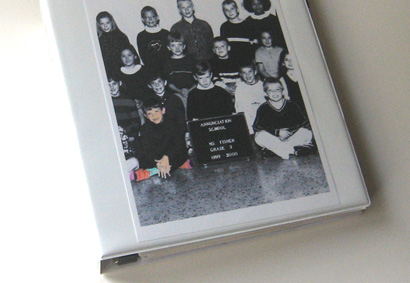
I purchased a 3″ (heavy duty) three ring binder. The picture envelopes of all my kids go into the binder, although if you prefer you could have a separate binder for each child. My binder has the option of slipping a photo under the clear plastic. So I made a black and white blow-up of a section of my son’s kindergarten class photo. Then I took some colored pencils and put color only on him. That picture slips in the front forming a sweet book cover!

School_pics_notebook_cover

I did the same for my other two children; one got the spine and the other got the back-side of the binder.

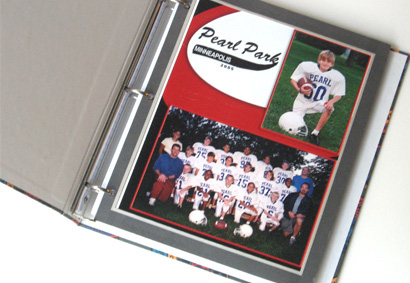
This system also works beautifully for team photos. Just hole-punch right through the cardboard frame that came on the photo. You can have a book dedicated to each child, or to each sport, or put them all in one, depending on the number of photos you’re collecting.

Team_photos_notebook

If you happened to see me demonstrate this idea on Twin Cities Live, and would like to see the rest of the projects I showed, click here, or click on the Twin Cities Live category to the right. And do let me know if you try any of them!