Archived Ideas for ‘04 April’

IDEA 83: ANTICIPATE

April_Garden_beds

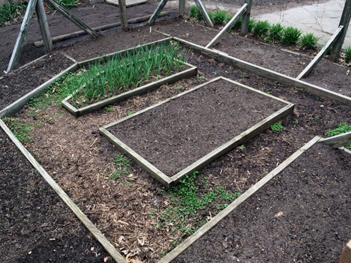
My husband, the gardener of the household, calls April in Minnesota the “cruelest of all months”.

Your natural clock tells you it’s time to plant, but history tells us we are better off waiting, than subjecting a plethora of tiny growing things to a surprise freeze or snow shower.

But that does not keep him (and most Minnesotans who are so inclined) form tidying up the gardens in anticipation of our short but much beloved growing season.

While a cursory glance around the yard doesn’t look like much, his appreciation and care for what is to come has made me much more aware of the coming beauty. The garden that’s been buried in snow all winter is now completely tidied up. It’s all dirt and wood chips, with the exception of two green things: The garlic bed, planted last fall is brimming with new green shoots that apparently were at work all winter under a cozy blanket of snow. And the wood-chip path is being taken over with soft green clover. I asked him why he left the clover when he cleared out everything else. And, while I would think most gardeners would consider this a weed, he appreciates the clover for the soft bed it forms for bare feet. Much preferable to wood-chips on the tootsies.

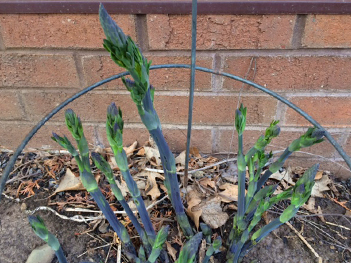
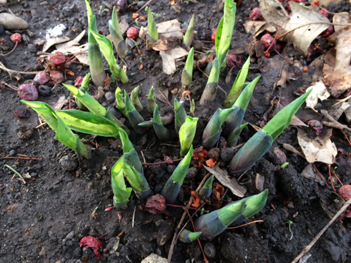
Elsewhere in the yard, a very young False Indigo has been guarded by a wire form. If he hadn’t lovingly cleared out around it, I may never have noticed. And I would never have known that at this young stage, a False Indigo looks exactly like asparagus poking up into the world.

April_False_Indigo

Teeny-tiny Forget-Me-Nots are up in force, but so small they’re easy to miss.

April_Forget-Me-Nots

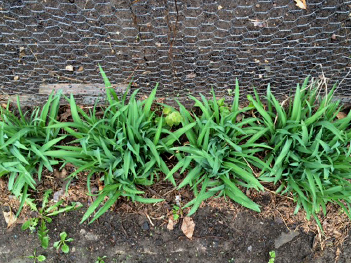
Just outside the vegetable garden, fresh green Stella d’oro daylilies are preparing for the show.

April_Stellas

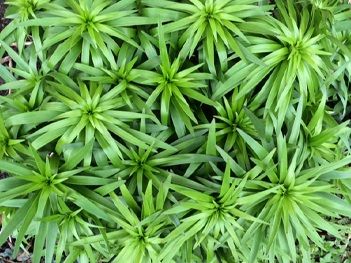
Before the red Asiatic lilies appear, the foliage makes a pretty green star pattern.

April_Lilies

And it wouldn’t be a Minnesota yard without a host of different hosta varieties peeking up.

April_Hosta

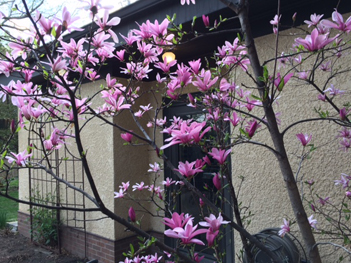
In all the brownness, our bright pink Magnolia tree tries to hold its own.

April_Magnolia_budApril_Magnolia

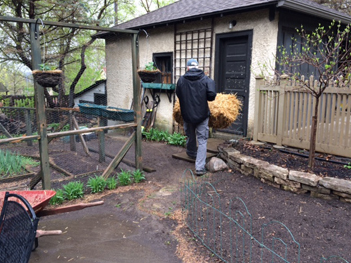
And the April rain reveals that all the loving preparation has it’s own beauty.

April_brown_yard

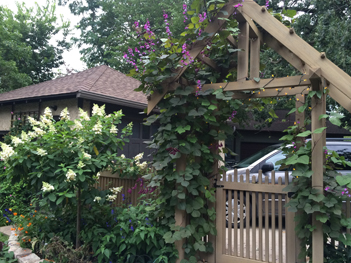
In the coming months, the garden will begin bursting with vegetation. The gate will be dripping with a bean vine so prolific, it makes you want to laugh. This place will get so lush and beautiful, coming home every evening will be a celebration.

And, once again, we’ll all be reminded why we put up with Minnesota winters.

April_Summer_Beauty

IDEA 76: MAKE A CHERISHED HAND-ME-DOWN

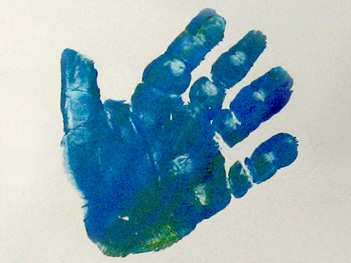
Hand_Ben_Notype

What is it about our off-spring’s little hand and footprints that look to us like one of nature’s most beautiful design motifs?

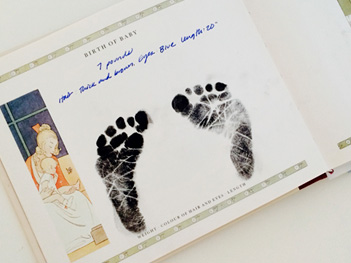
When my firstborn came back from the hospital nursery with inky feet, I was thrilled to see that the nurses had captured the one-day-old feet on a beautiful document, and I requested they put another set right onto the page of his baby book.

Foot_Nell_Book

When my baby daughter got to day-care, I received a “corsage” made by one of the teachers. It was for Mother’s Day, and was made using my daughter’s tiny handprint in pink paint, cut out, laminated with a pin back, and festooned with small pink ribbons. I wore that corsage on Mother’s Day for years.

That’s why, when my colleague Jen told me about her handprint project, I knew I had to share it. It’s just SUCH a BellaPamella idea!!

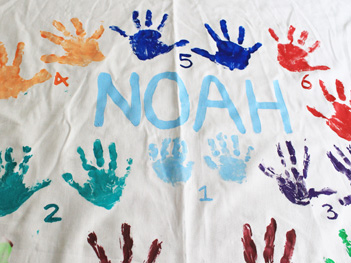
With each child’s first birthday, she purchased a white tablecloth. The birthday kid was allowed to put a painty set of his/her handprints on the cloth, which was then labeled with their age (1). As the birthdays commenced, the handprints collected. Each cloth is different, reflecting the “design sensibility” of each child.

Hand_Noah_Tablecloth

The original idea was to bring out the special tablecloth to decorate the birthday party table. But, very quickly, Jen realized this keepsake was way too precious to expose it to spilled Kool-Aid and ice cream.

So, it still comes out. It gets it’s annual set of prints, and becomes a wall hanging or other decorative drape for the duration of the celebration. Then it’s safely stowed, away from flinging food, until the next year. And one day, it just may provide a favorite story for her grand kids.

Helping_Hands_Link


IDEA 70: CELEBRATE THE FINISH

CELEBRATE_BATHROOM

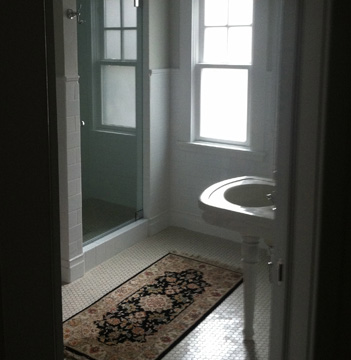
About a year ago, I posted about our DIY bathroom project that followed the premise “When there is no money, throw time at the problem”. That, in part, explained why after several months work, the bathroom looked pretty much like we’d just started. We live in a 1912 house, and this bathroom had been remodeled somewhere around 1950. Ever since we moved in, I’d wanted to make it a beautiful ommage to 1912 (with all the modern amenities, of course), so we took it down to the studs.

Well, a grueling 16 months after it began I’m happy to report the bathroom is finished! And, as promised, I’m now posting “afters”. I adore my new bathroom. But remodeling to return a room to it’s former glory comes with one potential downside: If you do your work too well, no one will know you did anything at all. So, for those interested in old house details, here are a few highlights.

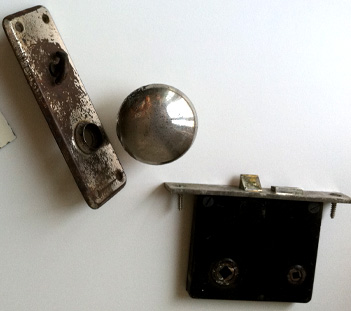
Remember the doorknob?
Old_Chrome

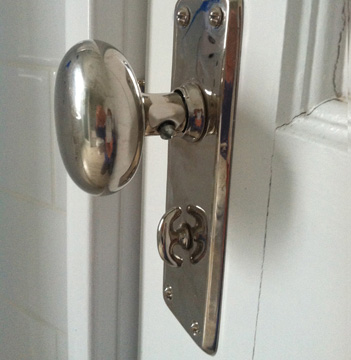
I was all set to buy a new one, thinking this one was a badly worn artifact of the mid century remodel. It did not match the other knobs in our house; in fact it didn’t even look to me like it would have come from 1912. But a painter that had been working in our house told me that it was indeed original. Although the hall knob (on the other side of the door) was quite ornate, the inside bathroom knob and the inside kitchen knobs were simple and smooth, in an early twentieth century attempt to create a more sterile environment. And since chrome was not the finish of the day, these knobs were usually plated in polished nickel. The story intrigued me so much, I had the knob re-plated in nickel, even though everything else in the bathroom is chrome. I guess I’m not a purist—or maybe that means I am…
CELEBRATE_KNOB

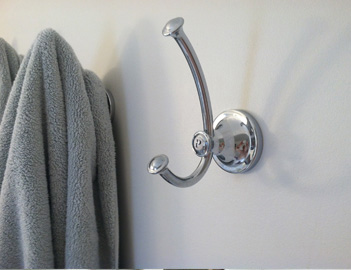
You might recognize the towel hooks from a past blog entry. That easy project adds just the right detail to the new space.
CELEBRATE_HOOK

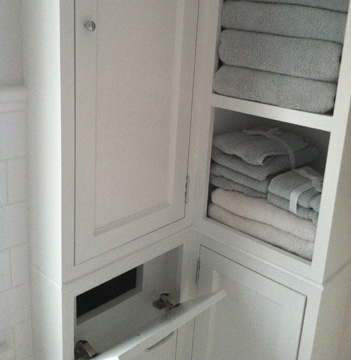
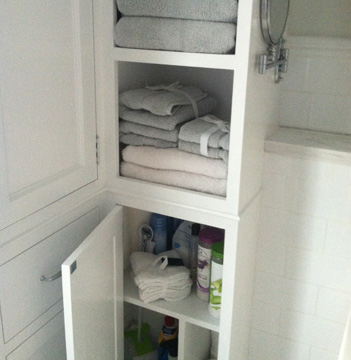
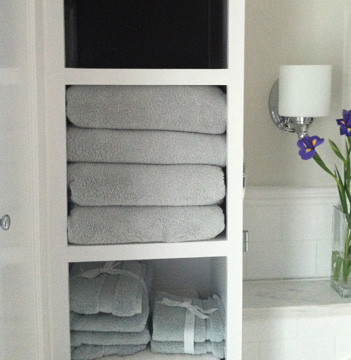
I am in awe of the beautiful yet practical storage my husband built, including open shelves for towels, closed deep cupboards for cleaning supplies, shallow storage for small items and a built in hidden laundry chute!
CELEBRATE_CUPBOARD

CELEBRATE_STACK_TOWELS


CELEBRATE_LAUNDRY_CHUTE

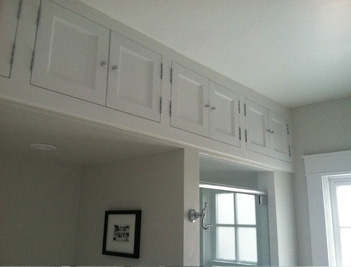
Above the tub and shower, a row of new-to-look-old cupboards stash anything you don’t care to see for a while.
CELEBRATE_UPPERS

Our original commode looks right at home here.
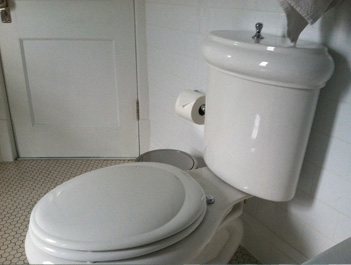
CELEBRATE_COMMODE

As does the vintage sink we snagged at the salvage yard.
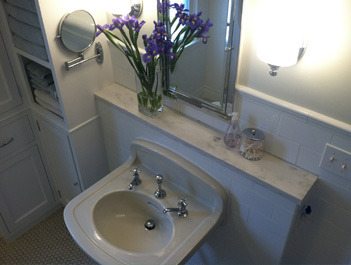
CELEBRATE_SINK

We found a beautiful, simple cast iron drop-in tub from Waterworks at a local shop. The person that had ordered it changed their mind and I was thrilled to see the exact item I was lusting after online (lusting after, but not being able to afford). The shop gave me a deep discount, and I didn’t have to pay to have it shipped either. Since I was looking for a solution that would marry a modern drop-in tub with a 1912 house, we ended up cutting 18” square marble tiles from Home Depot in half to create an oversized brick pattern to mimic the subway tile.
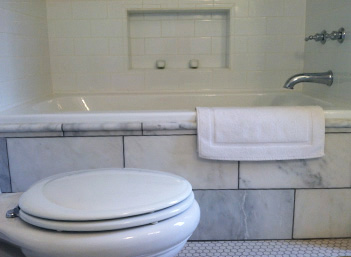
CELEBRATE_TUB

By moving the tub to the corner, we were able to fit in a separate shower, something I have always wanted. An almost invisible glass door keeps the corner clean and understated, even though it’s a bit of a departure from 1912. Trying to match the age of a house can be tricky with kitchens and bathrooms. My philosophy: strike a balance between comfort and style. You want to live in a house, not a history museum. But I do think the chrome knob on the shower (rather than the standard towel bar) adds a little old-timey class.
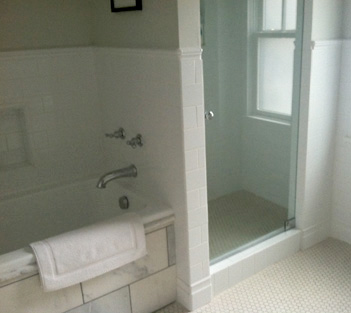
CELEBRATE_TUB_SHOWER

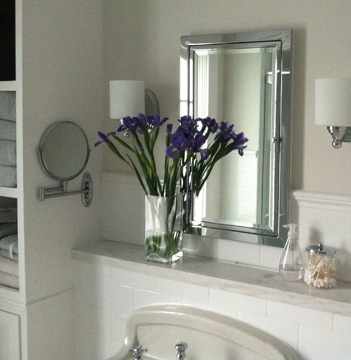
The sink is mounted on a short wall sporting a marble cap. This was a feature I chose for practicality as well as authenticity. I found the marble piece at a scrapyard, and my husband (with the help of a few extra saw blades) was able to cut it down to size. Above that, we installed the Restoration Hardware Framed Medicine Cabinet.
CELEBRATE_MEDECINE_CABINET

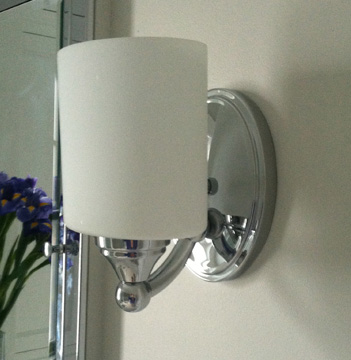
Quite possibly, the most difficult decision was what lights to install. My husband (my lighting expert) suggested two lights, one on each side of the mirror, with the bulbs pointing up, for a “soft bounce” off the ceiling. It was the perfect idea. This set-up provides beautiful, flattering light that easily removes ten years from your age when you look in the mirror. So, that was decided, but where to find just the right lights that celebrate the vintage without looking too fussy? I finally landed on lights from one source and glass shades from another. I got the lights online because I liked the vintage style. Then I bought an inexpensive two armed wall light from Home Depot because I really liked the modern looking straight-sided oval glass shades. I put those with my vintage lamps and they are (in my opinion) the perfect balance of old and new. (or maybe I just like to mettle). At any rate, it was an inexpensive way to get a unique look.
CELEBRATE_LIGHT

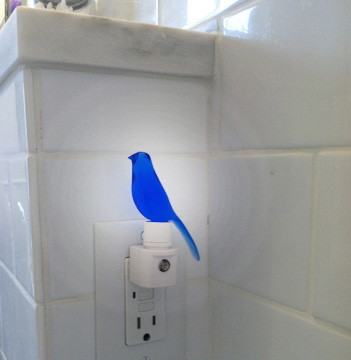
And speaking of lights, doesn’t every bathroom need a nightlight? I came across this sweet one online, and couldn’t resist.
CELEBRATE_BIRD

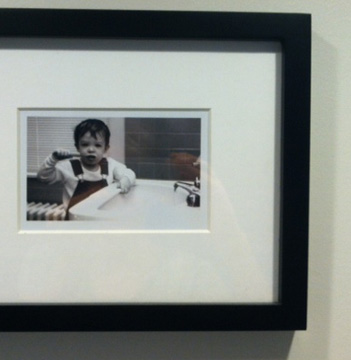
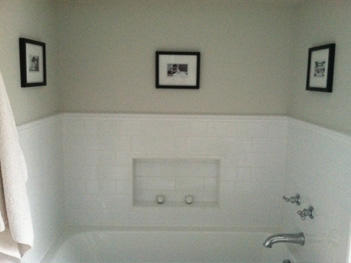
I framed black and white pictures of my kids in the old bathroom, bringing these sweet, nostalgic moments to my current bathroom. And now they adorn the three walls surrounding my tub.
CELEBRATE_PHOTO

CELEBRATE_TUB_PHOTOS

Just for fun, here’s where I found our tub spout, tub handles, shower handles, laundry chute pull and cupboard door knobs.

I’m so giddy about my bathroom remodel I don’t even mind the fact that some people may not know I did anything. The hotel-like amenities and soaking tub provide a welcome retreat in which I will celebrate this finish for years to come!
CELEBRATE_TP

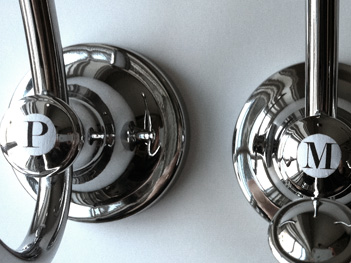
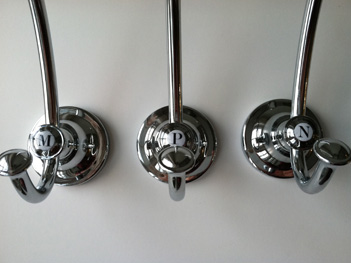
IDEA 62: INITIALIZE THE TOWEL HOOKS

Initial_Hooks_all_blank

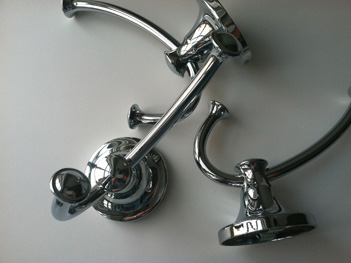
Once upon a time we had four people using a bathroom that had one towel bar. Those family members who lived on the edge simply used whatever towels were hanging on the bar and hung them back. Those more fastidious in nature used a clean towel every day and deposited it in the laundry. Neither solution was optimal. Who wants to dry off wondering where that towel has been? And who wants to launder towels that much? So, one day I hung four lovely hooks, one for each user of that bathroom.

Initial_Hooks_blank

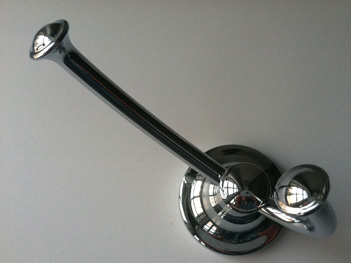
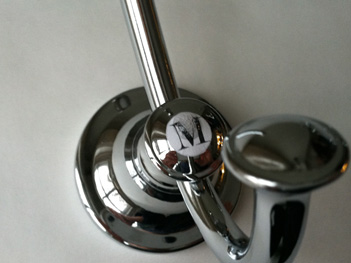
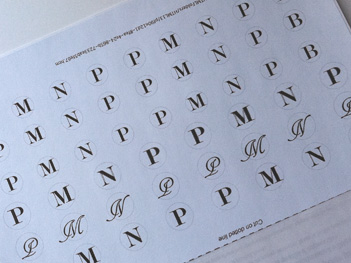
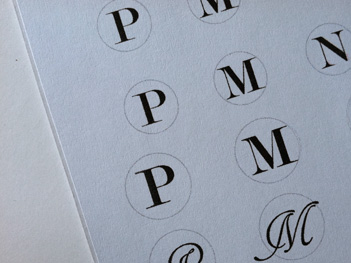
Even though we decided whose hook was whose, I often noticed my towel might be damp even if I hadn’t used it. Which led me to the obvious conclusion that people were confused about which hook was theirs. So I went on the hunt for a way to attach an initial to the lovely domed round at the center of the hook. I was inspired by the multitude of initial “buttons” available in the scrap-booking aisle. And if you happen to find hooks with a flat spot, this might be a great solution. But the flat buttons would not adhere to my domed hooks, so I made up this slightly more involved, but incredibly satisfying project.

Initial_Hooks_Materials

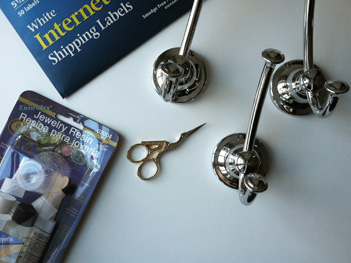
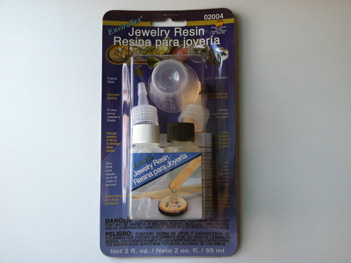
Here’s how I did it. You’ll need a printer and printing labels. I used my half-sheet shipping labels. You also need tiny scissors, like embroidery scissors and hooks that have a nice spot for an initial. Then at the craft store I bought this small “Jewelry Resin” kit.

Initial_Hooks_Epoxy

I knew the general size and typeface I wanted for my hooks, but I typed out a variety of sizes and even an alternative typeface because I wasn’t sure EXACTLY what size or type style would work best.

Initial_Hooks_Label_print

I also printed a pale circle around each letter so I would have a line to cut on.

Initial_Hooks_label_CU

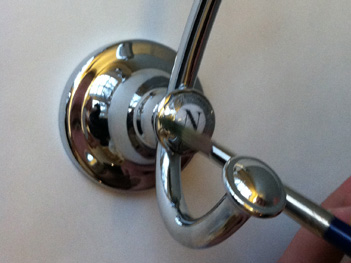
The absolutely trickiest part of the project is to cut the paper sticker in a smooth circle. Just take your time, use the tiniest scissors possible, and very small snips. Once you have your cutout, peel off the paper on the back and stick it to the hook. It tuned out it was good I tried multiple sizes. Because the spot was domed, the sticker had to be quite small or it creased and wrinkled when I tried to smooth it down. It took a little trial and error, but I was able to cut a very small round, and then “burnish” the edges down with the back of my thumbnail.

Initial_Hooks_Paper_Initial_CU

Next, comes the jewelry resin. Read the instructions in the kit. The one I had came with little cups that you mix the epoxy in. Once it was thoroughly mixed, I dropped the resin down onto the paper sticker using a flat wooden stick provided in the kit.

Initial_Hooks_Epoxy_drop

I dropped just a few drops, enough to make sure the paper sticker was covered. Don’t worry about the air bubbles trapped in the resin. They will find their way out by the time it dries. I made sure everything was covered down to the bottom of the dome, where there was a natural stopping point. I used a small paintbrush to help with this.

Initial_Hooks_brush

Once it looks like a thin coat of resin is covering everything, stop and leave it alone. It takes many hours for the resin to harden completely, and for all the bubbles to disappear.

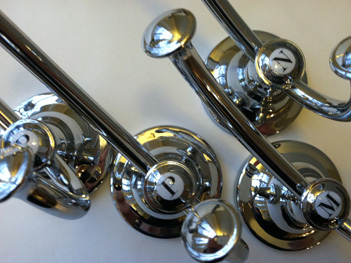
But look how pretty the finished hooks are!
Initial_Hooks_all_finishedInitial_Hooks_3_Finished

And just think how lovely it will be to know you have a clean towel without laundering seven loads of towels a week!
IDEA 52: HONOR THE ROAD TRIP

Souvenir

For many spring breaks our family of five has hit the road for the annual Road Trip.

Once my oldest began college, he had a different spring break week. So, we just hadn’t gone in what seemed like a very long time. But this year, we decided to go with what’s left of our dwindling family.

My middle son is 18. And I’m sure it’s no surprise that a few days before we were to leave he began making his case to stay home. And no one I complained to, (husband, office-mates) gave me the satisfaction of even humoring me, let alone agreeing that I was right, that he should feel excited, or at the very least obligated to go.

But here’s the thing. I really wanted my son to go with us. Not because I didn’t trust leaving him for a week (with his older brother and our dog), but because I just wanted very much to be with him. And somehow, miraculously, he saw the light and came along.

Not surprisingly, the road trips, whose photos fill to overflowing my many photo albums, really are some of the most dear memories we have. He’ll never admit it to me, but I think this son, in the very back of his mind, cherishes those memories too.

So, we headed off to Texas because we hadn’t done that trip, and it was somewhere we could drive to and back in a week (which is, of course, the first requirement of a Road Trip).

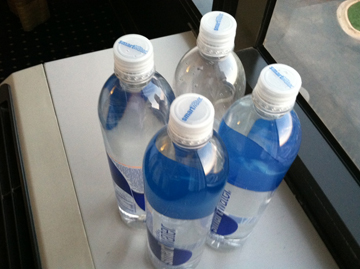
Several hours speeding along America’s highways gives one ample time to ruminate, and I began thinking about how different a road trip with grown children is than one with little kids. I remember one trick that worked so well when they were little. I actually wrapped six small “gifts”, two for each kid. The point was, just when things would get out of hand I would distract them, one child getting to open something. It would be something the whole lot could play with, like a deck of cards, or colored pens and paper. They were things I would have brought along anyway, plopped in a bag, but the fact that they were wrapped like presents put a whole different spin on things. It got their attention and made their trip much more exciting. Now, with teenagers, I brought a different kind of trail mix for each, (Target has an awesome variety) and marked big bottles of water with their initial. It’s not wrapped prizes, but the kids still respond to the love.

Water_bottles

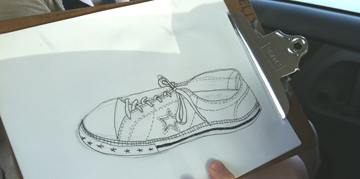
I’ll be the first to admit there was a bit of nostalgia to planning this trip. So I tucked in a binder we’ve been adding to for years. The binder is filled with drawing paper. And there’s room for a zip-lock bag of pencils, erasers and colored pencils. A big rubber-band keeps it all together. And it’s usually packed with a few clipboards. This book of drawings spans many years of car trips and it’s priceless. I was happy to see the attraction of making drawings is still there, as my daughter sketched a lovely rendition of her shoe.

Car_Art

This same smart daughter also came up with what I thought was a dandy car activity. She took a close-up (well, as close as you can get while speeding along the highway) photo of every different color car we passed. The object being to make a rainbow of all the car pictures at the end of the trip.

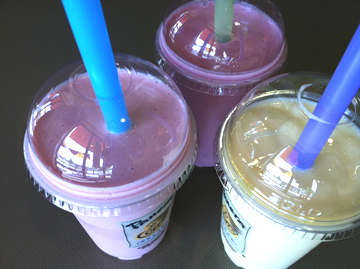
We’ve gotten smarter about car food, as we kept the snacks generally healthy, and stopped for the most photogenic smoothies, one strawberry, one Very Berry and one mango–all with different color straws.

Smoothies

And even though we’re all so “mature”, there’s something about a car trip that just brings out the family in you. We all marvel at the amazing things you can see as you roll along. We saw a hot-rod called “Godzlla” being hauled in a trailer. We realized we were in windmill territory when we saw three semis each carrying one blade of a windmill, hitting home just how gigantic those things really are.

Windmill_Truck

And we saw some cattle standing and walking along in what must have been a large, very shallow body of water. As the animals moved in the late afternoon light, it looked as if they were walking on water.

Honor the road trip tradition. You won’t be sorry you did.


IDEA 43: MAKE A TIMELESS CAPSULE

Transfer_Video_3

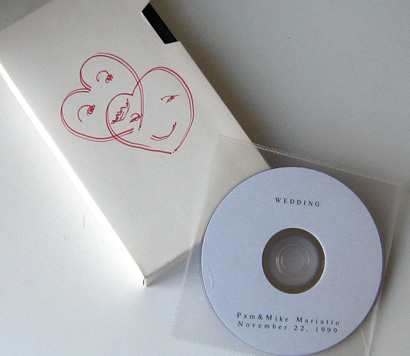
Is there a VHS videotape of your wedding somewhere in a box in your attic? How about some “Super-8” film reels from when you were a kid? If your house is typical, you have a few of these treasures, and you have no idea where they are.

Lately I’ve been noticing the shops offering to transfer my stuff to a current medium. And it got me thinking. How many of these things do I really have? I’m not about to transfer all the cartoons my kids used to watch, but I have only one wedding video. I have another cassette containing my fifteen minutes of fame (in my 30’s) on a local TV show. And a small hand-full of other things.

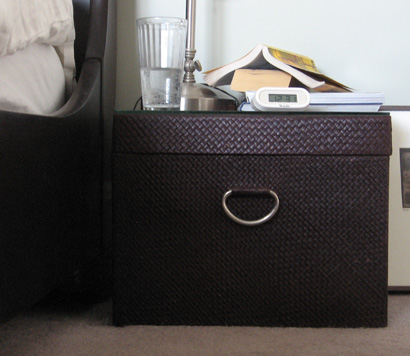
I decided it was time to collect and transfer these few precious things. But here’s the key: I won’t be putting them back in a box in the attic. I chose a basket/box with a lid that I also use as a bedside table. In here I’ve stashed the originals and the transferred DVDs. When the next new technology comes along I will have everything in one spot, hiding in “plain sight” so to speak, under a piece of glass that protects the lid of my bedside basket. In addition to this I’m keeping a file on my external hard drive, but that’s getting a bit technical, isn’t it?

You can choose any box or container you like. Maybe you’d prefer an interesting old box on the living room coffee table. But the point is to have something you keep out, not stash away in the attic. That way, you can add things as you collect them and you’ll actually be able to find them when the new media switches again. And you know it will!

Bedside_Basket

BELLAPAMELLA_BRIDE


IDEA 28: CELEBRATE 365 MOTHER’S DAYS A YEAR

Rain_kids_1

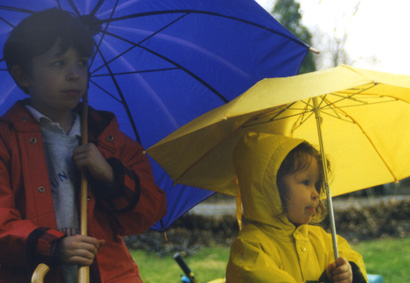
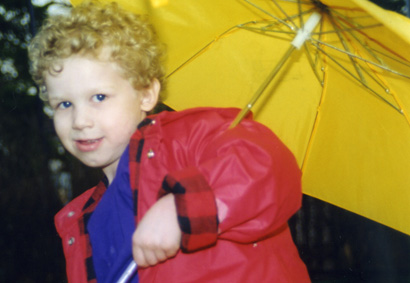
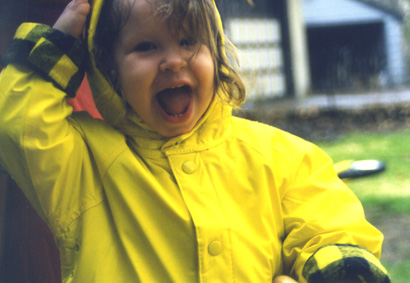
When my kids were about 2, 4 and 6 we decided to take a rain walk one rainy afternoon. We donned raincoats and umbrellas and took a walk around the neighborhood. Of course my goal was to get the kids to run off a little energy, but the whole thing proved to be quite a thrill, as we splashed through big puddles and marveled that no one else was out.

Rain_kids_2

But the real value of the rain walk didn’t make itself known to me until I was back at the office, later that week. A friend and coworker of mine mentioned that she saw us parade past her house. I don’t remember the conversation exactly, but she had a very real appreciation of the whole thing. The kids. The bright colored raincoats and umbrellas. The joyous abandon. Little did I know that she had been trying to have a baby. Some time later, that friend ended up adopting a little baby girl.

I don’t have to remind moms of the treasures that have been dropped in our laps (literally). But when we have sleep, food and shower deprivation, or we’ve been up all night with a sick child, or have just been screamed at by an angry teenager, it’s nice to take a moment to remember just how incredibly lucky we are.

Rain_kids_3

We knew the job was tough when we signed up. And amazingly, we find ourselves up to the challenge. So, to every person who has raised, cared for, or been touched by a child,

have a Happy Mother’s Day. (I know, I didn’t have to tell you that).

Pam

IDEA 27: GRADUATION CELEBRATION

Grad_cake_marble

I think I began stressing about the dreaded “Graduation Open House” when my kids entered kindergarten. I had been invited to a few, during which the main topic of conversation was how much the parents went through to get their house in order and make it all happen. One family attempted a remodel before the big day, and another decided to power-wash the house. Needless to say the whole thing had me in denial. When my oldest was nearing graduation, I pretty much decided we wouldn’t do anything. (Did I mention I have an aversion to stressful situations and avoid them at all cost)?

Over spring break we happened to be visiting out of town relatives. My sister-in-law stated that if we would have a grad party, they would come. The offer was just too good to pass up. Besides, I figured a family party was something that I might even be able to handle. There is something much safer about that prospect.

I am not a big party expert but I do know that if I give myself a few small, creative tasks to accomplish, I can throw a party that I won’t worry over, too much. The truth is, anyone who comes to your home to a party is not passing judgment on you, but quite happy to be there. And if you throw in a few creative touches, the whole thing is just more interesting and memorable. I’m not saying you HAVE to make things. But if you tend to be a crafty person, I say, go with your strengths! It will calm you down about the whole thing.

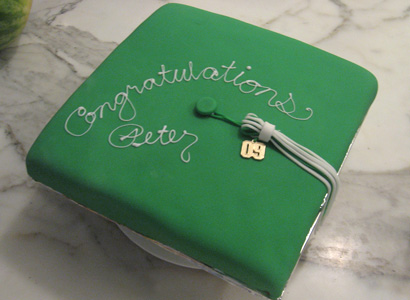
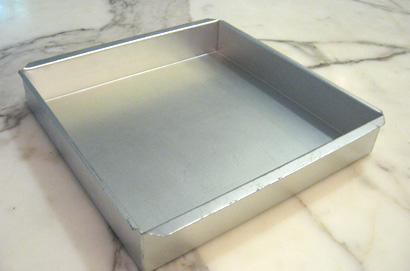
I knew I wanted to make a “theme” cake, and when my husband suggested the shape of a “mortar board” (graduate’s hat) I was thrilled. I happened to have a very large, very square pan, but you could always make a smaller one with a regular square pan.

Grad_pan

One of the easiest ways to make a very professional looking cake is to use fondant icing. And the best part is, it’s more like a craft project than cooking. Buy a box of pre-made fondant from the cake decorating isle of your local craft store. It comes in a package roughly the size of cake mix. Inside is a plastic bag containing a moist material that resembles white play-dough. The same store will also carry paste-based food colors. Depending on your school colors you may be able (as I was) to get away with buying only one color.

Now make and cool a square cake. I cut a piece of foam-core the exact size of the cake and covered it with foil, but you could also use corrugated cardboard covered with foil. Place the cooled cake on the square so no edge is showing, and ice the whole cake with your favorite butter cream frosting. Instead of placing the fondant directly on the cake, it’s preferable to ice the cake first with fluffy butter cream frosting. This not only helps keep a smooth surface, but tastes much better!

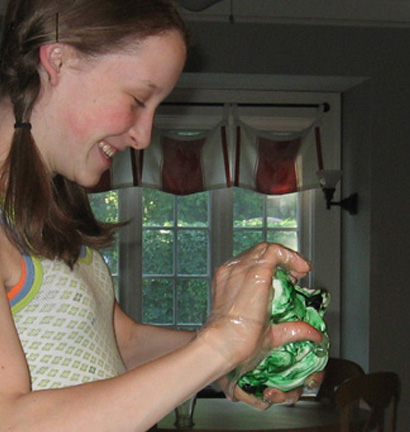
Here’s the fun part–you actually use your hands to squish and knead the color into the fondant. We used plastic gloves so that our hands weren’t dyed green. But make sure it’s not a latex or rubber glove which could transfer an unwanted flavor. We used thin plastic gloves, the kind you get in a box of home hair dye. When you start this, you have the impression the color will never even out, but have patience, eventually it will.

Grad_mix

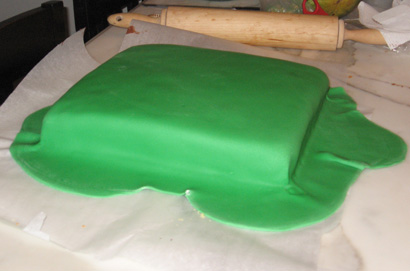
Once the color is even, the fondant is rolled out like a pie crust. Roll it as thin as you can, stopping to lift and turn over much like you would a crust. Rolling between two sheets of parchment paper makes lifting easier. Then it’s ‘easy as pie’ to lift the fondant and place it over the cake.

Grad_fondant

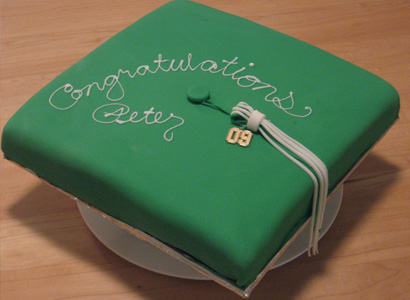
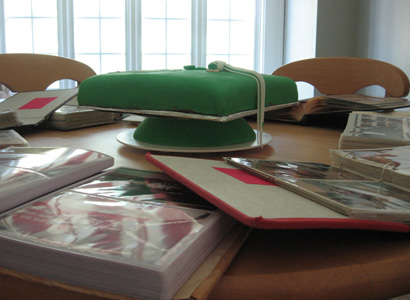
Trim the fondant around the bottom edge with a knife. Then, use extra fondant to cover an upside-down bowl for the “hat” part of the mortar board (seen in the book display photo below). Make sure to affix the cake board on top of the overturned bowl well, with more blobs of fondant as glue.

Flatten a ball of fondant for the button. Cut fondant strips for the tassel, and letter your message on top in your fanciest script with tube frosting. I then carefully removed the gold year charm from my grad’s hat and used it to temporarily decorate the cake, but this charm is also probably available at the craft store.

Grad_cake_wood

Now, you have worked so hard on this masterpiece it deserves to be displayed. And this leads me into the next little grad party detail. I’m sure you have heard of all kinds of photo boards parents have made of their grad so guests can take a little stroll down memory lane. Well a simpler solution is to decorate the cake table with memorabilia. I surrounded the cake with photo albums, each with a ribbon bookmark (school color, green) at a particularly significant (or embarrassing) page. Guests could do a whole lot of browsing simply walking around the cake table.

Grad_cake_books

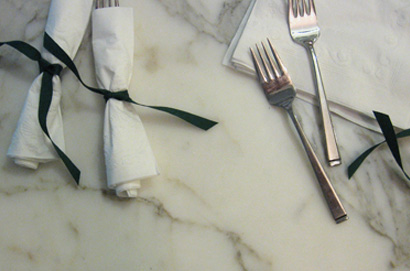
Another very simple decoration is to wrap white napkins around the flatware and tie with a ribbon of the school color. So, what’s so great about it? Don’t they look like little diplomas! (And if you point that out to your guests they will look even more like diplomas).

Grad_diplomas_d

And of course, I shouldn’t have to tell you to photograph your lovely accomplishments. If for no other reason, it will be a handy reference for when the next kid graduates!