Archived Ideas for ‘Short cuts’

IDEA 88: SCARF SKIRT

Scarf_Skirt_Model_2

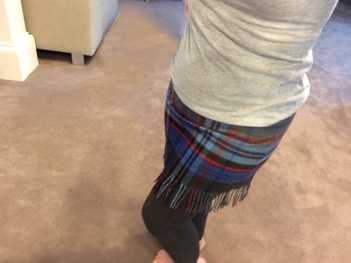
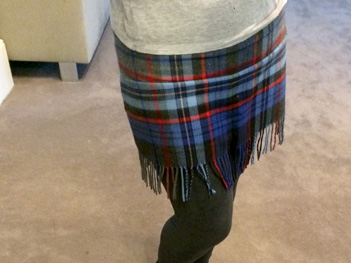
This may just be the best use of clearance merch ever! Last spring I picked up these sweet scarves at Target at a deep discount, for $5.98 each. I loved the fringe and thought they would make a super cute skirt. But it took me until I felt a slight chill on the wind to decide it was time to give it a try.

Materials were pretty simple: two identical men’s scarves (these were about 12″ x 46″ without the fringe), a 7″ skirt zipper, thread, scissors or a rotary cutter, pinking shears or a pinking rotary cutter and a sewing machine.
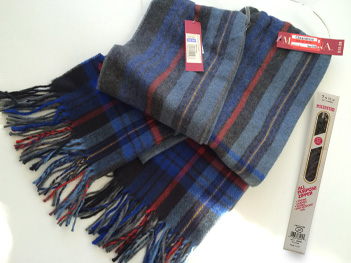
Scarf_Skirt_Materials

I decided if I pinked the top edge I wouldn’t have to make a waistband. So I measured on my body where I wanted the skirt to fall and cut four identical pieces from the ends of the scarves (so all pieces had a fringe). My pieces were 15 1/2 ” from the cut to the top of the fringe. I cut mine with a ruler and a ruffled rotary cutter to create a straight pinked edge.
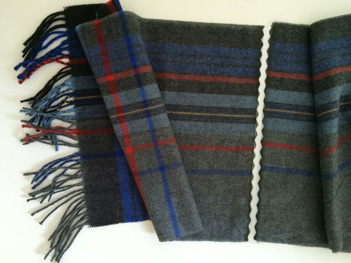
Scarf_Skirt_pinked_cut

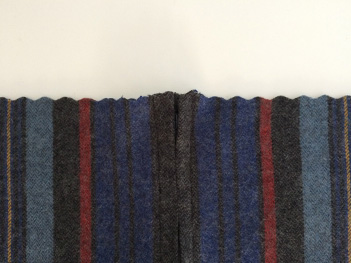
Next step was to install the zipper in the middle of two of the scarf pieces.
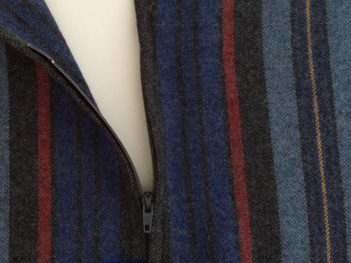
Scarf_Skirt_Zipper_CUScarf_Skirt_Pink

Once I had the zipper installed I went ahead and machine basted the other three vertical seams. I was essentially making a tube with a fringe at the bottom.

Then, with the whole thing inside-out, I tried it on. If you’ve gotten this far, you can now see how your body is not actually a perfect cylinder. And at this point you may need a helper, although I did manage on my own. Start to pull out and pin the excess fabric so the shape begins to fit your curves. You’ll take the most from the side seams, so start there, pinning the most excess on those sides. You want to take enough from the sides to create more of a skirt shape, but not so it’s tight yet. Then you want to pin in four darts, one on each side in the front and one on each side in the back. Your helper needs to make sure the darts are an even distance from the zipper in the back, and from the center seam in the front. In my case, I used the different colored stripes in the plaid to guide me.

This should get the whole thing fitting you just like a glove. Carefully unzip it and get it off without sticking yourself with all those pins!
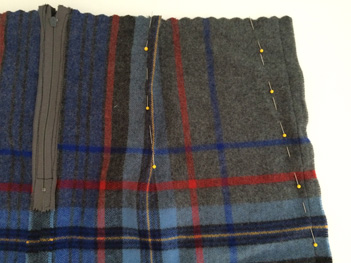
Scarf_Skirt_Pin

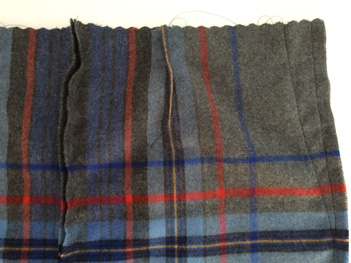
Sew everything you pinned.

Scarf_Skirt_Sew

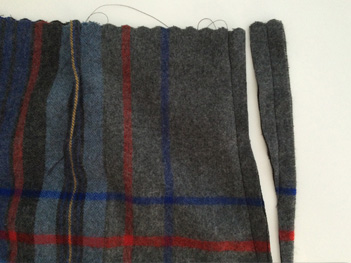
Once everything is sewn, it’s not a bad idea to try the whole thing on, still inside-out, and check it for fit. If all’s well, trim the seams to an even amount outside your stitching.
Scarf_Skirt_Trim

Get all the pesky threads trimmed, and press the seams open and the darts pointing away from the center. And that’s it!
Scarf_Skirt_Model_3

Now I’m looking  forward to brisk winds and boot days, and only you and I will know the secret behind my super swingy, $11.96 fringe skirt!



IDEA 87: MAKE IT EASY

Tea_Cake

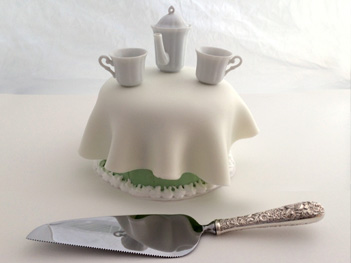
The idea for this cake came from a decorating disaster. But it came out so beautifully I just had to share. And the solution couldn’t be easier.

I had made a very tiny cake, the cake pans were just five inches in diameter. And the plan was to create a small pillow cake with quilted fondant. But the cake just hadn’t cooled enough and so, as happens when you try to rush, the frosting began to melt and crawl.

I just hate presenting a disaster cake, (even though we all know it tastes just as good). So I put the project in the fridge and ruminated on the problem, when the solution came to me.

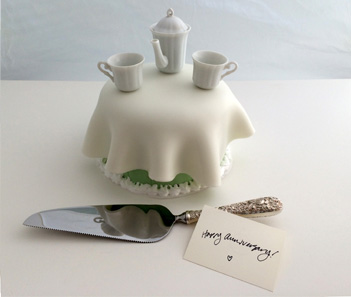
I still had fondant, so I simply rolled out a sheet and draped it over the frosted cake, like a perfect little fondant tablecloth! Then it was just a matter of adding a tiny tea set to the top.

You don’t have to make a disaster cake to try this one. In fact you really don’t even have to make the cake. This idea could be added to a small store bought cake. I think it would be perfect for a child’s tea party. Or better yet, a perfectly sweet wedding anniversary!

Happy_Anniversary_full

IDEA 64: SHARE YOUR WISDOM

Phil's-osophy_Book

If you have kids, one day they will be moving on from your nest. When this started happening at my house I found myself wondering if I had really covered all the topics. Had I sufficiently marinated them in my philosophy of life? And did any of it stick?

For this reason I had a bit of an epiphany while watching the episode of Modern Family called “Phil’s-osophy”. (By the way, if you are a parent, this show should be required viewing. I have often noticed that in the throes of raising a family, your first defense is a sense of humor). Anyway, in this episode, The family’s oldest daughter sets off for college. The dad, Phil, creates a book for her called Phil’s-osophy. (If you are Phil Dunphy, this title makes perfect sense). Since Phil is Phil, his words of wisdom are kind of hilarious. But, while it’s all loads of fun, that’s not my point. My point is this: Why not create your own book of philosophy to send along to college with your grad!

I just finished a small (5.75″ x 7.75″) 20 page book from My Publisher that cost only $12.99 and it was beautiful! Another very popular book making site is Snapfish. And I know there are many others. The idea is to put together a book of your own words of love and wisdom for your kids flying the coop.

Of course you don’t have to use an online publisher, although they are simple, inexpensive, and do a beautiful job with photos. You could consider making a handmade book. It all depends on your inclination, and artsy-crafty prowess.

So, in my haste to get this idea to you in time for school starting this fall, I’m writing this without my example to show you. In lieu of that, we’ll just have to take a look at a few of Phil’s pages:

Phil's-osophy_8

Phil's-osophy_3

Phil's-osophy_2

And a few more of my favorites:

The most amazing things that can happen to a human being will happen to you if you just lower your expectations.

Take a lesson from parakeets: If you’re ever feeling lonely, eat in a front of a mirror.

Watch a sunrise at least once a day.

If you’re ever in a jam, a crayon scrunched up under your nose makes a good pretend mustache.

Never be afraid to reach for the stars because even if you fall, you’ll always be wearing a Parentchute™.

IDEA 57: EASE THE TRANSITION

Door_Pear_Wreath_CU

Those who shop Nordstrom’s may be aware of their policy not to “deck the halls” until the day after Thanksgiving. Shoppers who grow weary of tinsel and lights weeks before Christmas find Nordstrom’s policy a breath of fresh air. I hold a similar view. The day after Thanksgiving, all bets are off. But until that time I like to give each holiday it’s day in the sun.

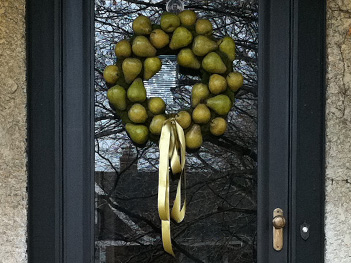
The only problem is that it can be confusing (or wasteful, or just a lot of work) to treat Thanksgiving completely separate from the festivities to come. Case in point, the well-meaning homeowner (below) I spied this morning.

Two_wreaths

Some might remember my blog entry a couple years ago on how to take a simple decoration and transition it from Halloween to Thanksgiving to Christmas. This year’s idea is even simpler. Because after all, celebration makes the world go round, but in my book, simplicity keeps it sane.

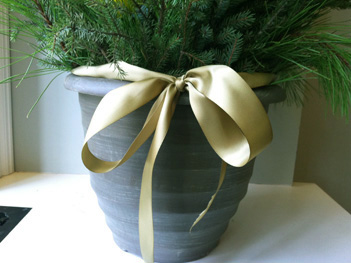
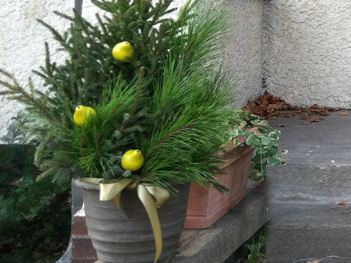
I’m having a big crowd for Thanksgiving, so I wanted to doll up the front of the house. I scored a great deal on two pots of spruce tips from the grocery store, complete with “sugared” red berry branches. I love the sweet look, but just not quite this early, so I temporarily removed the red.

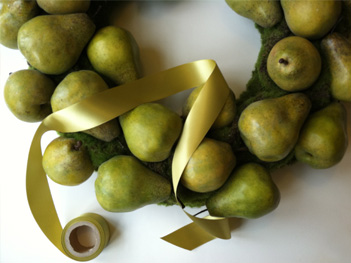
I’m kind of a pear freak, and I just happened to have a pear wreath purchased a few years ago from Target.

Pear_wreath_ribbon_CU

A quick trip to the craft store produced a spray of mini pears and some gorgeous taupe, and pear and colored ribbons.

Ribbon_bow_CUSprucetop_Pear_Left

Front_Porch

And, “Voila!” my front porch is ready to welcome my family and guests.

So here’s the funny part. My intention was to doll up Thanksgiving with an updated cornucopia-type theme using pears. But the resulting motif, with the pears, ribbon and wreath, form a fresh holiday look that may just take me through to Christmas!

(And I can always add in the sugared berry branches on Friday).

IDEA 50: DO A LOW BUDGET “REMODEL”

bathroom_hooks

I have a feeling I’m not the only one out here completely mesmerized by HGTV and all the home improvement shows. There’s just nothing quite like watching someone take a sledge hammer to a corroded bathroom wall and within minutes transform a nightmare into a dream space. Like everyone else watching, I have a few rooms of my own that could definitely use the treatment. But also, like most people watching, I have neither the funds nor where-with-all to do anything about it. Well, not yet, anyway.

When my parents came to visit for the holidays and my mom asked me what I really wanted, my answer of a new bathroom didn’t exactly fit what she had in mind. But she gave me a couple days of hers and my dad’s time and some very clever solutions. It inspired me to remind us all something that former generations knew by necessity. That you don’t always have to tear things down and start fresh, sometimes some good old fashioned elbow grease is just the ticket.

So here’s how it went down:

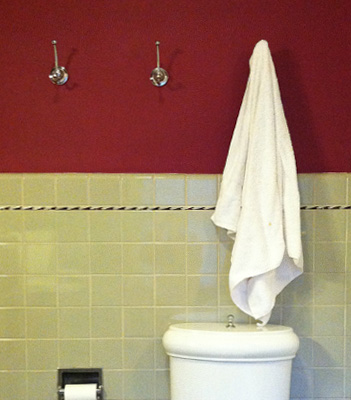
Our upstairs bathroom is shared by four members of the family. It is a 1950s dream, complete with all kinds of tiles, including a little border of gray and burgundy “wave” tiles. When we moved into this 1912 house eighteen years ago, I painted the walls above the tile a deep cabbage red. Over the years the deep red paint seemed to sweat, causing the walls to develop an odd sort of drip texture which went ignored, along with the cracked sink and a tub that was so old, it refused to come clean.

Add to this the fact that there was no counter space or drawers so my teenage daughter and I became experts at balancing small items all around the edges of the sink. You’d be amazed how many make-up and hair products will fit, as long as no one knocks into them. My husband complained, but it had pretty much become just one of those idiosyncrasies of living in an old house. Oh, and since there was only one towel bar we alternated between periods of all of us using the same towel and then discovering it, and over-compensating by throwing every towel in the wash after only one use.

Last year the faucet in the cracked sink went kaput, so we were forced to replace it, and rather than diving in to do the whole project, we found a dandy specimen from the original era of the house at a salvage yard and installed it. The bathroom got de-cluttered for about a week, but it wasn’t long before the miscellaneous items returned to the edges of the new sink.

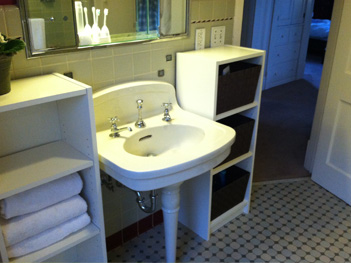
So, my mom and I gave ourselves two days, one to plan and shop and one to work. We bought mostly cleaning supplies, and found two perfect-size matching small shelf units. We got four beautiful “robe hooks” so each person has their own dedicated towel hook.

I think the real ah-ha came when my mom donned gloves and washed the red walls from top to bottom. I had planned on a coat of stain blocker paint to try to cover the red, and a new paint job, but simply washing the walls made them look brand new. The shower/tub got the cleaning of it’s life while my dad assembled the shelves.

Bathroom_shelves

With some very basic lightweight basket inserts from the home improvement store, the two little units are incredibly efficient. There are surfaces to work on, and they actually stay clear because it’s so easy to drop everything back into the basket when you’re done.

We all know that eventually the bathroom will get the big remodel. But in truth, it will probably be years before that happens. And I can’t think of a better gift than working side by side with my parents AND getting a groovy bathroom out of the deal. I say, we should still watch home improvement shows and continue to collect ideas for our future rooms. But in the meantime, try applying just a tad of elbow grease to the problem. For the results, you can’t beat the cost!

IDEA 29: DOOR HANGER DIALOG

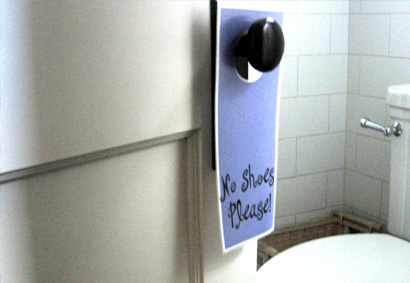
Door_dialog

You probably feel like there are things that would go smoother if the members of your family would just listen and retain. No one likes to hear themselves constantly repeating things like a parrot only to have the sentiment go unheeded.

After spending the evening on my knees scrubbing a particularly grimy bathroom floor near our back door, it occurred to me that if people were not wearing shoes in there I wouldn’t have to do it again so soon. So I printed a cute door hanger on my printer and cut a circular hole and hung it on the knob. It said simply: No Shoes Please. And then a funny thing happened. Everyone took their shoes off. Even the guests. Even the repair man. And all the floors of the house stayed a little cleaner.

You have knobs all over your house that are just waiting to display a “suggestion.” A closet door could say “Hang it up, Please!” The pantry could say “No snacks before dinner.” For the laundry room: “Fold it and take it.” And maybe a second, “Just sayin’.”

You get the idea.

IDEA 14: KEEPING UP WITH THE SEASONS


Door_wreath_d

If you are like me, the season which starts with fall and ends with New Years goes by so fast the thought of redecorating for each holiday brings on more stress than comfort.  

So, I offer this thought: Rather than reinvent the decorations for each holiday, why not simply add a little more color and bling as the holidays progress? I’m utilizing the door wreath for this example, but the theory could be done anywhere in the house. The key is to add on as opposed to take down and replace. Here’s how:

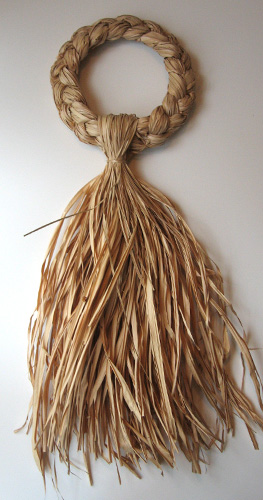
Choose a plain wreath. I chose this grass braid swag. But a wreath made of all bay leaves, all eucalyptus, all pine cones, grapevine, twigs or all magnolia would work as well. The best options are made of one solid material.

Wreath_1

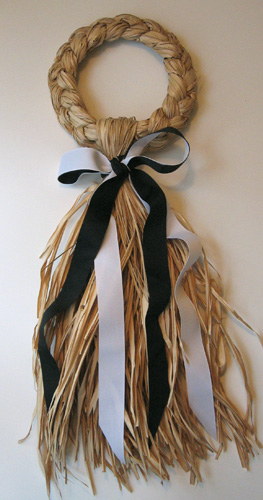
Just as fall begins to nip the air, hang the plain wreath.  Sometimes simplicity is just the thing. Have a jones to celebrate Halloween? Use two ribbons, one black, one white and use them back-to-back and tie the bow as if they are one. Trim the ends of the ribbons at an extra deep angle instead of the usual 45 degrees.

Wreath_2

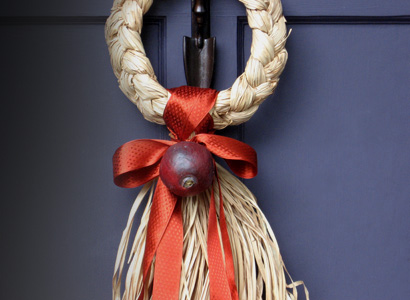
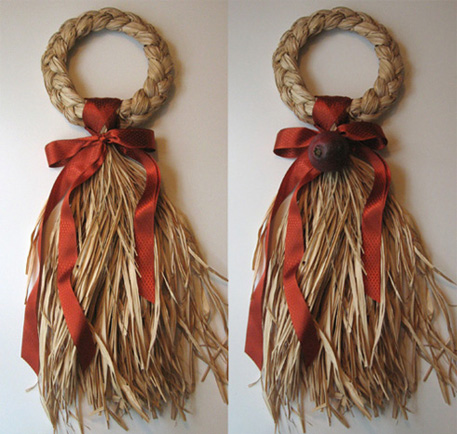
The day after Halloween, (or the next weekend day), switch to a pretty fall look. This rust colored ribbon with a basket weave texture is just beautiful. I chose to wind the ribbon into the center of the wreath before tying a pretty double bow. If desired, you can attach a single piece of artificial fruit such as this pomegranate. Look for decorative fruits at the craft store. They are very lightweight and usually come with a wire that can easily be anchored into your wreath or twisted into the ribbon. If the fruit does not have a wire hanger, create your own by drilling a small hole in the back and pushing a short piece of floral wire into it.

Wreath_3,4

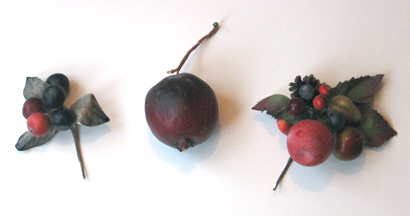
I love to collect “fruit pics”. These are small clusters of artificial fruit all gathered and held on a single wire with floral tape, available at craft stores and florist supplies. These pics are easily poked into your arrangement. Here are some of my favorites, but the options are endless.

Fruit_pics

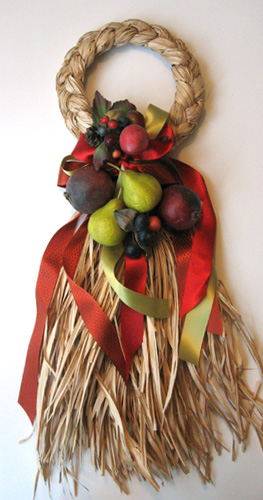
Which brings us to the next and final phase of your seasonal wreath. Leave the fall ribbon on the wreath. Now take a rich red ribbon, and if you like, a handsome chartreuse one. Put them back-to-back and tie another big bow over the first. Then, using floral wire, poke and twist several pieces of fruit and fruit pics into the wreath. I love the look of pears among all the rich reds and purples of pomegranates, berries and even grapes. The result is a beautiful, lush tribute to the season that won’t look out of date the day after the holiday. Which is, of course, your greatest gift of all!

Wreath_5