Archived Ideas for ‘Holiday’

IDEA 28: CELEBRATE 365 MOTHER’S DAYS A YEAR

Rain_kids_1

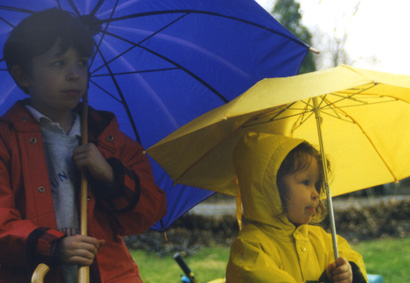
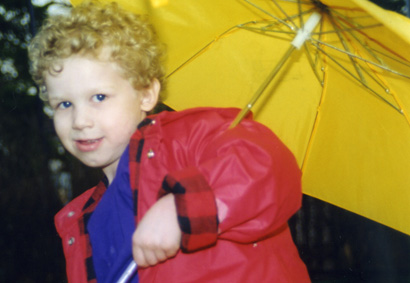
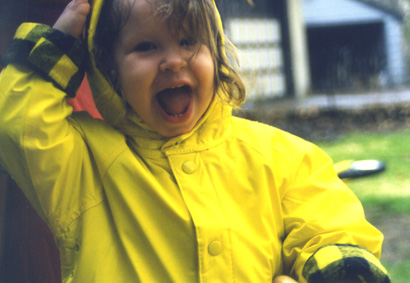
When my kids were about 2, 4 and 6 we decided to take a rain walk one rainy afternoon. We donned raincoats and umbrellas and took a walk around the neighborhood. Of course my goal was to get the kids to run off a little energy, but the whole thing proved to be quite a thrill, as we splashed through big puddles and marveled that no one else was out.
Rain_kids_2

But the real value of the rain walk didn’t make itself known to me until I was back at the office, later that week. A friend and coworker of mine mentioned that she saw us parade past her house. I don’t remember the conversation exactly, but she had a very real appreciation of the whole thing. The kids. The bright colored raincoats and umbrellas. The joyous abandon. Little did I know that she had been trying to have a baby. Some time later, that friend ended up adopting a little baby girl.

I don’t have to remind moms of the treasures that have been dropped in our laps (literally). But when we have sleep, food and shower deprivation, or we’ve been up all night with a sick child, or have just been screamed at by an angry teenager, it’s nice to take a moment to remember just how incredibly lucky we are.
Rain_kids_3

We knew the job was tough when we signed up. And amazingly, we find ourselves up to the challenge. So, to every person who has raised, cared for, or been touched by a child,

have a Happy Mother’s Day. (I know, I didn’t have to tell you that).

Pam
IDEA 26: HAPPY EASTER BASKETS

Easter_eggs

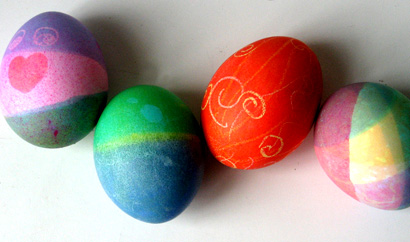
When I was a kid I just loved Easter morning, which ranked way up there, somewhere between Christmas and Halloween. My mom is a practical soul and it became pretty obvious she did not believe in investing in a new brightly colored, plastic grass-filled Easter basket every year for each of four kids, that would eventually find its way to the basement (or worse).  So, on Easter morning the hunt would begin, but we never knew exactly what we would find. In the name of practicality, my Easter surprise would be housed in something that was already around the house. My mom is a potter, so often, those sweet chocolate eggs would be nestled in a hand thrown bowl.

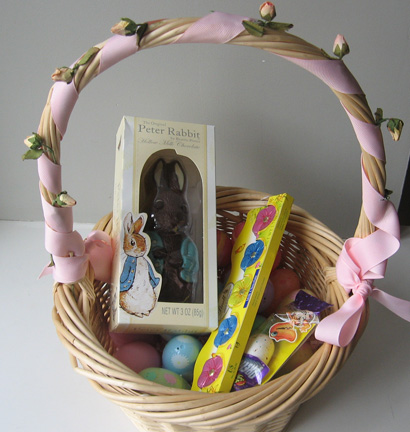
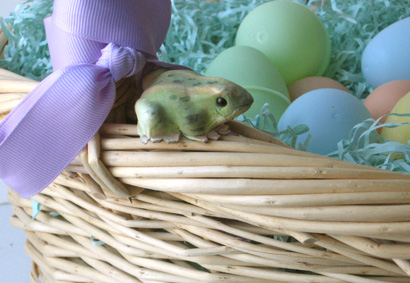
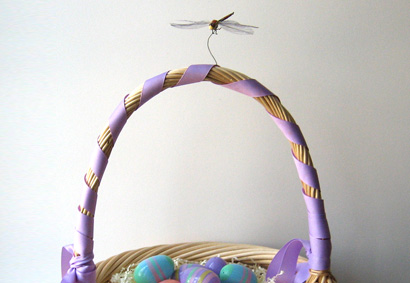
I didn’t inherit my mom’s talent for ceramics, but I do think I adopted her penchant for practicality. When it came to my kids, rather than fall for the “temporary” Easter baskets that line the shelves every spring, I chose a special basket for each child. I wrapped the handle in grosgrain ribbon and attached findings from the craft store floral isle. My eldest son got a dragon fly that will forever hover one-and-a-half inches over the handle via a wire. My second son got a frog at each point where the handle attaches to the basket, and my little daughter got a row of paper rosebuds tucked into the ribbon that wrapped her handle. The baskets were thus decorated, and then christened as each child’s permanent basket.

Easter_basket

Basket_frog

Basket_Dfly

Much like their Christmas stockings, the children learned to recognize their familiar basket, alleviating any pressure to designate whose basket was whose.  And the plastic eggs and even the pastel shredded paper “grass” have gotten reused countless times.

In the off-season they reside in a big bin in the attic where I can get a glimpse of Easter any time I need it. So, maybe it’s not the most earth-shattering idea. But I do think my mom’s thinking was way before her time. And that she taught a lesson that was “green” before people even knew what that was.

IDEA 25: EASTER SURPRISE CAKE

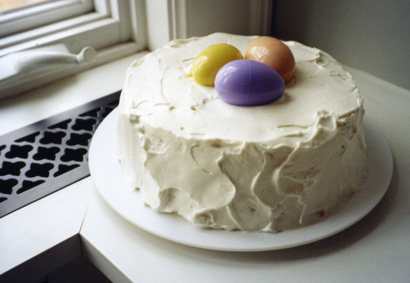
Easter_cake

This Easter, why not make a special cake adorned with a little surprise? This recipe is from my Aunt Liz who called it Snowball Cake and often decorated it with fresh strawberries. While that is an extraordinary way to make this cake, and highly recommended, here is a fun Easter version of it. The cake is the same, but nestled on top, we put one plastic Easter egg for each child. Hiding inside the eggs can be candy treats or small toys, anything that says Happy Easter to you!

Of course if you are the type of domestic goddess who prefers to have your local bakery make the cake, the idea still works! You can still steal the show by adorning it with the filled Easter eggs. After all,  BellaPamella style is all about making it creative,  not adding undue stress.

The recipe that follows is also here for you to download. Just print one of the pdfs on card stock and, either cut out for your file [recipe card] or hole-punch for your notebook [page].

Enjoy!

No Bake Easter Cake

2 envelopes unflavored gelatin

1 cup crushed pineapple, drained (keep the juice)

1 cup pineapple juice (add water, if needed to make cup)

1/2 cup sugar

1/8 teaspoon salt

1 tablespoon lemon juice

1 tablespoon lemon zest if available

2 cups whipping cream (+1 more for topping)

4 teaspoons sugar

2 teaspoons vanilla

1 store-bought Angel Food Cake

optional, 1/2 pint of fresh strawberries, sliced

Whipped Cream Topping

1 cup whipping cream

2 teaspoons sugar

1 teaspoon vanilla

Dissolve gelatin in 4 tablespoons cold water. Add 1 cup boiling water, and stir till lumps are gone. Add pineapple, pineapple juice, sugar, salt and lemon juice. Mix well and refrigerate to cool, about an hour. When partly gelled, beat 2 cups of whipping cream, 4 t sugar and 2 t vanilla in a cold bowl just until peaks form. Fold the whipped cream into the gelled mix.

Break up the angel food cake into 1” chunks. In an angel food cake pan or Bundt or other round pan, make layers of the cake, the gelled mixture and if using, sliced strawberries, ending with the gelled mixture. Refrigerate over night. When set, loosen around the edges and turn onto a plate. Frost with the whipped cream topping, made as you made the other whipped cream.

Fill most of the hole with whipped cream and nestle your surprise filled eggs in the indent. Best when kept refrigerated until ready to serve.

IDEA 23: FOREVER VALENTINE

Val_4

My daughter was born in February, which meant I had one very pregnant Valentine’s Day. So that may have been the reason I got this idea. But never-the-less it’s one worth sharing. Who, but your new born baby could possibly be your best Valentine ever?

Val_2

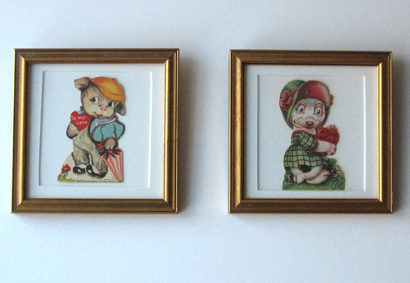
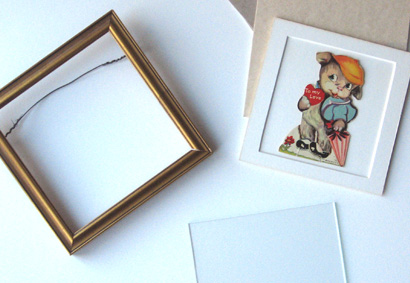
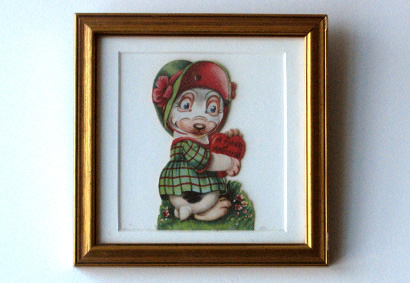
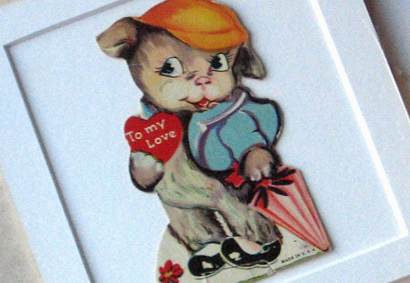
Look for some sweet old fashioned Valentines at an antiques shop and frame two of them for the nursery wall. Frames are available everywhere, but I liked these vintage gold leafed ones. Many come equipped with a mat, but since I wanted very small pictures, I took mats from a larger frame and cut them down to fit small frames. This way I got the fine professional bevel of the mat and I just had to cut the outside to make it fit my small frame. You can also have small mats custom cut at the craft and floral store. Or, cut your own mat from a piece of wrapping or wallpaper. I used another matching solid white piece of mat board under the card and stuck it down with a little double stick tape.

Val_3

Of course you don’t have to use antique cards for this. Any Valentine you love will do. And when it comes to your little one, it’s sweet sentiment really does last all year long!

Val_1

IDEA 19: SANTA MANTEL


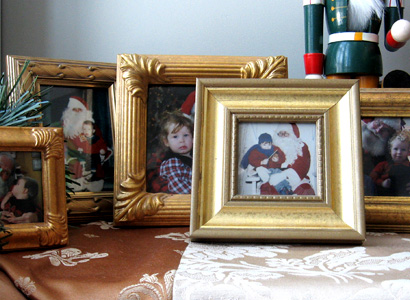
Santa_mantel

If you have been taking and saving photos of your child with Santa, you may have been looking, like I was, for a way to use them. (And if you haven’t been, maybe this will inspire you to do so!) This little idea seems so perfect you might wonder, why didn’t I think of that?

While you are perusing discount and craft stores, start collecting interesting gold (or silver) frames. I would buy one when it was on sale, or caught my eye. Size can vary from tiny to about 5”x 7”. Then, each year when you photograph your child with Santa, frame it in one of the frames. Make sure to write the year on the back side. These treasures are packed in a box all year, but at Christmas time, they come out to fill the fireplace mantel.

This will be a holiday tradition you will treasure long after your kids have moved away.

IDEA 18: BEDROOM WREATHS

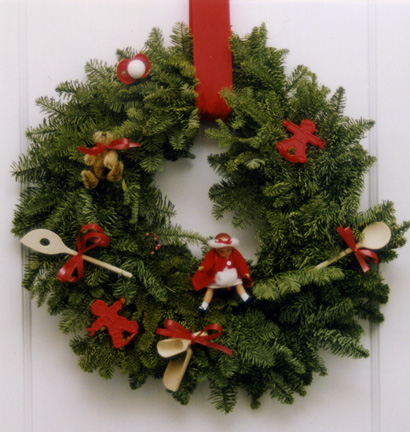
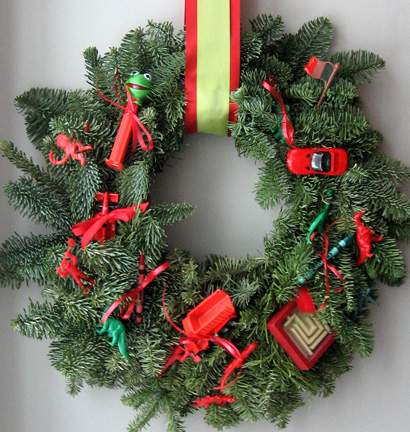
Door_Wreath_1

A simple and beautiful tradition to add to your holiday ready-making is the bedroom wreath. We do one for each child’s door. You’ll need a plain evergreen wreath, (you can use artificial wreaths if you prefer), about a yard and a half of 3” wide grosgrain ribbon per wreath, and some smaller, 1/4 inch wide red grosgrain or curling ribbon.

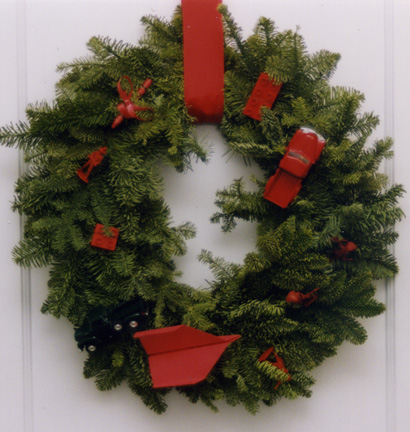
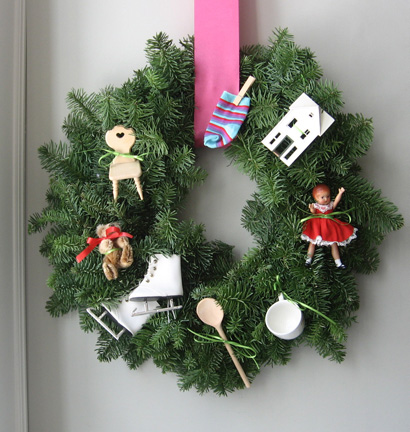
Gather a collection of small toys from each child’s stuff. From my son’s room I collected all red things: A building block, a red crayon, a truck, and red plastic army men. I even made a small red paper airplane. From my daughter’s room I collected tiny wooden spoons and a rolling pin, a small doll, a tiny bear, red plastic toys, even a red pacifier.

Using the narrow ribbon, tie the objects onto the wreaths. Loop the 3” wide ribbon through the center and line up the two raw ends. Thumbtack through both layers to the top edge (horizontal surface) of the door. Use very flat tacks so the door can open and close freely. If you like, embellish with a bow.

If you happened to have installed a hook as suggested in Idea #5 “Saving Private Places,” forgo the wide ribbon. Just hang the wreath right on the hook!

Door_Wreath_2

On December 7, I demonstrated this idea on Twin Cities Live, a local Minnesota show. The wreaths we did on the show are shown below.

Bedroom_Wreath_girl

Bedroom_Wreath_boy

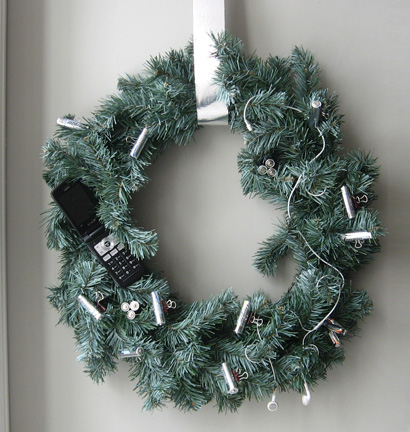
And one we didn’t get to is the “teen” wreath. I used old batteries, an old pair of “ear buds” and my son’s cell phone that went through the wash! Instead of ribbon it’s hung with silver duct tape.

Bedroom_Wreath_teen


IDEA 17: HOLIDAY TO-DO NECKLACE

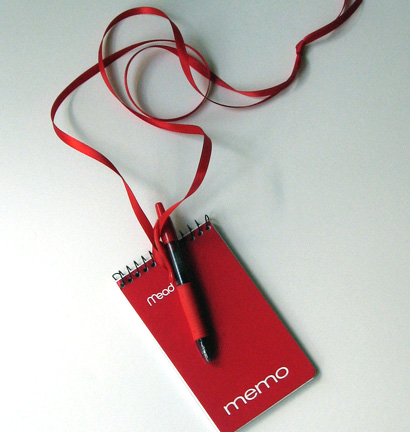
Holiday_To_Do


I’m pretty sure it has to do with having multiple kids, but sometimes, especially at the holidays, I really need a good way to jot down my thoughts. Just any old list will not do, since I think of things at the most inconvenient times (like when I’m out shopping, or taking a walk to clear my head). I found that I just needed a pen and paper handy all the time.

The solution? The To-Do list necklace. Buy one of those tiny lined notebooks (I like red) and about 1 1/4 yards red ribbon. Slip the ribbon through the hole and knot it to form a long notebook necklace. Clip on the shortest (red) pen you can find and if you like, embellish with a jingle bell. Now you are ready to record every fabulous thought.

Write each family member’s name on it’s own page. Then when a gift idea pops into your head record it on that page. Use a page for your own wish list (in case anyone asks) and one for food or other house stuff you are thinking about. You’ll be more organized if different type tasks are on different pages. And since the book is just for the holidays, you won’t worry about using lots of the pages.

You will be the most organized person you know this season. That’s so BellaPamella!

IDEA 16: THANKSGIVING PLAN

Thanks_plan

Here is what I have come to believe about the Thanksgiving holiday:

The best part of this holiday is cooking the big meal with ones you love. And not only does it not matter if you make the same meal every year, everyone actually likes that. If you buy into these two things, Thanksgiving really can be the wonderful, not too stressful tradition you wish it were.

Here are some tips for cooking with a big group in your house:

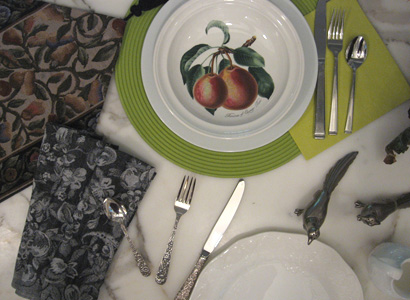
1. Make YOUR quintessential Thanksgiving meal. Of course this means all recipes you like to eat, and equally important, you understand how to make. Mine is Roast Turkey, butter & sage stuffing, braided egg bread, ginger/pear cranberry sauce, mashed potatoes, gravy, baked squash with molasses, tarragon green beans, pumpkin pie and apple pie. It’s pretty much always the same meal and my kids have come to believe that braided egg bread (for example) is what one makes at Thanksgiving.

2. Record all the above recipes in a spiral notebook titled THANKSGIVING. Next year you will be so glad you did this. If you are really industrious, add the shopping list in the front. Honestly, you only have to do this once. Every year after that just pull out the notebook and make the same meal. Why reinvent the wheel?

3. When you get up on the big day (at the crack of dawn) make Belgian waffle batter (Yes, you can use the box kind). Get the waffle iron set up and the minute your family starts arriving put as many guests as necessary on waffle duty. Making, distributing, and munching on waffles is great because it creates easy jobs (which you need with a kitchen full of guests), and you won’t starve as you spend all day creating the big meal. No syrup necessary, just dust with powdered sugar and serve on a napkin.

4. Unless you are big football fans, buy a big jigsaw puzzle and have the kids start it on the coffee table. It’s more social than TV and doesn’t require non-interrupted time.

5. After dinner, invite everyone outside for a big family walk. 

Nothing too fancy, but it covers the important stuff.  You’ll be creating good memories. And with any luck you can manage being together without being at each other’s throats! Have a wonderful holiday. And don’t forget to say thank you!

IDEA 14: KEEPING UP WITH THE SEASONS


Door_wreath_d

If you are like me, the season which starts with fall and ends with New Years goes by so fast the thought of redecorating for each holiday brings on more stress than comfort.  

So, I offer this thought: Rather than reinvent the decorations for each holiday, why not simply add a little more color and bling as the holidays progress? I’m utilizing the door wreath for this example, but the theory could be done anywhere in the house. The key is to add on as opposed to take down and replace. Here’s how:

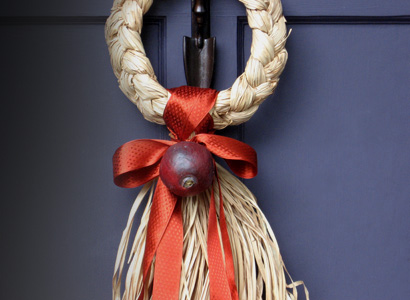
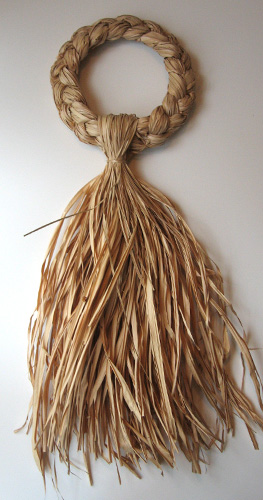
Choose a plain wreath. I chose this grass braid swag. But a wreath made of all bay leaves, all eucalyptus, all pine cones, grapevine, twigs or all magnolia would work as well. The best options are made of one solid material.

Wreath_1

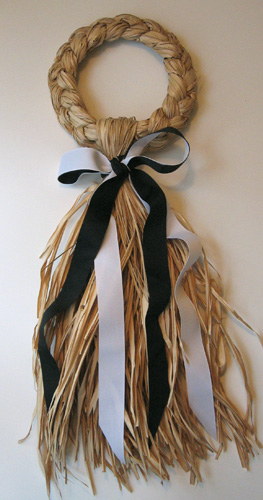
Just as fall begins to nip the air, hang the plain wreath.  Sometimes simplicity is just the thing. Have a jones to celebrate Halloween? Use two ribbons, one black, one white and use them back-to-back and tie the bow as if they are one. Trim the ends of the ribbons at an extra deep angle instead of the usual 45 degrees.

Wreath_2

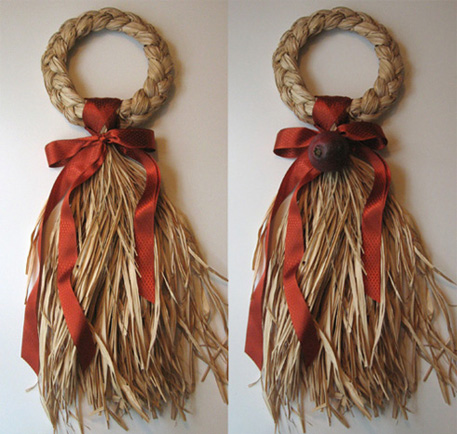
The day after Halloween, (or the next weekend day), switch to a pretty fall look. This rust colored ribbon with a basket weave texture is just beautiful. I chose to wind the ribbon into the center of the wreath before tying a pretty double bow. If desired, you can attach a single piece of artificial fruit such as this pomegranate. Look for decorative fruits at the craft store. They are very lightweight and usually come with a wire that can easily be anchored into your wreath or twisted into the ribbon. If the fruit does not have a wire hanger, create your own by drilling a small hole in the back and pushing a short piece of floral wire into it.

Wreath_3,4

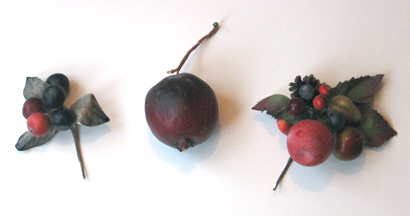
I love to collect “fruit pics”. These are small clusters of artificial fruit all gathered and held on a single wire with floral tape, available at craft stores and florist supplies. These pics are easily poked into your arrangement. Here are some of my favorites, but the options are endless.

Fruit_pics

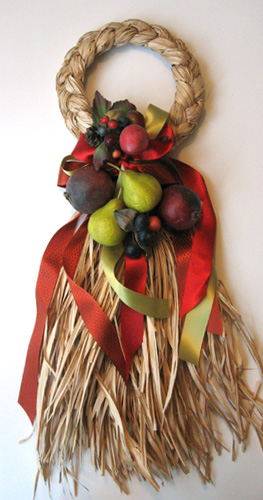
Which brings us to the next and final phase of your seasonal wreath. Leave the fall ribbon on the wreath. Now take a rich red ribbon, and if you like, a handsome chartreuse one. Put them back-to-back and tie another big bow over the first. Then, using floral wire, poke and twist several pieces of fruit and fruit pics into the wreath. I love the look of pears among all the rich reds and purples of pomegranates, berries and even grapes. The result is a beautiful, lush tribute to the season that won’t look out of date the day after the holiday. Which is, of course, your greatest gift of all!

Wreath_5

IDEA 13: JACK LUMINARIES


Jack_lum_day

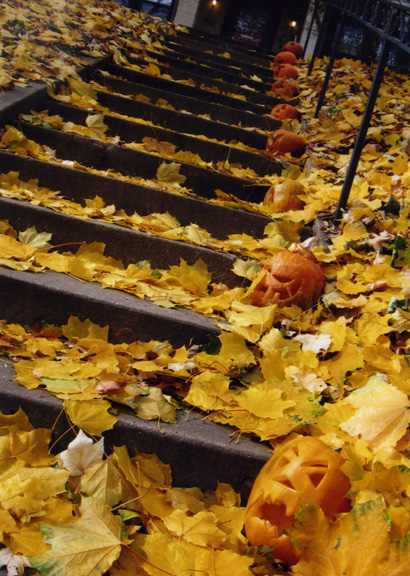
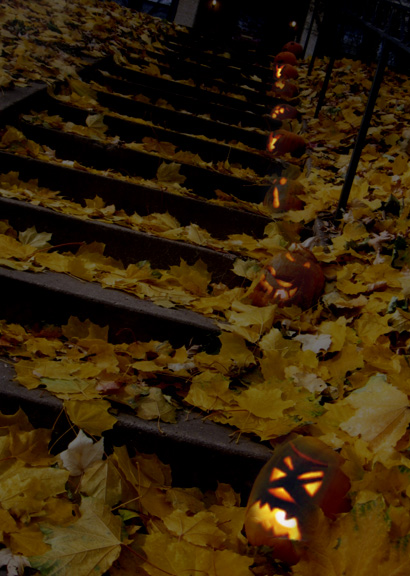
Here in Minnesota, and probably many other regions around the country, we have a lovely tradition associated with the holidays. When the snow falls, many people line their walk or driveway with luminaries, paper bags filled with sand or even a big chunk of ice formed in a milk carton, each containing a lit candle. The effect of luminaries lining the walk, especially in the snow, is absolutely magical.

Well, this idea sparked another: Luminaries for Halloween. If your family is like ours, we love to take the fall trip to the pumpkin patch and bring back lots of plump orange pumpkins. Of course it’s fun for each person to select just one that suits their personality, have a carving party, and set them on the porch as a pumpkin version of the family who lives inside. These Jack-o-lantern luminaries could be done instead of, or in addition to that.

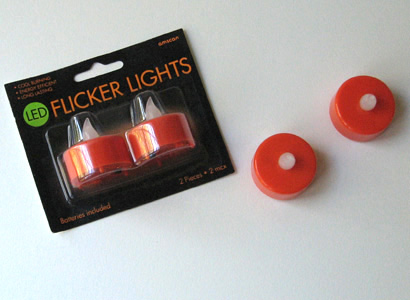
Purchase as many pumpkins as you like. They don’t have to be any certain size (you can keep them small if you like). For each pumpkin, purchase one votive candle-sized light.

Flicker_lights

These are great, and available at the party goods store as well as big box and discount stores. Since you will be lining your walk, you will most likely have lots of kids walking along beside your luminaries so you do not want to use real candles as they could pose all kinds of risks. Whenever kids (and lots of dry fall leaves) are involved, play it safe!

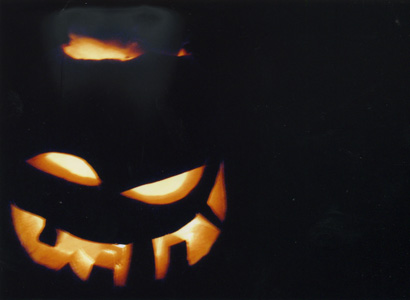
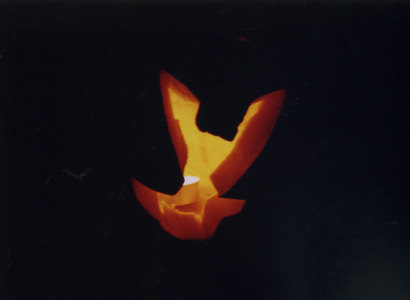
Now you and your kids get to go to town carving pumpkins. The more you carve out, the more light will show. My kids just did whatever they felt like. Here are some of them:

Jack_1

Jack_2

Jack_3

Now set them out and turn on the lights! You have not only managed to keep the kids busy for a long time, but you’ve created a stunning Halloween decoration for your home that looks great during the day, and lights up the night!

Jack_lum_nite