Archived Ideas for ‘Organization’

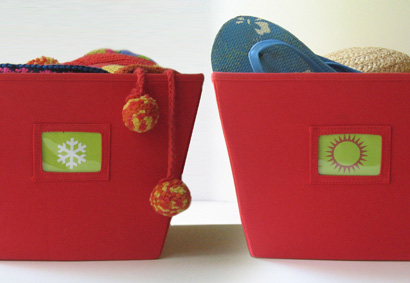
IDEA 34: CHANGING SEASONS BASKETS

Bin_tag

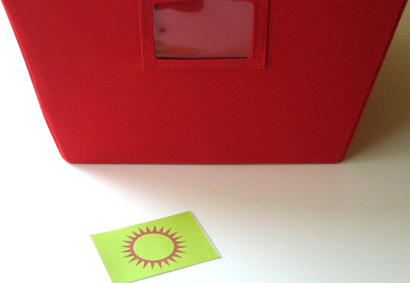
This is a pretty simple idea inspired by those nifty bins with the place to put a label in a holder on the front. I was using them for off-season gear in our closet, but the contents (of course) kept changing with the seasons. My solution: For each bin I made up two tags, one for summer, one for winter. Voila, a solution for summer, (both bins use the winter tags) a solution for winter, (switch out the tags and both bins house the summer stuff) and, in a season like this, where only half the summer stuff is put away, use one of each. (Store the extra one behind).

Changing_Seasons_bins

You can download and print these cute, visual, seasonal bin markers on card-stock, if you like. There’s extra background, so cut them to any size that works for your needs. Happy organizing!

IDEA 33: COLOR ME ORGANIZED

Marker_Organize_2

It’s September. Which means you very well have replenished the stock of colored markers, pens, and pencils. Let’s face it. When you have an organized environment it really does inspire use.

This simple and sweet idea comes from my friend Anne who, like me and probably you, is thrilled to figure out a clever way to keep kid-stuff organized. Anne’s boys had a jumble of colored markers, pencils, crayons and pens. The supplies were a big hit when they were first purchased, but soon became spread all over the house, buried in various drawers, lost in the general chaos of life at home.

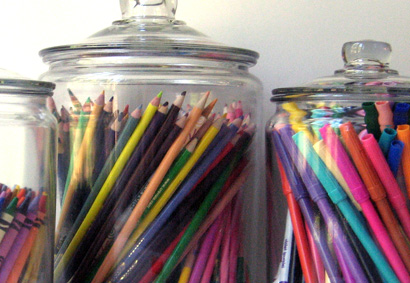
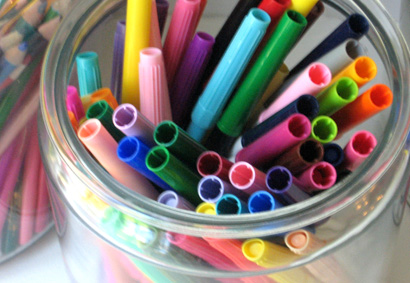
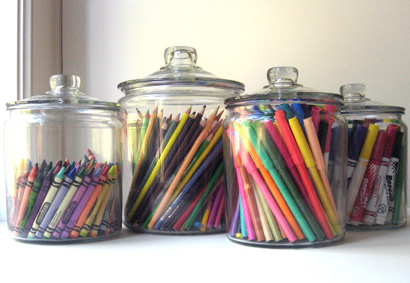
Then Anne got the idea to purchase clear glass jars from the kitchen department of a local big box store. The jars came in two sizes, so she chose a selection to house the various supplies. All the crayons went in one, the colored markers in another, and so on.

Marker_Organize_4

The resulting jars now inspire her boys to create. They bring a jar to their room, and when they’re done, they bring it back to the shelf in an open cupboard in their sunny front room where the display looks as great as it is functional. (How many kid-stuff solutions can you think of that not only clean things up, but add to your decor as well)!

I don’t know about you, but now I’m inspired to go out and buy all new pens just to do this.

Marker_Organizer_1

IDEA 32: MAKE HEALTHY WORK FOR YOU

Vitamin_organize_3

Our family has taken to trust supplements and vitamins in a big way. It’s a great solution when you have kids running everywhere and you want to make sure they are getting their fair share of the good stuff. But if your kitchen counter is like mine, it has a way of looking cluttered even when you tidy up. The myriad bottles of vitamins, fish oil capsules and kelp were one thing, but when we started buying the mega-jars of whey protein it was getting a bit unsightly.

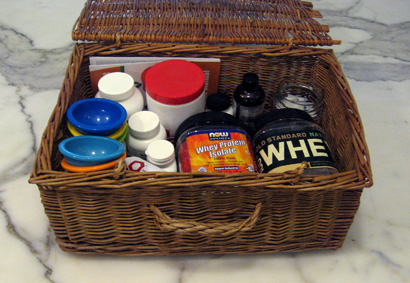
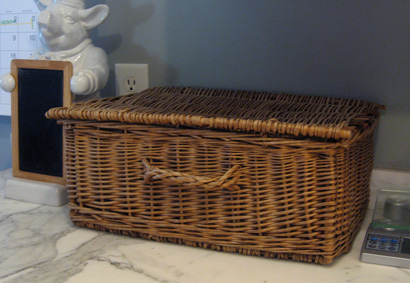
My solution? First, I found a sweet old basket with a lid at a tag sale. It used to be a picnic basket, I guess, but you could use any container with a lid that fits your decor.

All the little items went in without problem, then I found square jars that fit in the basket. I used peanut jars from Cosco. They are plastic and have large plastic lids. I cleaned the jars and removed the labels from the whey containers and taped them onto the smaller jars. Of course I had to cut the labels smaller to fit. I wanted to use the labels rather than just writing on the jars for two reasons: First, I wanted to keep the nutrition info, and second, I knew I would need the visual of the actual products so next time I would remember which one to buy! I scooped out enough of the whey to fill the smaller jars and the mongo ones went in the pantry.

Supplement_organizer_2

I used another empty jar to house small packets, and there was also room for a carb counting booklet. Everything fits inside and is easily accessible, then with a flip of the top, it’s all out of site!

Supplement_organization_1

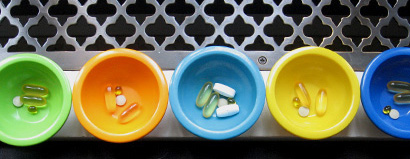
On the subject of ways to organize keeping the family healthy, we found a set of tiny, colored melamine bowls at the big box store. They came in a set of six, in six different colors. Since we have five in our family, we had each person pick their color. Now, in the morning, I divvy all the vitamins and supplements into the bowls. They sit there as a reminder to each family member whether or not they’ve taken their vitamins that day. By dinner time the last straggler has taken theirs and the next morning they all get refilled. An idea that not only beautifies your space but keeps you healthy? Now, that’s a very BellaPamella idea!

Vitamin_organization_5

IDEA 24: PHOTO ORG

Photo_Org_1

If you are looking for a photo album solution, it means you probably have boxes (or drawers, or computer files) of photos that have piled up. This tidbit is not exactly about organizing those. For now, I would either ignore them or if they have been printed, buy a whole bunch of matching photo boxes and at least get them all in one place. Once you have seen how clever you can be at photo org, you can go back and tackle them.

This is about This Day Forward. Because if the very next time you take pictures you start doing this, the number of organized pictures will eventually surpass the number of disorganized ones. And hopefully you will inspire yourself to one day work on the others. (Besides, by then you’ll be a pro).

Here’s the first key: In most of our lives there are really only a handful of photo events in any year. OK, if you have a newborn, there is a photo event every day. But generally, most of us haul the camera out a half a dozen times a year, usually centering on holidays or other significant ceremonies, etc. Even if you do snap away every day, use the big picture events to do this.

As soon as possible after the next picture event, download your camera to your computer. Right now, before getting up, you are going to decide which ones to print. Just start going through them. If you like the picture, either name it or put it in a folder (whichever works for you). If you don’t like the photo, just skip to the next one. Don’t worry about throwing it out. (That’s the part that makes it way too hard). All you’re doing is identifying the ones you LIKE. Once you are sure the files are all in your computer, delete everything on the camera.

Now, go to a photofinishing website. I use my local drugstore. On the site you will learn to send your photos to the store (you’ve just identified which ones to print with your naming or file system) and they will make prints which you will go pick up. There will be options for paying online and/or having the prints sent to you. Do as you wish, but I find checking the box that says I will pay when I pick up is the easiest.

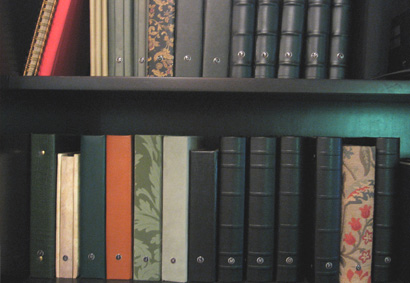
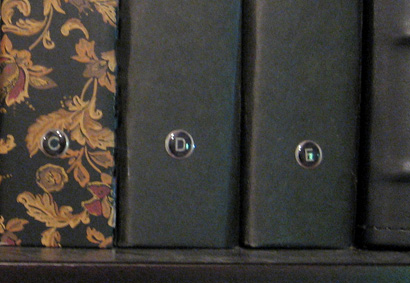
This next part can be done at the same drugstore, or in my case I like the big box stores: Find some reasonably priced photo albums and buy as many as you are comfortable, like a row as wide as your shelf. Do the albums HAVE to be the same? No. Get what you want. Sometimes sameness helps one to feel organized. And a whole row of identical albums is beautiful. My collection consists of chunks of like albums interspersed with the occasional fun surprise, partly because I like a little variety, and partly because of the way the collection has taken years to grow. Purchase a sheet of letters of the alphabet from the scrapbook aisle and letter the spines of the albums starting with A.
Photo_Org_2

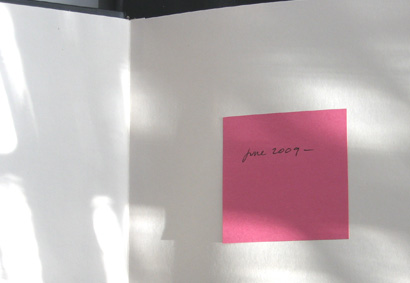
Then, attach a “sticky note” inside the cover of album “A” and write the month and year of the photo event followed by a dash. Now put in all those photos you picked up.
Photo_Org_3

Repeat the process immediately after each picture event, with all shots that are in the camera, deleting the camera files when you have downloaded them to your computer. When the album is filled, write the current month and year on the sticky note (after the dash) and move on to album “B.” Once you’re sure the album is done, if you like, you can write the dates directly on the album page and scrap the sticky.

I have used this system for years. The resulting books are a constant source of joy for me and for anyone who comes in my kitchen (where the albums are stored, taking up more shelf space than the cookbooks). Of course I started the system long before there was digital photography. The main thing is to just start putting the pictures in books. And making it part of the photo-taking experience. You don’t have to feel bad if you don’t want to print them all, or put them all in the book. I’ve had occasions where I used most of an album on one single occasion. And others where there were only one or two photos that told the whole story. Since you don’t throw out the computer files, you will always have them as back-up. So you can proceed without feeling the burden of getting it exactly right. You rest assured knowing you can always go back in for “revisions” if you want to. Although we both know, you never will!
IDEA 21: IDENTIFY WITH SOMETHING

Paint_number

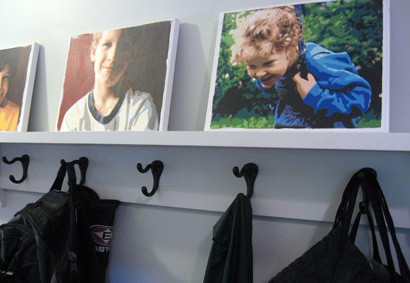
One day I discovered that you could order a Paint-by-number kit of your own photos. I sent in a picture of my daughter and the resulting painting was so beautiful and fun to do, I did the rest of our family. Now, the five portraits identify the hooks in our mudroom. Each picture sits above two hooks belonging to the person in the picture.

Of course it would have been much easier to write their names. But, that’s not the point is it?!

IDEA 20: JUNK DRAWER RESCUE

Kitchen_Drawer_org_2

Here’s a test for you: Open your kitchen junk drawer. Now, does it make you feel all happy and on top of things? Or is it just another reminder of the myriad of things that need your attention? My theory is that something as simple as organizing your junk drawer can have a halo effect on your general well being that will last you until spring.

So, how does one even begin this horrendous task? And even if you do, how will it STAY organized? We all know, the more people in your family, the quicker the organized junk drawer turns into chaos.

I’m at the time in my life that I need glasses, “readers” at every turn throughout the day. I tried to house a pair in the kitchen junk drawer for those moments when I needed to read a recipe, or the microscopic print on the back of a package. And inevitably they would end up on top of my head where they would travel to various parts of the house so that next time I opened the drawer they would not be there. So one day I bought a pair of red glasses. This is a color that looks fab in my kitchen, but not very good on my face. Amazingly, whenever I would begin to take the red glasses to another part of the house I would either stop and deposit them in the drawer, or, if I happened to see them, say, sitting on my desk, I’d bring them back to their place. And thus was born an inspiration. Like most junk drawers, ours was full of the miscellaneous bits and pieces people find and stash but never have a use for. What it did NOT EVER have was a working writing utensil, paper, tape, scissors, you get the idea. The junk drawer was a place you went to look for something, and never found it.

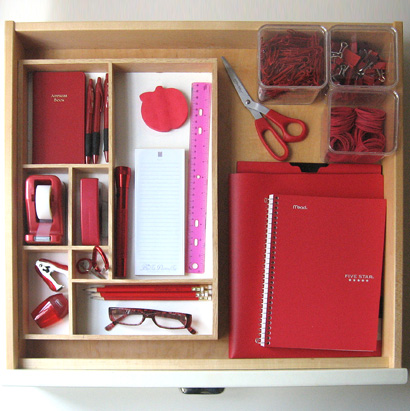
Try this and see if it makes life just a little better: First of all, empty the junk drawer and wipe it clean. If it doesn’t have dividers you may want to purchase an insert at one of those “get organized” stores. Now, (this is the fun part), whenever you are out at the grocery, drugstore, office supply or big box store, start collecting red stuff. Yes, you can choose a different color if you like. The point is that everyone in the family knows that that particular color stuff goes in the drawer. If you use the scissors, they go back. If you find them around the house, bring them back. You would be amazed at how this simple rule helps keep the drawer full of its useful stuff.

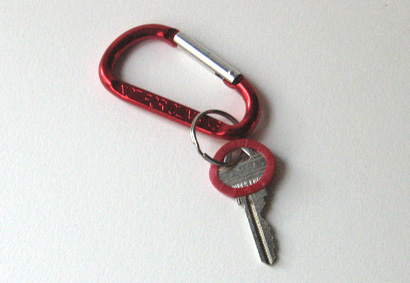
House_Key_org

So, what did I find in red? Pens and pencils, scissors, tape dispenser, stapler and staple remover, paperclips, rubber bands, those gripper clips (great for closing chip bags) a ruler, flashlight, address book, key ring (and red plastic marker for spare house key), post-its, folder to hold rosters and school directories,  lined paper notebook, and last but not least…my glasses!


IDEA 17: HOLIDAY TO-DO NECKLACE

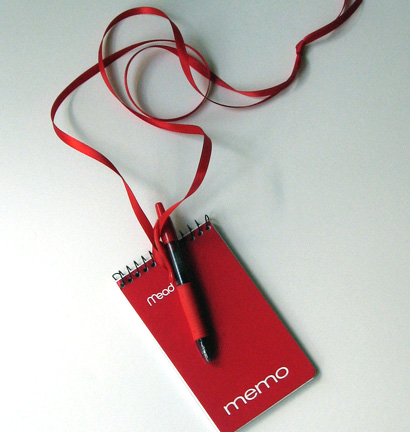
Holiday_To_Do


I’m pretty sure it has to do with having multiple kids, but sometimes, especially at the holidays, I really need a good way to jot down my thoughts. Just any old list will not do, since I think of things at the most inconvenient times (like when I’m out shopping, or taking a walk to clear my head). I found that I just needed a pen and paper handy all the time.

The solution? The To-Do list necklace. Buy one of those tiny lined notebooks (I like red) and about 1 1/4 yards red ribbon. Slip the ribbon through the hole and knot it to form a long notebook necklace. Clip on the shortest (red) pen you can find and if you like, embellish with a jingle bell. Now you are ready to record every fabulous thought.

Write each family member’s name on it’s own page. Then when a gift idea pops into your head record it on that page. Use a page for your own wish list (in case anyone asks) and one for food or other house stuff you are thinking about. You’ll be more organized if different type tasks are on different pages. And since the book is just for the holidays, you won’t worry about using lots of the pages.

You will be the most organized person you know this season. That’s so BellaPamella!

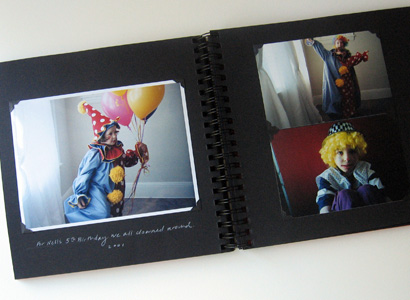
IDEA 11: COSTUME BOOK

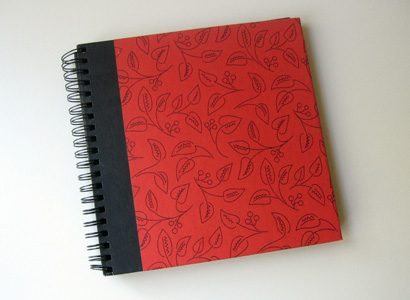
Costume book_outside

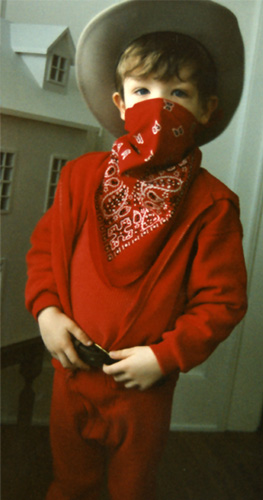
One of my favorite pictures of my son was when he was about four years old. He had on red waffle weave PJ’s, a ten gallon cowboy hat and a red bandana tied across most of his face.

Costume book_cowboy

It was this picture that inspired me to begin a book of costumes. When kids dress up it’s a perfect opportunity to take pictures, and somehow putting only the costume pictures in a book made it quite simple. If these are the only pictures you manage to get into an album you are still way ahead of the game!

If you make costumes for Halloween, it’s the perfect way to “honor” all that work you did. But of course any dress-up occasion (or non-occasion) will do. Another great side note: If you have more than one child, chances are the same costume will get worn by each of them on different years. My book is loosley structured with scrapbook pages so I left room for future pictures and put the pictures of different kids in the same costume on the same page. We all get a kick out of comparing their different styles!

Costume book_inside

IDEA 8: TO DO LIST

ToDoList

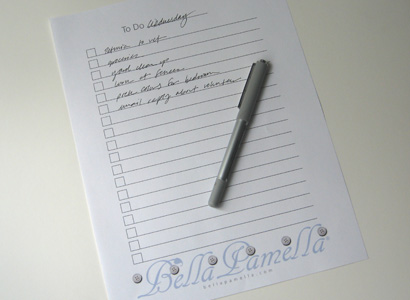
You may wonder why you need a To Do list if you already have a great day planner or calendar. But if you are like me, you have found that you really do need something more. I found that I had so many lists going on in my head and it seemed there was just no perfect way to organize them, so I designed my own solution. What I wanted was to have at my fingertips the ability to begin a variety of lists. There were things that needed to be done today, and then more things that needed to be done eventually. In between, there were things, not for today but by Friday, etc, you get the picture.

So I designed a nice, clean “To DO” list and now I’m sharing it with you so you can print out as many as makes you happy. At the top it says To Do: and a blank. You can print out seven of these and fill the blank with each day of the week. Or you can print out one that says today’s name at the top and one that says “By the weekend”. For your more lofty ideas you can put “Eventually” in the blank, or even “Before I die”. You can also use the heading of an event, like “Party” or “Thanksgiving”.

I’m giving you a choice of two sizes. One is a full page [Large To Do List] and the other is half size which will be printed two to a page, and can be cut apart [Small To Do List]. It’s my gift to you, print as many as you like. List to your heart’s content. And hopefully it will make you the organized Domestic Goddess you have always known you could be!

By the way, because technology is mysterious, and computers and printers vary, there is a chance that the above documents aren’t centered when printed. Try printing the Small To Do List above. If the center cut line is NOT in the center of the page, here are two more for you to try: [Large To Do List Alt] and [Small To Do List Alt]. Happy listing, and let me know how they came out!


IDEA 4: KID ART CALENDAR

Artcal_three

Kids produce an amazing amount of art. You love, love, love it. But you can also get stressed out by it. How do you decide how much and how long to keep it? Here’s what we do:

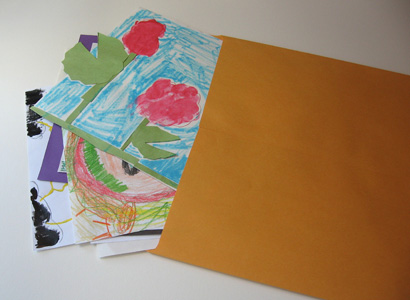
We have a dedicated drawer, but if you don’t have that, one of those big paper envelopes from the office supply or paper portfolio from the craft store will do just fine.

Artcal_folder

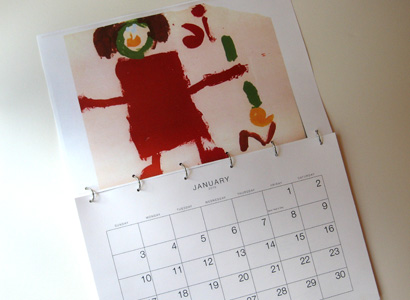
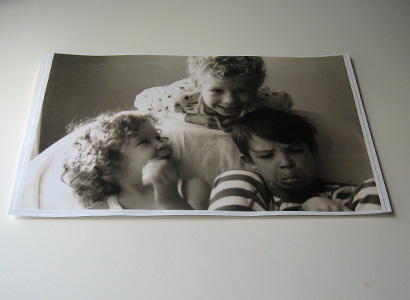
All year long, as the kid art comes home, display it if you like, but either right away or when you are done displaying it, put it in the big envelope. Keep as much as you want. At the end of the year go through all the art (with your kids, if they are old enough). Pick out the 12 best things, doing your best to represent each child equally. Now, download this large 2011 calendar. Once you download the calendar to your desktop, you can go online to FedEx Kinkos and upload to their site, print the pages in black and white on 11″ x 17″ card stock, and pick up your calendar pages at the shop. (For 8 1/2″ by 11″ size, download and print this small 2011 calendar). At the copy shop, color copy each piece of kid art onto 11” x 17” card stock (or of course, 8 1/2″ x 11″ card stock if you are making the small calendar). For the cover, print a blow-up of a photo of the kids.

Artcal_stack_1

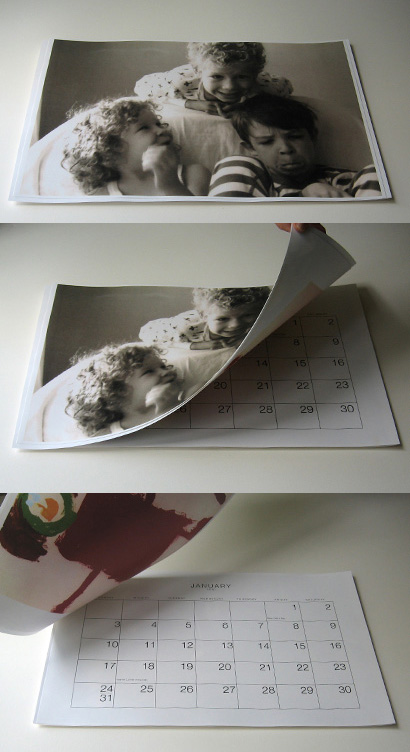
Now stack the pages starting with the cover picture and the “January” art back to back. Remember, the art will be positioned upside down so you can “flip” the calendar open.

Artcal_stack_all

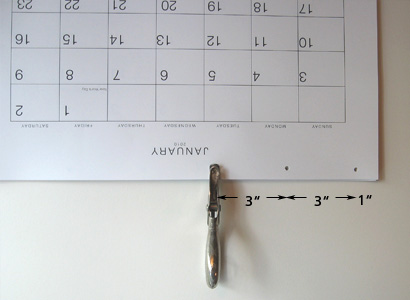
Once you have made the whole stack with calendar pages and artwork, use a hole punch to punch six holes along the “spine” of the calendar, in 1” from each edge and spacing holes every three inches.

Artcal_punch_1

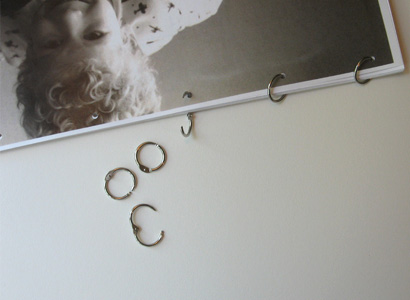
For the small calendar, punch just three holes, with a three-hole punch if you have one. Punch a single hole centered at the top of the other edge of the pages for a hanging hole. Now, just slip six 3/4” binder rings through the holes (for the small size, three rings) and your calendar is ready for service!

Artcal_rings

By the way, if you really have one of those engineer’s brains, you can have the copy shop print the calendar pages and art on opposite sides of the same card stock. But it helps to do it this way the first time so you have a template for how things need to be positioned.

We always make two copies of the calendar, one for our house and one for the Grandparents. As far as the big portfolio of art, you can either a) Empty it and start clean for next year, b) Keep the originals of the best 12, or c) Keep it all, put the year on the portfolio and buy a new one for next year. Art proliferation solved!