Archived Ideas for ‘Home’

IDEA 19: SANTA MANTEL


Santa_mantel

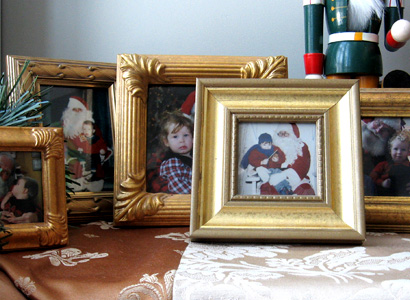
If you have been taking and saving photos of your child with Santa, you may have been looking, like I was, for a way to use them. (And if you haven’t been, maybe this will inspire you to do so!) This little idea seems so perfect you might wonder, why didn’t I think of that?

While you are perusing discount and craft stores, start collecting interesting gold (or silver) frames. I would buy one when it was on sale, or caught my eye. Size can vary from tiny to about 5”x 7”. Then, each year when you photograph your child with Santa, frame it in one of the frames. Make sure to write the year on the back side. These treasures are packed in a box all year, but at Christmas time, they come out to fill the fireplace mantel.

This will be a holiday tradition you will treasure long after your kids have moved away.

IDEA 18: BEDROOM WREATHS

Door_Wreath_1

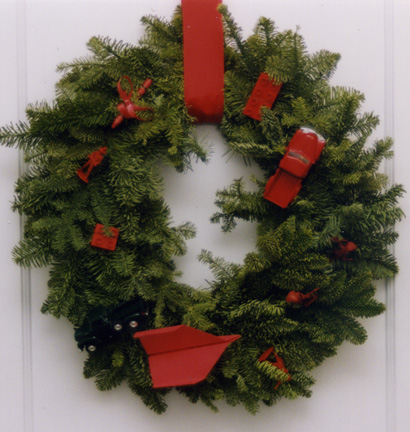
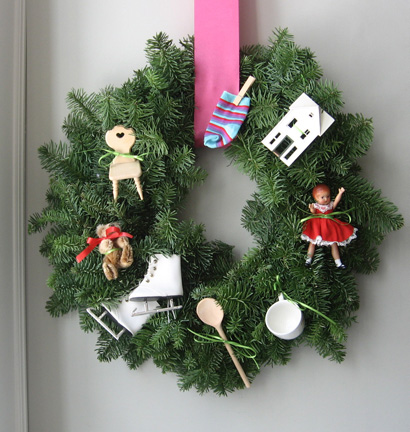
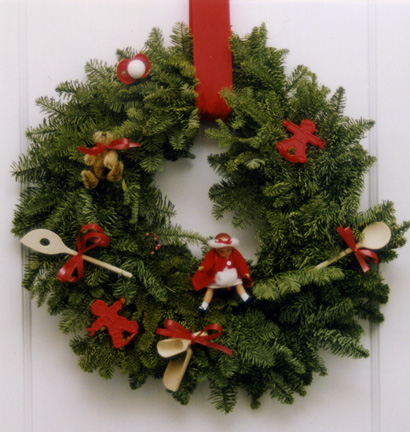
A simple and beautiful tradition to add to your holiday ready-making is the bedroom wreath. We do one for each child’s door. You’ll need a plain evergreen wreath, (you can use artificial wreaths if you prefer), about a yard and a half of 3” wide grosgrain ribbon per wreath, and some smaller, 1/4 inch wide red grosgrain or curling ribbon.

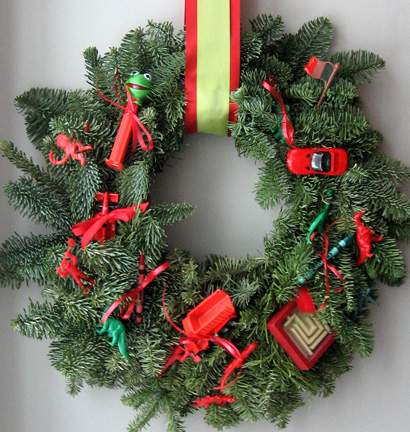
Gather a collection of small toys from each child’s stuff. From my son’s room I collected all red things: A building block, a red crayon, a truck, and red plastic army men. I even made a small red paper airplane. From my daughter’s room I collected tiny wooden spoons and a rolling pin, a small doll, a tiny bear, red plastic toys, even a red pacifier.

Using the narrow ribbon, tie the objects onto the wreaths. Loop the 3” wide ribbon through the center and line up the two raw ends. Thumbtack through both layers to the top edge (horizontal surface) of the door. Use very flat tacks so the door can open and close freely. If you like, embellish with a bow.

If you happened to have installed a hook as suggested in Idea #5 “Saving Private Places,” forgo the wide ribbon. Just hang the wreath right on the hook!

Door_Wreath_2

On December 7, I demonstrated this idea on Twin Cities Live, a local Minnesota show. The wreaths we did on the show are shown below.

Bedroom_Wreath_girl

Bedroom_Wreath_boy

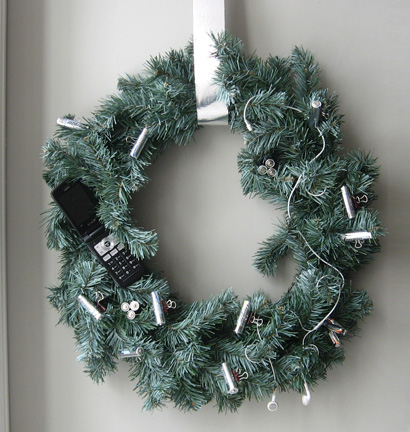
And one we didn’t get to is the “teen” wreath. I used old batteries, an old pair of “ear buds” and my son’s cell phone that went through the wash! Instead of ribbon it’s hung with silver duct tape.

Bedroom_Wreath_teen


IDEA 15: WEAR AN APRON

WEARANAPRON

When you are a mom and wear an apron, you and your kids are making a pact of sorts. The pact says to the kids, this will always be your home, and I will always be your mother. It does not matter if work takes you away from your home all day. It does not matter if the meals are prepared in 45 seconds in the microwave. The kids, for their part, will never question or judge, They will simply understand that they are loved.

So, where should you get the apron? Hmmm. Let’s see. How about here?

IDEA 14: KEEPING UP WITH THE SEASONS


Door_wreath_d

If you are like me, the season which starts with fall and ends with New Years goes by so fast the thought of redecorating for each holiday brings on more stress than comfort.  

So, I offer this thought: Rather than reinvent the decorations for each holiday, why not simply add a little more color and bling as the holidays progress? I’m utilizing the door wreath for this example, but the theory could be done anywhere in the house. The key is to add on as opposed to take down and replace. Here’s how:

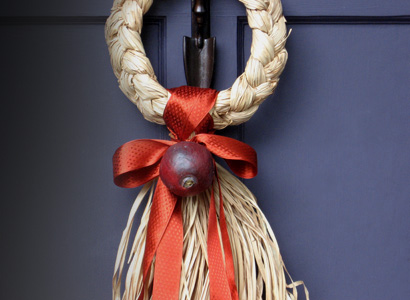
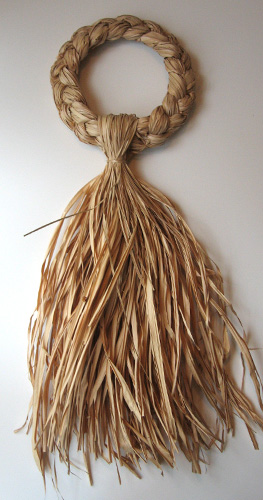
Choose a plain wreath. I chose this grass braid swag. But a wreath made of all bay leaves, all eucalyptus, all pine cones, grapevine, twigs or all magnolia would work as well. The best options are made of one solid material.

Wreath_1

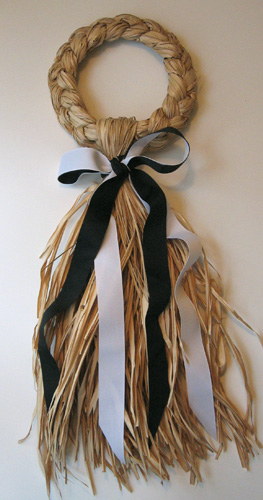
Just as fall begins to nip the air, hang the plain wreath.  Sometimes simplicity is just the thing. Have a jones to celebrate Halloween? Use two ribbons, one black, one white and use them back-to-back and tie the bow as if they are one. Trim the ends of the ribbons at an extra deep angle instead of the usual 45 degrees.

Wreath_2

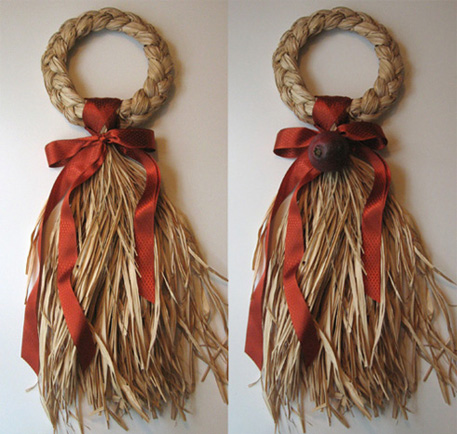
The day after Halloween, (or the next weekend day), switch to a pretty fall look. This rust colored ribbon with a basket weave texture is just beautiful. I chose to wind the ribbon into the center of the wreath before tying a pretty double bow. If desired, you can attach a single piece of artificial fruit such as this pomegranate. Look for decorative fruits at the craft store. They are very lightweight and usually come with a wire that can easily be anchored into your wreath or twisted into the ribbon. If the fruit does not have a wire hanger, create your own by drilling a small hole in the back and pushing a short piece of floral wire into it.

Wreath_3,4

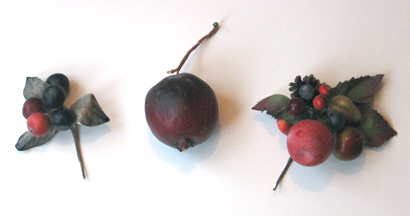
I love to collect “fruit pics”. These are small clusters of artificial fruit all gathered and held on a single wire with floral tape, available at craft stores and florist supplies. These pics are easily poked into your arrangement. Here are some of my favorites, but the options are endless.

Fruit_pics

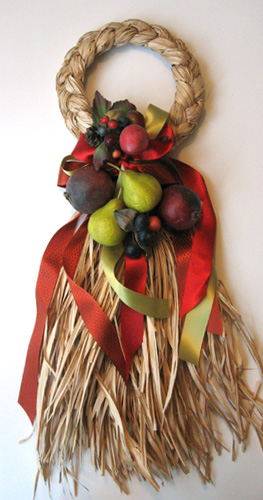
Which brings us to the next and final phase of your seasonal wreath. Leave the fall ribbon on the wreath. Now take a rich red ribbon, and if you like, a handsome chartreuse one. Put them back-to-back and tie another big bow over the first. Then, using floral wire, poke and twist several pieces of fruit and fruit pics into the wreath. I love the look of pears among all the rich reds and purples of pomegranates, berries and even grapes. The result is a beautiful, lush tribute to the season that won’t look out of date the day after the holiday. Which is, of course, your greatest gift of all!

Wreath_5

IDEA 13: JACK LUMINARIES


Jack_lum_day

Here in Minnesota, and probably many other regions around the country, we have a lovely tradition associated with the holidays. When the snow falls, many people line their walk or driveway with luminaries, paper bags filled with sand or even a big chunk of ice formed in a milk carton, each containing a lit candle. The effect of luminaries lining the walk, especially in the snow, is absolutely magical.

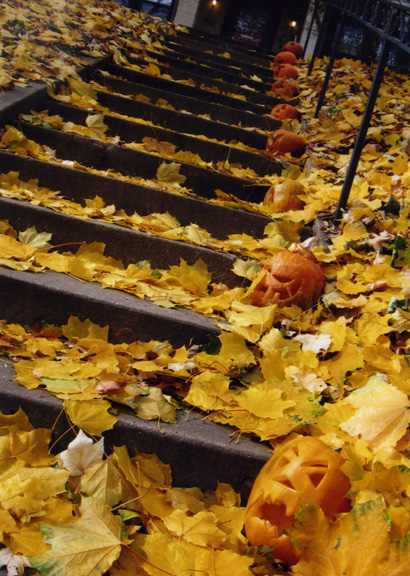
Well, this idea sparked another: Luminaries for Halloween. If your family is like ours, we love to take the fall trip to the pumpkin patch and bring back lots of plump orange pumpkins. Of course it’s fun for each person to select just one that suits their personality, have a carving party, and set them on the porch as a pumpkin version of the family who lives inside. These Jack-o-lantern luminaries could be done instead of, or in addition to that.

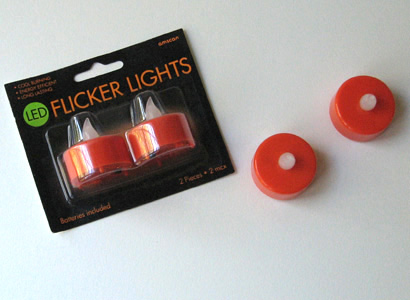
Purchase as many pumpkins as you like. They don’t have to be any certain size (you can keep them small if you like). For each pumpkin, purchase one votive candle-sized light.

Flicker_lights

These are great, and available at the party goods store as well as big box and discount stores. Since you will be lining your walk, you will most likely have lots of kids walking along beside your luminaries so you do not want to use real candles as they could pose all kinds of risks. Whenever kids (and lots of dry fall leaves) are involved, play it safe!

Now you and your kids get to go to town carving pumpkins. The more you carve out, the more light will show. My kids just did whatever they felt like. Here are some of them:

Jack_1

Jack_2

Jack_3

Now set them out and turn on the lights! You have not only managed to keep the kids busy for a long time, but you’ve created a stunning Halloween decoration for your home that looks great during the day, and lights up the night!

Jack_lum_nite

IDEA 8: TO DO LIST

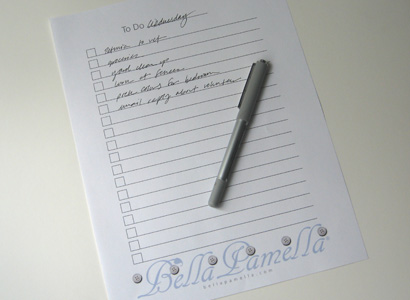
ToDoList

You may wonder why you need a To Do list if you already have a great day planner or calendar. But if you are like me, you have found that you really do need something more. I found that I had so many lists going on in my head and it seemed there was just no perfect way to organize them, so I designed my own solution. What I wanted was to have at my fingertips the ability to begin a variety of lists. There were things that needed to be done today, and then more things that needed to be done eventually. In between, there were things, not for today but by Friday, etc, you get the picture.

So I designed a nice, clean “To DO” list and now I’m sharing it with you so you can print out as many as makes you happy. At the top it says To Do: and a blank. You can print out seven of these and fill the blank with each day of the week. Or you can print out one that says today’s name at the top and one that says “By the weekend”. For your more lofty ideas you can put “Eventually” in the blank, or even “Before I die”. You can also use the heading of an event, like “Party” or “Thanksgiving”.

I’m giving you a choice of two sizes. One is a full page [Large To Do List] and the other is half size which will be printed two to a page, and can be cut apart [Small To Do List]. It’s my gift to you, print as many as you like. List to your heart’s content. And hopefully it will make you the organized Domestic Goddess you have always known you could be!

By the way, because technology is mysterious, and computers and printers vary, there is a chance that the above documents aren’t centered when printed. Try printing the Small To Do List above. If the center cut line is NOT in the center of the page, here are two more for you to try: [Large To Do List Alt] and [Small To Do List Alt]. Happy listing, and let me know how they came out!


IDEA 5: SAVING PRIVATE PLACES

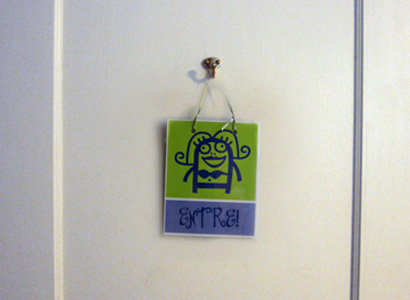
ENTRE

Once kids realize they can, it seems they begin to put signs on their bedroom doors. We live in an old house with painted woodwork, and taping things to these painted surfaces usually results in a large square chunk of paint coming off with the tape.

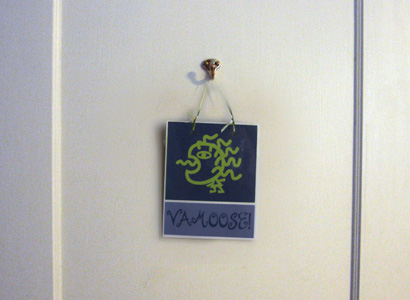
One day I repainted all the doors and installed a simple brass hook, right in the middle, on the outside (hall side) of the kids’ doors about 14 inches from the top. Then I made little two-sided signs that (in fun ways) said to come in on one side and keep out on the other. I had the signs laminated and punched at the copy shop, and strung a ribbon through. The sign hangs neatly on the hook. Now the kids can post their wishes depending on their mood. And no more worry about ruined paint!

VAMOOSE

IDEA 4: KID ART CALENDAR

Artcal_three

Kids produce an amazing amount of art. You love, love, love it. But you can also get stressed out by it. How do you decide how much and how long to keep it? Here’s what we do:

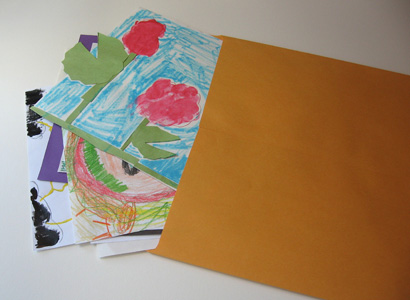
We have a dedicated drawer, but if you don’t have that, one of those big paper envelopes from the office supply or paper portfolio from the craft store will do just fine.
Artcal_folder

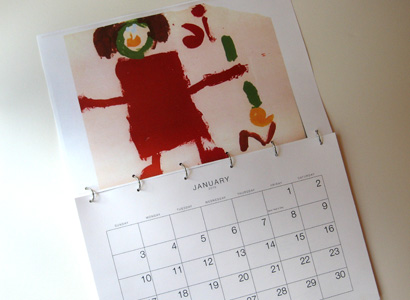
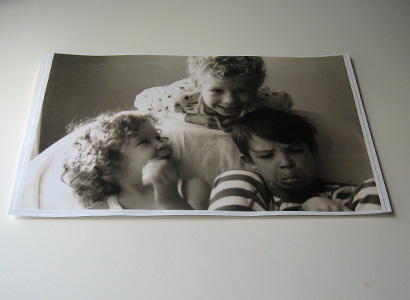
All year long, as the kid art comes home, display it if you like, but either right away or when you are done displaying it, put it in the big envelope. Keep as much as you want. At the end of the year go through all the art (with your kids, if they are old enough). Pick out the 12 best things, doing your best to represent each child equally. Now, download this large 2011 calendar. Once you download the calendar to your desktop, you can go online to FedEx Kinkos and upload to their site, print the pages in black and white on 11″ x 17″ card stock, and pick up your calendar pages at the shop. (For 8 1/2″ by 11″ size, download and print this small 2011 calendar). At the copy shop, color copy each piece of kid art onto 11” x 17” card stock (or of course, 8 1/2″ x 11″ card stock if you are making the small calendar). For the cover, print a blow-up of a photo of the kids.
Artcal_stack_1

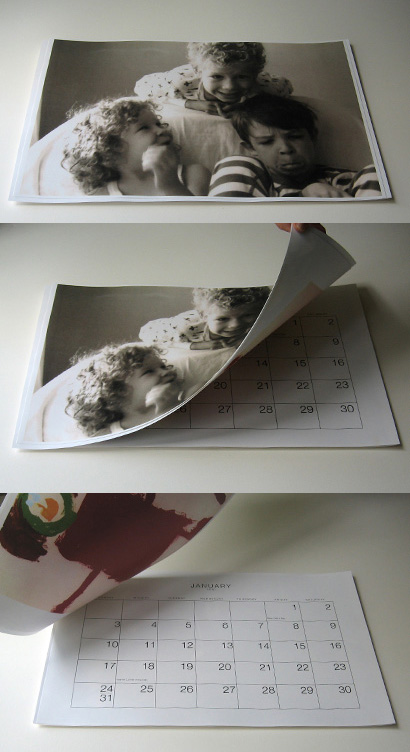
Now stack the pages starting with the cover picture and the “January” art back to back. Remember, the art will be positioned upside down so you can “flip” the calendar open.
Artcal_stack_all

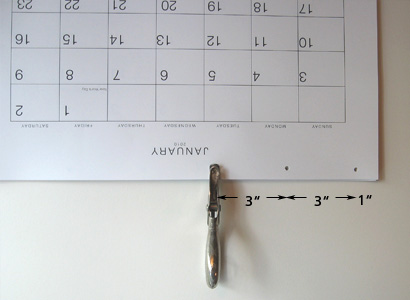
Once you have made the whole stack with calendar pages and artwork, use a hole punch to punch six holes along the “spine” of the calendar, in 1” from each edge and spacing holes every three inches.
Artcal_punch_1

For the small calendar, punch just three holes, with a three-hole punch if you have one. Punch a single hole centered at the top of the other edge of the pages for a hanging hole. Now, just slip six 3/4” binder rings through the holes (for the small size, three rings) and your calendar is ready for service!
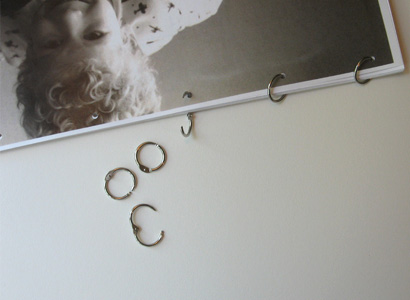
Artcal_rings

By the way, if you really have one of those engineer’s brains, you can have the copy shop print the calendar pages and art on opposite sides of the same card stock. But it helps to do it this way the first time so you have a template for how things need to be positioned.

We always make two copies of the calendar, one for our house and one for the Grandparents. As far as the big portfolio of art, you can either a) Empty it and start clean for next year, b) Keep the originals of the best 12, or c) Keep it all, put the year on the portfolio and buy a new one for next year. Art proliferation solved!
IDEA 3: WHAT’S IN HERE

drawer_two

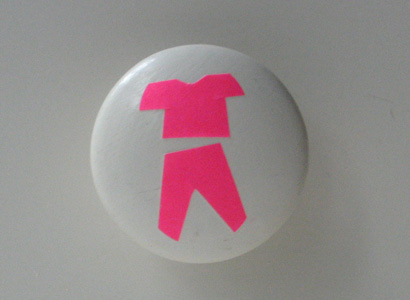
When my kids were small, I wanted a way for them to learn to put their clothes in their drawers. I really  didn’t want to write on the furniture, so I came up with this very simple idea.

drawer_one

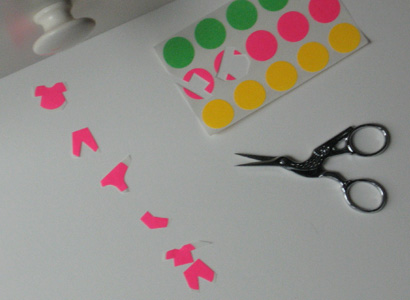
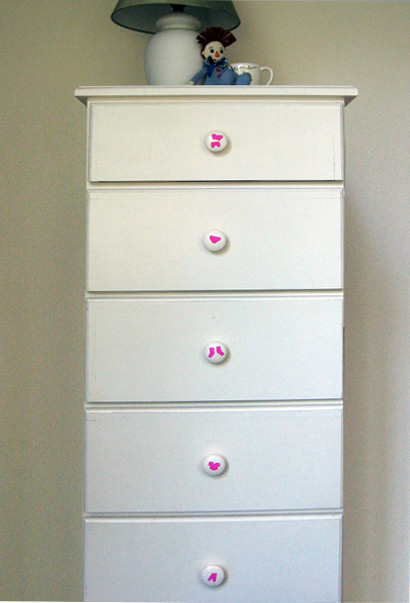
Using round colored stickers from the office supply store, I cut simple shapes of a top, pants, socks, underwear, and pajamas, and simply stuck them on the drawer knobs, or flat fronts, (depending on the furniture style).

The system worked, was simple and graphic, and when the kids outgrew the need, it was a cinch to peel the labels back off.

Dresser_5_drawers

IDEA 2: LAUNDRY DECODED

laundry_pete

Where there is family, there is laundry. And for some reason, one person (you) seems to always end up having to deal with it. This system is simple enough so that eventually, any family member can handle it. (Unfortunately you DO have to wait till they can walk).

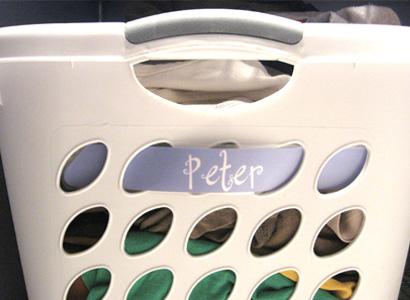
Buy one laundry basket for each family member and one for “house”. Permanently mark each basket with a person’s name, or use different color baskets. We made little signs and had them laminated at the copy shop, then simply “threaded” them in the basket’s holes. Now, when laundry comes out of the dryer, it gets folded and put in the correct basket. This can be a family chore or it can be done by the family’s “laundry expert”.

Once the clean clothes are in the baskets, the laundry expert washes her hands of them, so to speak. Each person is in charge of their basket. If your family is like ours, the baskets never leave the laundry room. Most people (who shall remain nameless) simply use their basket like a mini dresser so they never actually have to put anything away. But this matters not to you. If they want to go to the basement to change clothes, who cares? The laundry remains miraculously organized.