IDEA 40: LOVE THYSELF

Tulips_1

I thought I was the first person to recognize that the flight attendant’s recommendation to strap the air hose onto yourself before helping your kids was an obvious analogy for how to approach motherhood. As the flight attendant points out (without actually saying it) you won’t be any good to your kids if you are passed out for lack of oxygen. Maybe I was the FIRST one to see it, but Laura Bennett beat me to the punch as her book (Didn’t I Feed You Yesterday–highly recommended, I might add) opens with that very idea. Never-the-less, it is obviously a good and valid idea.

Being mom carries with it slights and sacrifices so numerous you lose count by lunch time. We know it. We do it every day. But since we knew the job was dangerous when we took it, we feel we have neither recourse, nor justification for complaint.

So, this is that month when we all secretly hope to receive something that reinforces the fact that we are loved and cared about. And if you are one of the lucky ones, and get just exactly the flower, trinket or candy that you crave, in exactly the right setting, congratulations. You truly do deserve it. But if you are one of the many deserving that come up just a little disappointed, let me offer this thought: If it’s expected that on Valentine’s Day someone who loves you gives you flowers (or candy), than it should be required for you to give them to yourself. In fact, if you DON’T give yourself flowers on Valentine’s Day, you are just as guilty as every other loved one who doesn’t.

By the way, I’m aware that the Valentine tradition of giving things is secretly a marketing ploy started by the retailers of the world. So if you are of the mind to ignore it, I say more power to you, sister.

On the other hand, it does make for a pretty good excuse to reward yourself, don’t you think?

IDEA 39: SHORE UP YOUR DRAWERS

Drawer_1

You could spend this month trying to keep all those resolutions you made. Or you could forget that, and just work on getting your kitchen drawers organized. I just love a well-organized drawer. It makes me feel just a little bit in control of things.

So, edit your stuff if you have too much. Buy a couple of drawer dividers. And have at it. Here are some photos of my drawers. I think my newer pot-holders were in the wash, and several of my food storage containers were in the freezer, but I took a “come-as-you-are-party” approach to these photos. They’re not bad. And real is good.

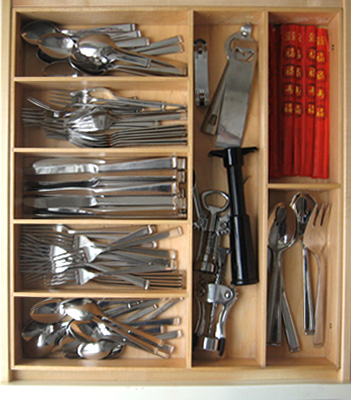
This drawer may have been my inspiration for it all. Years ago, when we put new cabinets in the kitchen, I got real live built-in dividers for the silverware drawer. (Previously I had used the plastic unit that you just pop into a drawer, with empty space around it, which collected other stuff). The fact that this drawer has remained organized all these years I think is a testament to how the right organization device will take care of itself. There’s a reason someone coined the phrase, “A place for everything, and everything in it’s place”!

Drawer_2

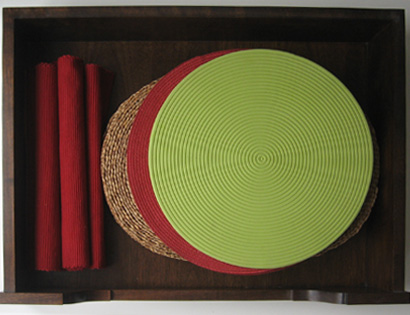
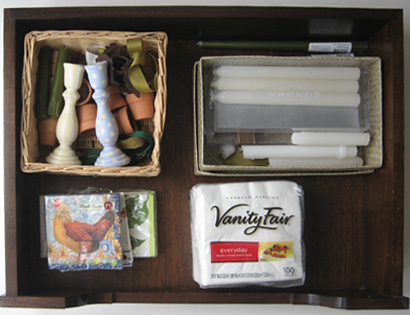
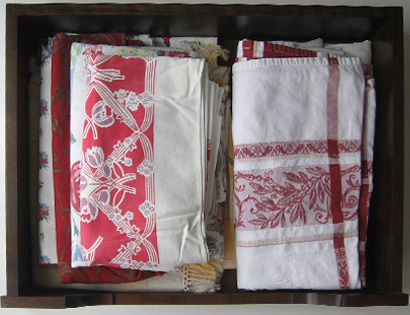
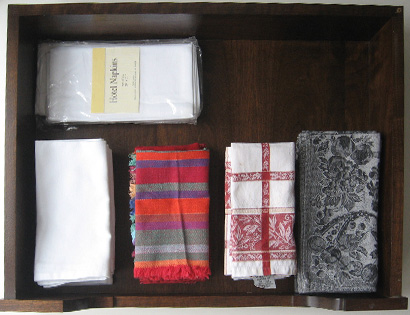
There are four drawers in my “peninsula” which house stuff to set the table:

Place mats

Drawer_9

Candles, candle holders, napkin rings and paper napkins. The box that the candles are in a woven box with a lid. Very sweet.

Drawer_8

Table cloths

Drawer_11

Fabric napkins

Drawer_10

The drawers below my main counter are arranged by task.

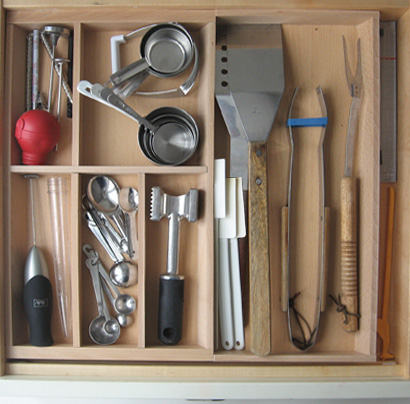
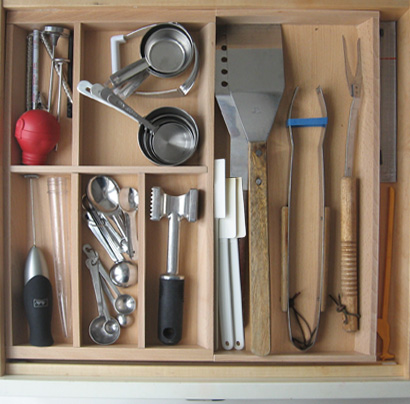
Baking, grilling and roasting: measuring cups and spoons, rubber spatulas, grilling utensils. Hint: use a heavy rubber-band (like the one found on broccoli in the produce section) to keep the grilling tongs from taking over the whole drawer. This drawer has adjustable dividers from IKEA. (Classy AND inexpensive!)

Drawer_1

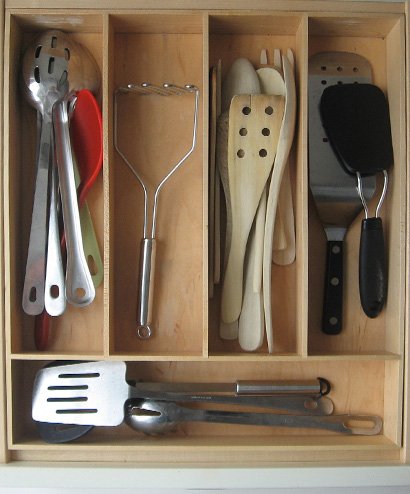
This drawer is at the stove: Stirring spoons, wooden utensils, flipper, spatulas, etc.

Drawer_4

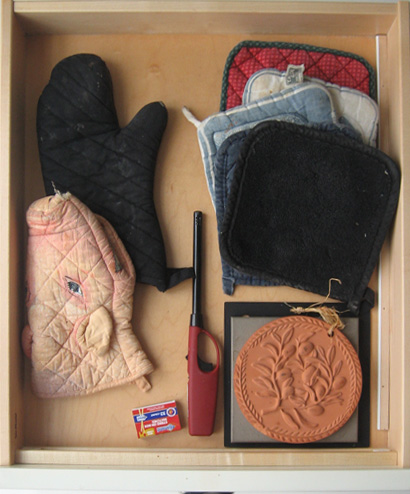
A second drawer at the stove: Hot pads, oven mitts, trivets and matches and stove lighter.

Drawer_5

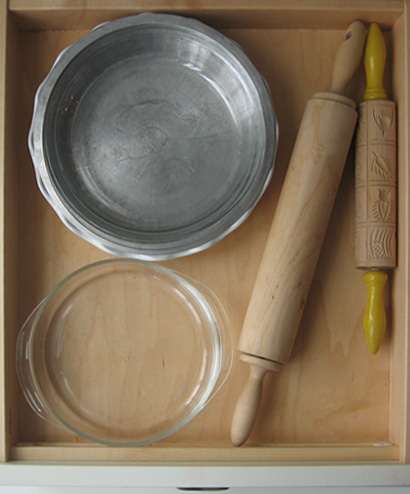
Pie plates and tins, and of course rolling pins.

Drawer_3

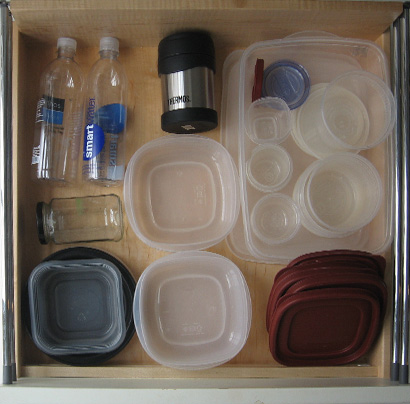
Food storage. I find this drawer is also a good place to keep empty water bottles for re-use.

Drawer_7

If you’ve been inspired, try fixing up even one drawer per weekend. In no time your entire kitchen will be organized!

IDEA 38: MAKE A GINGERBREAD FAMILY TREE

Gingerbread_Family_Tree

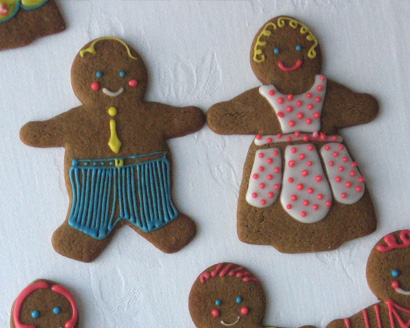
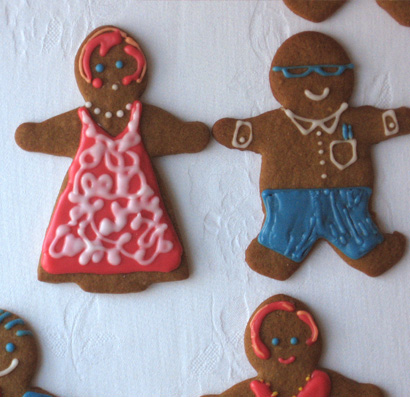
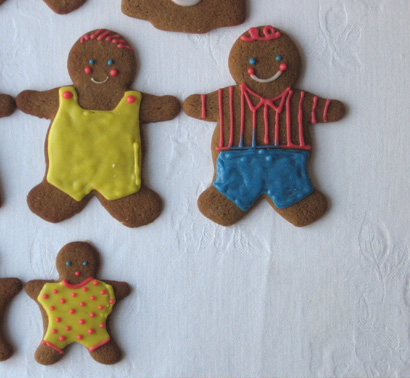
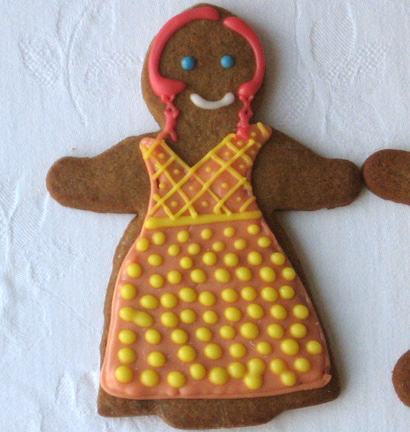
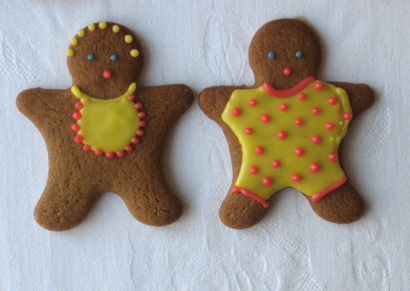
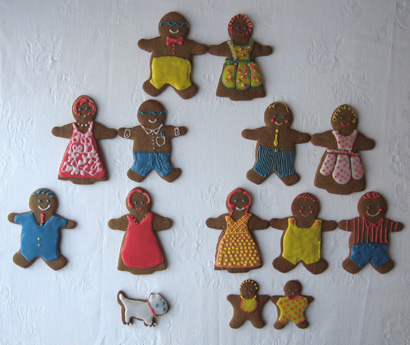
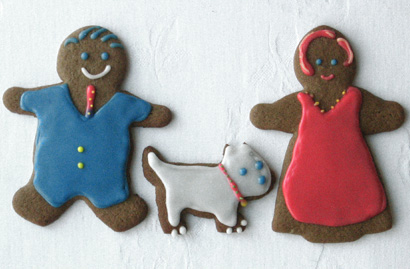
This holiday season you can be with your loved ones, even if no one is able to travel. This very sweet and inexpensive idea was inspired by my daughter who, during our holiday cookie bake this year, decided to represent each family member in gingerbread form. The resulting “Family Tree” (captured on our FaceBook page here) was such a hit that we’ve decided to give you some more details. And, as if that weren’t enough, the project was showcased on Twin Cities Live, a local Minnesota television program. Because of the show, our “Family Tree” includes the hosts, Elizabeth Ries, and John Hanson as well as Elizabeth’s Westie, Henry!
ElizJohnHenry_Gingerbread

You really could complete this project with only one cookie cutter, the gingerbread man. But since we happened to have a gingerbread girl and a mini cutter, we added dresses and babies to our group. Our little dog was hand cut-out, but if you have a dog-bone shaped cutter, that is another way to include the family pooches in the mix. Of course if you want to include the cat, fish, hamster or whatever, we encourage you to do so!

We used the gingerbread cookie recipe from a Williams-Sonoma cook book. Here’s a link to the recipe on-line. The trick with the cookie dough was to divide it into smallish hunks and chill before trying to roll out. You really need to move quickly and get the cut-out cookies onto the baking sheet before they have a chance to warm up. Bake lots of extras, then let the cookies cool completely.

As I’m sure you have realized there are lots of squeezable cookie frosting products available. And although I truly believe that you should do what works for you, I’m here to tell you that I still think the best option is to make your own. It’s much less expensive and gives you so many more color options. But also, in my not-at-all-official trial of a few of those products, I never found one as easy to control as my own. If for no other reason than, if you make your own you can vary the thickness until it’s right.

Frosting ingredients:

Powdered Sugar

milk

vanilla (optional)

food coloring

For each color, measure one cup of powdered sugar. Add about four teaspoons of milk (and 1/4 teaspoon vanilla if you like). Mix with a spoon to get a glossy-smooth mixture. Now add drops of food color. Here are the quantities we added to one cup of sugar to get our colors:

Poppy Red: 10 drops red

Goldenrod: 4 drops yellow

Blue: 8 drops blue

If your frosting gets too thin, add a little more powder. If it’s too think, add about 1/4 teaspoon milk at a time. For the large area background colors we found a little thinner frosting worked better. The frosting lines would “melt” into each other and form a smooth, even surface. When we made dots or other small designs we found having the frosting slightly thicker worked better.

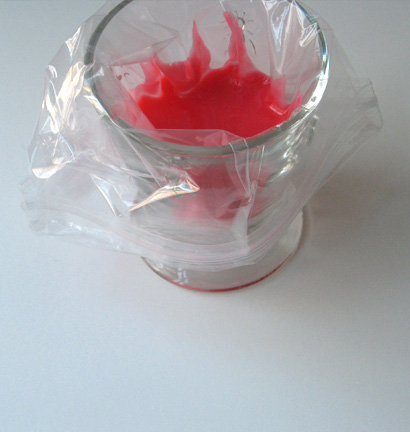
Once you get all your colors mixed in individual cereal-sized bowls, it time to make your decorating tools. Each color will require a small freezer “zip” bag. Zip open the bag and place one corner of it in a short glass. Now turn the top edges out and down, draping over the glass rim on the outside. Pour the icing as close to the corner of the bag as you can.
Frosting_fill

Zip the bag closed, but keep each bag in it’s own glass. This will help keep the mess to a minimum, once you’ve cut them open and need a place to set them down.
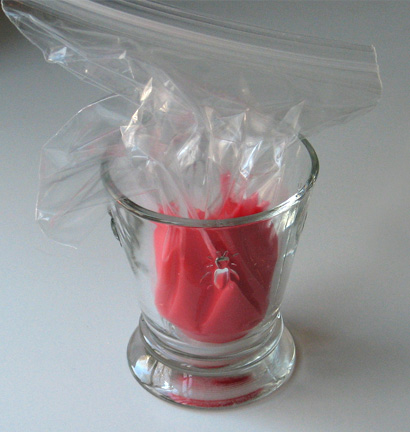
Frosting_baggie

To decorate, snip the tiny corner off the bag. Grip the closed bag ‘behind’ the icing and gently force the icing out the hole. Of course the larger the hole, the thicker your line will be. If you find you’ve made the hole too big, put a new bag in the glass, cut a good inch off the too-big corner and use that nice big hole to squeeze the whole mess into the new bag. Then you can try again.

Now, pick a background color, for example John’s blue suit, and outline the shape of the suit. Now it is as easy a pie to fill in the area just like a coloring book. We found it easiest to fill in with repeated concentric shapes, starting just inside the outline and repeating the shape until they got smaller and smaller and eventually filled in. If you have mixed the icing to a glossy, viscous consistency, you will end up with a nice smooth solid shape. Wait until the background color dries completely, then add the details. This sequence shows the process.
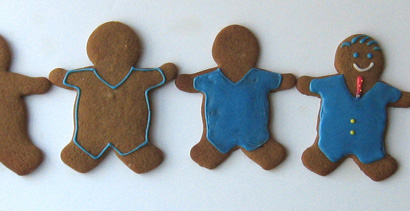
John_process

Make your family members any way you want. Here are some of ours, in case you need ideas.
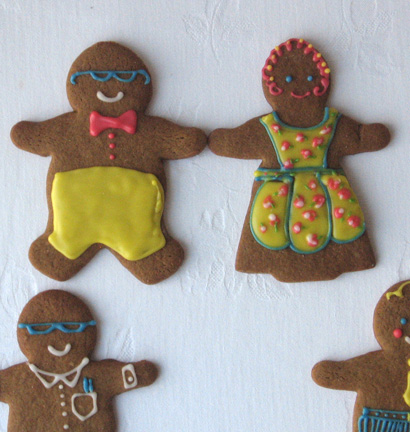
Gingerbread_Grandparents

Gingerbread_Parents

Gingerbread_In-Laws

Gingerbread_Brothers

Gingerbread_sister

Gingerbread_Babies

Of course I have to point out the ladies (my mom and I) in our BellaPamella aprons! My mom is wearing the Eunice in Kitchen Fruit and I’m sporting the Nora in Ruby Dot!
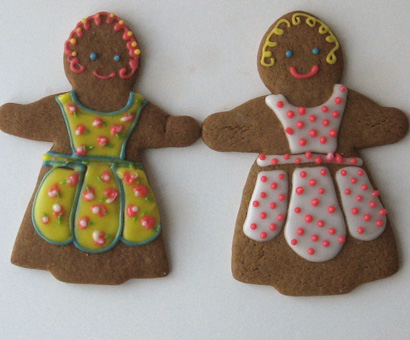
Gingerbread_aprons

Once your gingerbread family tree is finished you can display it on a platter, or bag each one up and tie it with a ribbon to hang on your tree, or theirs. Make a small paper tag with the name on it, slip the ribbon through, and you have a very special handmade gift to give. By the way, if you arrived here from the Twin Cities Live site and wish to see all the projects highlighted on that show, either click on the Twin Cities Live category to the right, or click here.
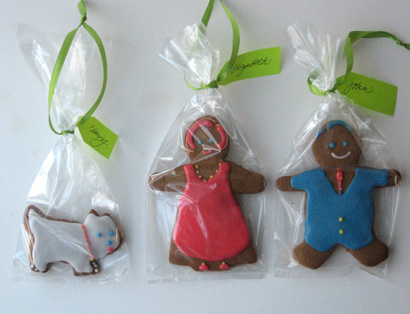
TCL_bagged_cookies

Happy Holidays! And don’t forget to have fun with your family, gingerbread and otherwise!
IDEA 37: SHOW YOUR THANKS

Thanks_writing_Cait

Whether you are hosting a big dinner, or preparing to head out of town, if there’s a Thanksgiving meal in your near future, you know how lucky you are. Thanksgiving is often one of the few times of the year most of the family is together.

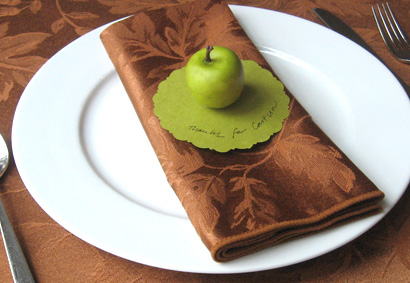
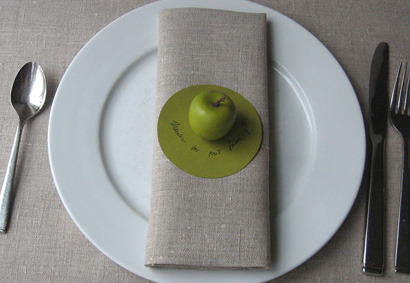
For this year’s table, why not make sweet little name place cards that do a little more than just point out where someone should sit? This simple idea combines a few things I love about Thanksgiving. It’ll make the table even more special, it’s an easy project, and doing it allows me to dwell on all the things I’m thankful for.

Thanks_Brn_setting

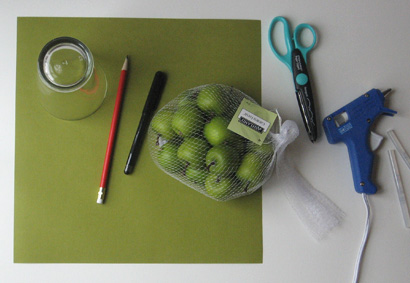
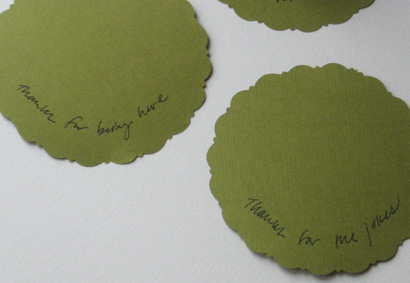
For the project you’ll need some pretty paper and tiny faux green apples from the craft store, a hot glue gun, a pencil, a black fine point pen, something about 3 1/2″ round to trace around, like a glass, and either plain or fancy scissors.

Thanks_tools

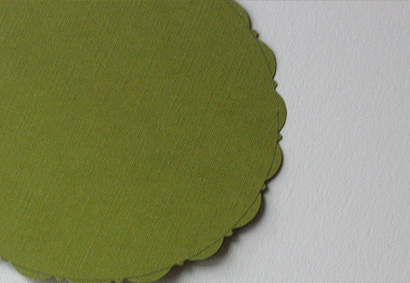
Use the glass and pencil to make 3 1/2″ circles on the pretty paper. You’ll need one per person. If there is a right and wrong side, make the circles on the wrong side. If you are using the fancy scissors, cut along the outside of the circle, so you will still see the drawn circle when it’s cut out.

Thanks_fancy_edge

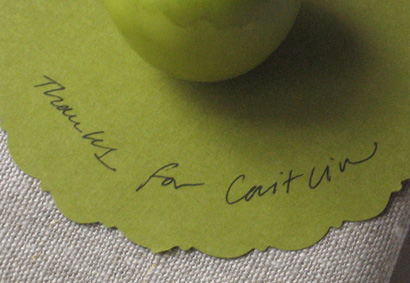
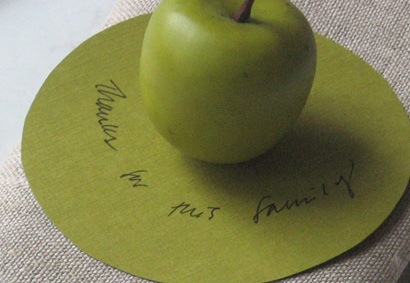
Once you’ve cut all the circles, on the top side, you may put a very light pencil line in an arc about 5/8 ” or so from the edge. (This is optional). Then, with the pen, along an arc shape, hand write “Thanks for [NAME]” for each person that will be at the table. The last step is to hot glue a tiny faux apple to the center of the circle.

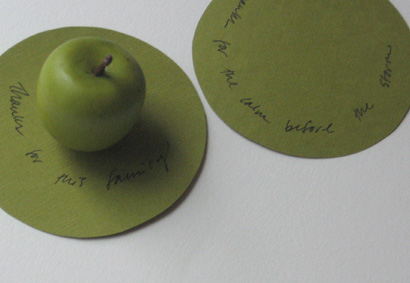
If you don’t want to tell people where to sit, another idea is to name things you are thankful for. Then, like “stem gems” people can pick whatever sentiment they like! Some thoughts could be:

Thanks for being here.

or

Thanks for the happy.

Thanks for the warm.

Thanks for the calm before the storm!

Thanks for this family.

Thanks for this meal.

Thanks for the jokes.

Thanks for how I feel.

Okay, I couldn’t resist a little rhyme! Here are a few more pictures. I almost can’t decide if I like the plain or fancy cut. Do what works for your decor and make your thankful table as plain or fancy as you like! And Thanks for reading!

Thanks_fancy

Thanks_plain

Thanks_setting_family

Thanks_ECU_family

IDEA 36: MAKE A BOO! BOOK

Kid_Book_1

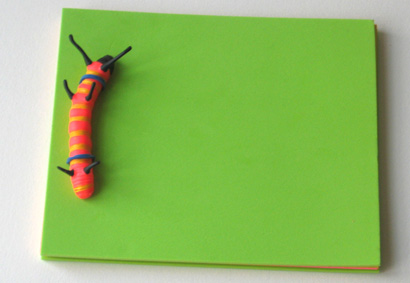
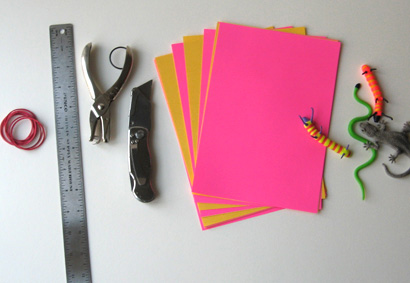
Here’s a sweet project you can do this weekend. You might even challenge yourself to use only items you already have, although it is also fun to shop for some bright colored papers. The finished size and function of the book is up to you (and/or your child). We made a photo album for your Halloween pictures, and two smaller books your child can use as his or her drawing/sketch book, or journal. Here is what you will need to make a fun book project:

Kid_Book_2

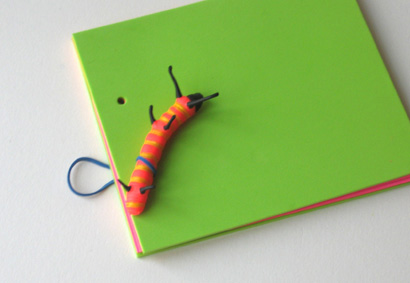
First you need the covers, you can use card stock or, for a chunky book, craft foam. For the pages just use regular paper. It can be plain white printer paper, colored paper, even lined paper for a journal. You’ll also need rubber bands, a ruler, a hole punch, a mat knife or other cutter, and a fairly rigid skinny toy. For a Halloween costume album, choose a plastic snake or bug. You’ll see later that you can even use a crayon or colored pencil.

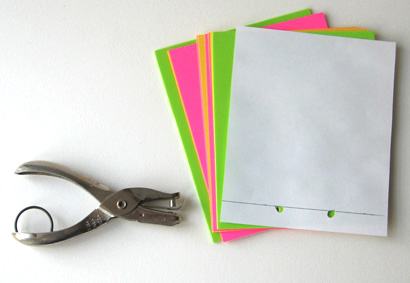
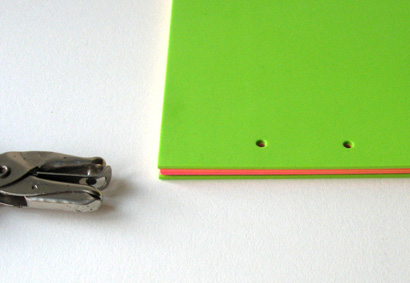
Cut the covers and all the pages to the same size. Our mini bug journal is 5″ x 6″. We used neon green craft foam for the covers (2 of them) and alternated pink and yellow paper to make the pages. Once everything is cut to size, use a plain piece of 5″ x 6″ paper to mark your hole punch placement. From the short edge (the spine edge) draw a line 5/8″ away from the edge. Then, on the line, make a mark 1 3/4″ down from the top and another 1 3/4″ up from the bottom edge. This is where you will punch your two holes. Punch them on your plain paper. Now you have the hole pattern for all pages.

Kid_Book_3

Use your pattern to punch all the pages and covers. You will probably not be able to punch the whole stack at once. Just do little stacks until they are all punched.

Kid_Book_4

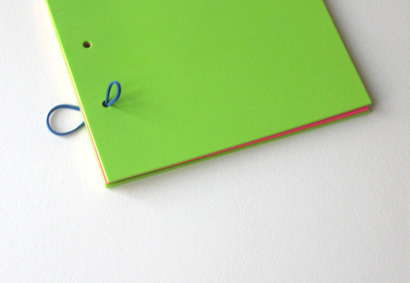
You’re almost done! Now take a rubber band and pinch it so you can “lace” it trough the bottom hole from the back of the book to the front. Don’t worry if you can’t thread it all the way through. Just do a few pages at a time until you’re through the whole stack.

Kid_Book_5

Once you’ve got it through like this, stick the object into the loop to prevent the rubber band from pulling out when you do the next step!

Kid_Book_6

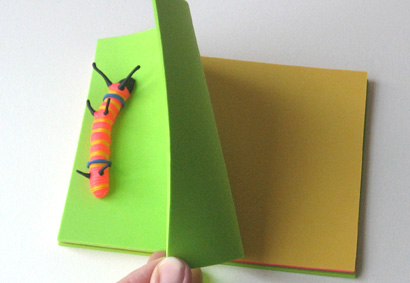
Now, just pull the rubber band tight from the back and thread it through the top hole just as you did the bottom one, back to front. Once you get it through the cover, loop it over the other end of the toy and Voila! You have a super fun and inspiring journal!

Kid_Book_8

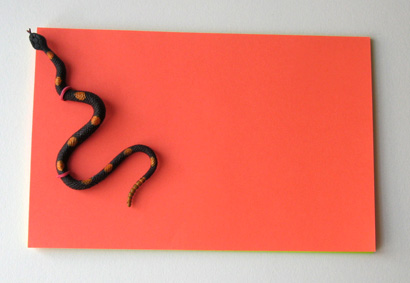
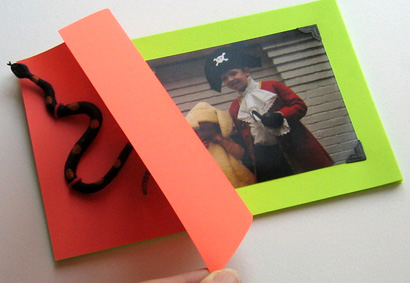
For a creepy crawly Halloween costume album we used half sheets (5 1/2″ x 8 1/2″) of orange card stock for the cover and acid green for the pages. A black and orange plastic snake, and black photo corners finished the look. Your holes will be in different places depending on the size of your object and length of your rubber band. It’s usually best to center the two holes so the top hole is the same distance from the top edge as the bottom one is from the bottom edge.

Snake_Book_1

This book is just the right size for all the photos of all the kids in their costumes. Don’t forget to add new photos each year.

Snake_Book_2

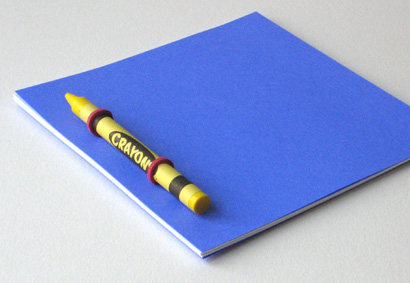
And the simplest of all, the “sketch book” uses plain white printer paper, and a crayon or colored pencil to form the binding. This little book measures 5″ x 5″.

Crayon_Book

Now, just think of all the cool little books you can make with things around the house! Happy bookbinding!
IDEA 35: SCHOOL PORTRAIT BINDER

School_pics_notebook

One of the classic mementos of childhood is the annual school portrait that comes home in a big envelope. If you are organized, you will be able to locate the envelope when it comes time to send the pictures to the rellies, such as in the holiday card. But how many of you can put your finger on the photos from last year, or the year before?

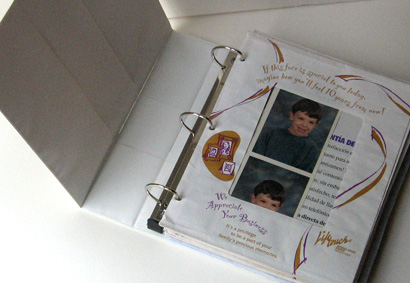
Miraculously, I have a full set of my own school portraits from my childhood, and I’ve always been grateful that these precious artifacts survived in tact. Possibly because of this, I decided I needed a solution to house all my kids’ school photos. Here’s what works for me. As soon as we get the school pictures I simply three-hole punch the edge of the envelope where the flap is. (Making sure to shake the photos away from that edge first).

School_pics_holepunch

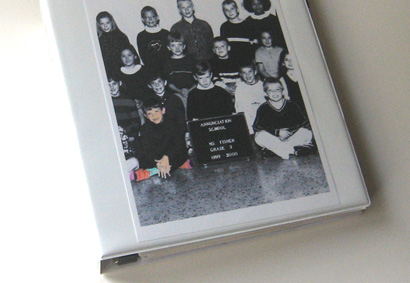
I purchased a 3″ (heavy duty) three ring binder. The picture envelopes of all my kids go into the binder, although if you prefer you could have a separate binder for each child. My binder has the option of slipping a photo under the clear plastic. So I made a black and white blow-up of a section of my son’s kindergarten class photo. Then I took some colored pencils and put color only on him. That picture slips in the front forming a sweet book cover!

School_pics_notebook_cover

I did the same for my other two children; one got the spine and the other got the back-side of the binder.

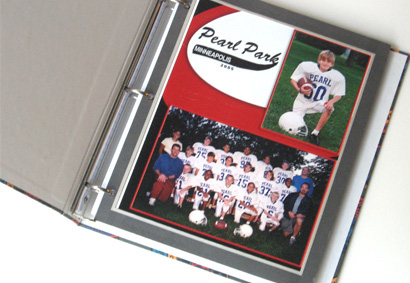
This system also works beautifully for team photos. Just hole-punch right through the cardboard frame that came on the photo. You can have a book dedicated to each child, or to each sport, or put them all in one, depending on the number of photos you’re collecting.

Team_photos_notebook

If you happened to see me demonstrate this idea on Twin Cities Live, and would like to see the rest of the projects I showed, click here, or click on the Twin Cities Live category to the right. And do let me know if you try any of them!

IDEA 34: CHANGING SEASONS BASKETS

Bin_tag

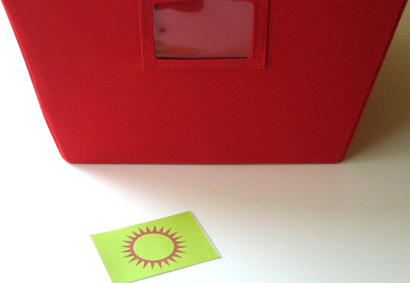
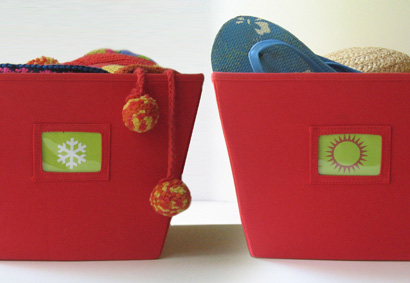
This is a pretty simple idea inspired by those nifty bins with the place to put a label in a holder on the front. I was using them for off-season gear in our closet, but the contents (of course) kept changing with the seasons. My solution: For each bin I made up two tags, one for summer, one for winter. Voila, a solution for summer, (both bins use the winter tags) a solution for winter, (switch out the tags and both bins house the summer stuff) and, in a season like this, where only half the summer stuff is put away, use one of each. (Store the extra one behind).

Changing_Seasons_bins

You can download and print these cute, visual, seasonal bin markers on card-stock, if you like. There’s extra background, so cut them to any size that works for your needs. Happy organizing!

IDEA 33: COLOR ME ORGANIZED

Marker_Organize_2

It’s September. Which means you very well have replenished the stock of colored markers, pens, and pencils. Let’s face it. When you have an organized environment it really does inspire use.

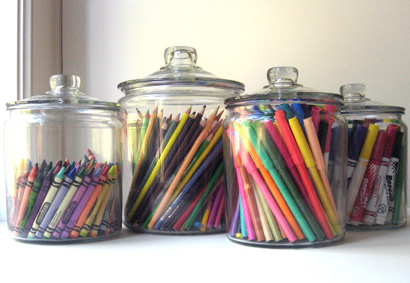
This simple and sweet idea comes from my friend Anne who, like me and probably you, is thrilled to figure out a clever way to keep kid-stuff organized. Anne’s boys had a jumble of colored markers, pencils, crayons and pens. The supplies were a big hit when they were first purchased, but soon became spread all over the house, buried in various drawers, lost in the general chaos of life at home.

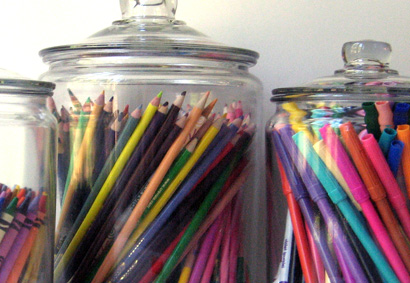
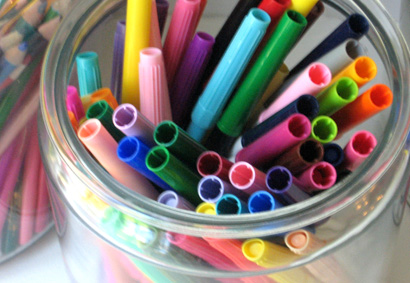
Then Anne got the idea to purchase clear glass jars from the kitchen department of a local big box store. The jars came in two sizes, so she chose a selection to house the various supplies. All the crayons went in one, the colored markers in another, and so on.

Marker_Organize_4

The resulting jars now inspire her boys to create. They bring a jar to their room, and when they’re done, they bring it back to the shelf in an open cupboard in their sunny front room where the display looks as great as it is functional. (How many kid-stuff solutions can you think of that not only clean things up, but add to your decor as well)!

I don’t know about you, but now I’m inspired to go out and buy all new pens just to do this.

Marker_Organizer_1

IDEA 32: MAKE HEALTHY WORK FOR YOU

Vitamin_organize_3

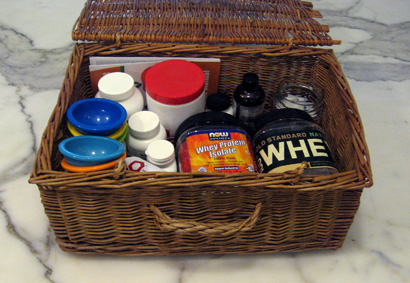
Our family has taken to trust supplements and vitamins in a big way. It’s a great solution when you have kids running everywhere and you want to make sure they are getting their fair share of the good stuff. But if your kitchen counter is like mine, it has a way of looking cluttered even when you tidy up. The myriad bottles of vitamins, fish oil capsules and kelp were one thing, but when we started buying the mega-jars of whey protein it was getting a bit unsightly.

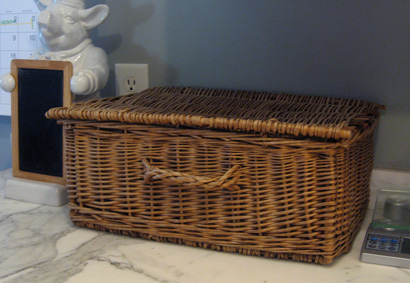
My solution? First, I found a sweet old basket with a lid at a tag sale. It used to be a picnic basket, I guess, but you could use any container with a lid that fits your decor.

All the little items went in without problem, then I found square jars that fit in the basket. I used peanut jars from Cosco. They are plastic and have large plastic lids. I cleaned the jars and removed the labels from the whey containers and taped them onto the smaller jars. Of course I had to cut the labels smaller to fit. I wanted to use the labels rather than just writing on the jars for two reasons: First, I wanted to keep the nutrition info, and second, I knew I would need the visual of the actual products so next time I would remember which one to buy! I scooped out enough of the whey to fill the smaller jars and the mongo ones went in the pantry.

Supplement_organizer_2

I used another empty jar to house small packets, and there was also room for a carb counting booklet. Everything fits inside and is easily accessible, then with a flip of the top, it’s all out of site!
Supplement_organization_1

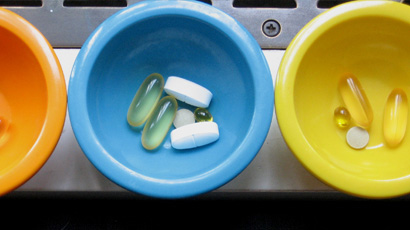
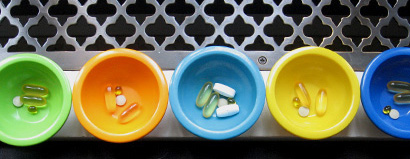
On the subject of ways to organize keeping the family healthy, we found a set of tiny, colored melamine bowls at the big box store. They came in a set of six, in six different colors. Since we have five in our family, we had each person pick their color. Now, in the morning, I divvy all the vitamins and supplements into the bowls. They sit there as a reminder to each family member whether or not they’ve taken their vitamins that day. By dinner time the last straggler has taken theirs and the next morning they all get refilled. An idea that not only beautifies your space but keeps you healthy? Now, that’s a very BellaPamella idea!
Vitamin_organization_5

IDEA 31: DO SUMMER LIKE A KID

Summer_kids

The combination between the end of school and summer’s warm weather provide the perfect opportunity for an annual family trip. Here in the mid-west, countless families head “North to the Cabin”, and I’m not the first to notice how time slows down these hazy lazy days.

We take the annual summer vacation to the family farm in northern Michigan. And since our children were born, it has become the time and place that, once a year, they bond with their cousins.

Northern Michigan cherry orchards, sand dunes, and lakes have been the backdrop for relationships that have been playing out two weeks a year for the duration of their young lives. And as a parent, it’s one of my favorite things. It has not only cemented the relationships of the children, but of myself, my siblings, parents, and in-laws.

Jacqueline M. deMontravel, editor of Romantic Homes Magazine, in her letter from the editor, expressed what I consider a near perfect reflection on summer. I had to share it with you. Here is Jacqueline’s letter, with a title that could have been the title of today’s idea. May everyone reading this take a moment to breathe in and quietly savor summer, whether you choose to travel to the woods, or just the back yard.

Let It Go

July follows the loose, relaxed style of a past-season sundress. Fully entrenched in summer, stray towels, flip-flops and all the necessities brought back from beach day can wait an hour, or day, to be tidied up.

July is the coffee break of the calendar year. Urgent matters become less urgent. Casual conversation lingers into the evening. The style of the summer follows these tenets. You are less likely to succumb to modern conveniences, opting for the entertainment provided by the season. There are many: falling asleep outdoors, losing a day to the garden and listening to the sounds of night.

At home you cook more. Meals are made with fewer ingredients but fresher foods. People come over frequently. There is more of a desire to entertain when you are so relaxed, feel less strained and have no qualms if a guest may spot a basket of laundry.

It is a forgiving season. It is also fleeting, which is what July is about.