Archived Ideas for ‘Home’

IDEA 86: DARE TO COMMUNICATE

July_Note

You never know where the next inspiration is going to come from.

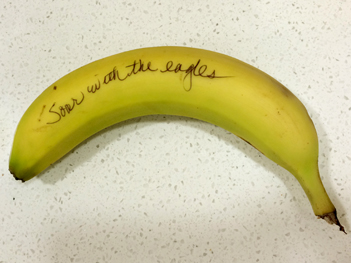
Recently, I was traveling and stayed at one of those chain motels with the free breakfast included (what’s not to love about that?) So, I was already happy about getting a free banana, when I saw that someone had hand-written a note of well wishes on every one. Generally, the notes were all a variation of “Have a great day”, I chose “Soar with the eagles”, which inexplicably lifted the next couple hundred miles of my road trip.

It occurred to me how simple, yet powerful these little unexpected ball-point moments of inspiration had been, from one stranger to another, placed ingeniously on the part of the fruit that would be stripped off and thrown out anyway.

It suddenly made me nostalgic for the days I used to pack lunches for school. Wouldn’t this be a fun way to remind a child that his lunch was lovingly packed? (Or to pontificate on the importance of potassium–whichever is your whim).

So, in this world of email, text and instant messaging, I dare you to try zagging when others zig. Pick up a ball-point pen and a piece of food and have at it! And while you’re at it, Soar with the eagles!


IDEA 85: MAKE YOUR MARK

Mark_Lilly

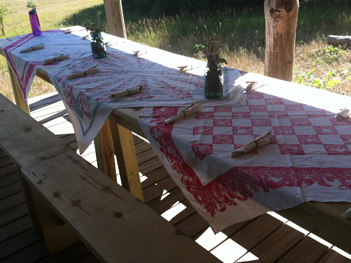
My extended family has been congregating on our family farmland for many summers. And the highlights of the reunions are the beautiful big meals, prepared, served and enjoyed outdoors.

Mark_party_scene

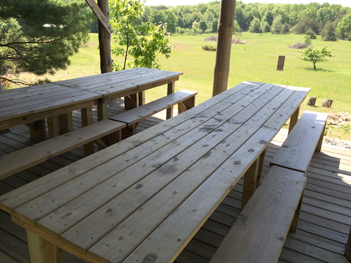
A handsome open-air structure, made by my brothers and cousins hosts the meals, and several years ago we replaced the mismatched tables and chairs with something sturdy enough to survive the northern Michigan winters.

Mark_tables and benches

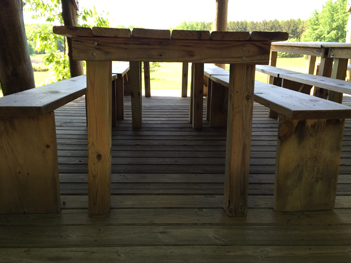
My brother made the simplest of designs and all hands helped out to build the iconic tables and benches.

Mark_Table_end

With all the materials (treated lumber and screws) coming from the lumber yard, the solution is smart, elegant and very cost effective.

Mark_Ben

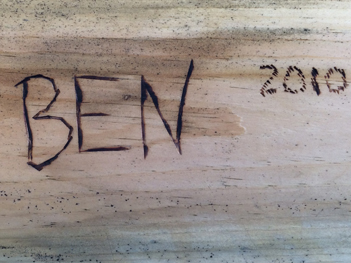
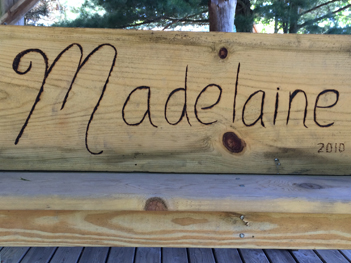
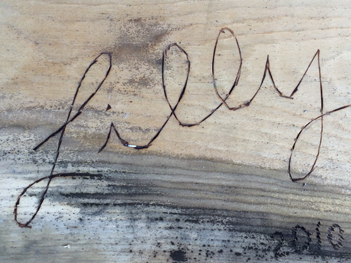
Even better, each kid who put a bench together got to burn his or her name in the bottom, proof that they pitched in and deserve their place as a crucial piece of this family.

Mark_Mad

The otherwise humble tableau is dressed up with our well worn and faded tablecloths.

Mark_tablecloths

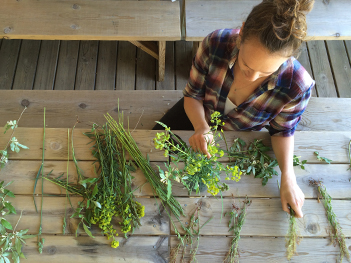
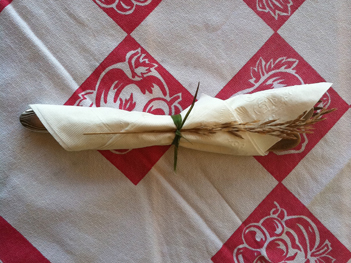
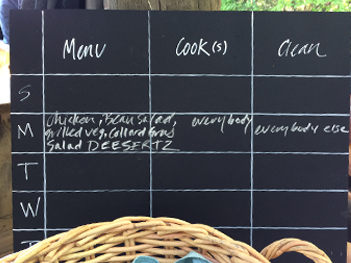
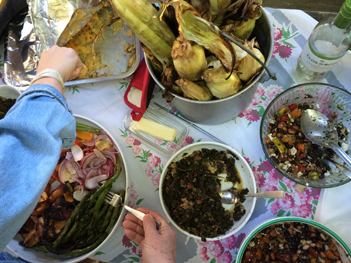
And, of course, lots of helpers make amazing food and natural decor.

Mark_wildflowersMark_napkinMark_GrillMark_Menu2Mark_Picnic_food

It’s an annual ritual, that none of us could imagine going without. I say, take a stand. Embrace a tradition. And make your mark.


IDEA 84: BEAUTIFY SOMETHING

Bench_before

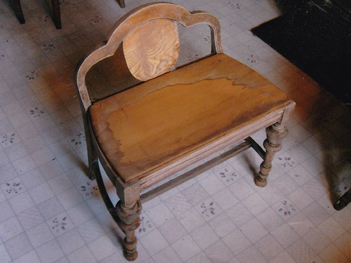
I love to troll around flea markets looking for that odd old thing that’s just begging for me to buy it and make something out of it. Such was the case when this little boudoir bench caught my eye. It had a raggedy finish and was topped by a flat piece of wood with a garish striped fabric stuck to it. Still, the unusual piece and deeply turned legs grabbed me.

Bench_Detail

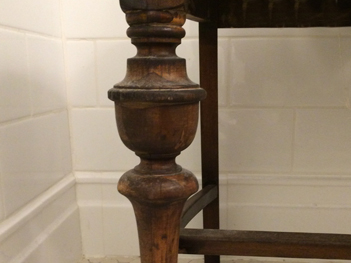
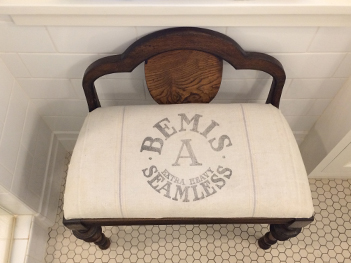
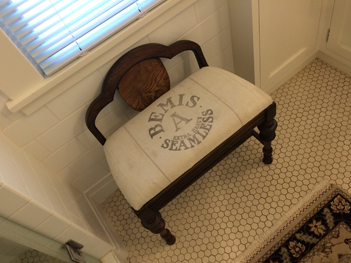
I stripped, stained and finished the legs and back. And cut a nice thick piece of foam for the seat. But for the longest time I couldn’t decide what fabric to cover it in. Until one day when I found myself at another flea market. And was standing there holding this beautiful old faded seed sack that said “Bemis Extra Heavy Seamless” on it.

Bench_Top

That made the perfect cover. The result is so sweet, and dare I say, chic? I noticed Restoration Hardware was selling a similar look in their latest catalog.

Restoration_Hdwe

Now the bench lives in my bathroom, at the ready if you’re looking to set down your towel, or need a place to prop the iPad next to the tub. And everyone who comes in there comments on it.

Bench_In_Bath

I just tell them it’s from Restoration Hardware. (Not really, but it so could be).

IDEA 83: ANTICIPATE

April_Garden_beds

My husband, the gardener of the household, calls April in Minnesota the “cruelest of all months”.

Your natural clock tells you it’s time to plant, but history tells us we are better off waiting, than subjecting a plethora of tiny growing things to a surprise freeze or snow shower.

But that does not keep him (and most Minnesotans who are so inclined) form tidying up the gardens in anticipation of our short but much beloved growing season.

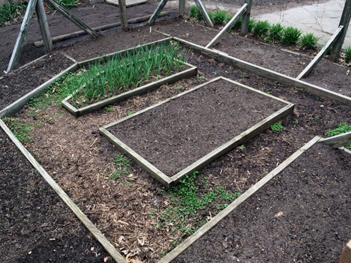
While a cursory glance around the yard doesn’t look like much, his appreciation and care for what is to come has made me much more aware of the coming beauty. The garden that’s been buried in snow all winter is now completely tidied up. It’s all dirt and wood chips, with the exception of two green things: The garlic bed, planted last fall is brimming with new green shoots that apparently were at work all winter under a cozy blanket of snow. And the wood-chip path is being taken over with soft green clover. I asked him why he left the clover when he cleared out everything else. And, while I would think most gardeners would consider this a weed, he appreciates the clover for the soft bed it forms for bare feet. Much preferable to wood-chips on the tootsies.

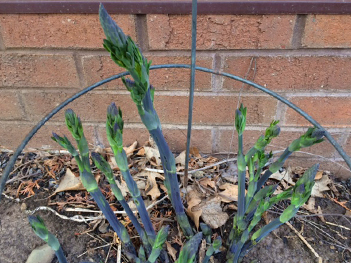
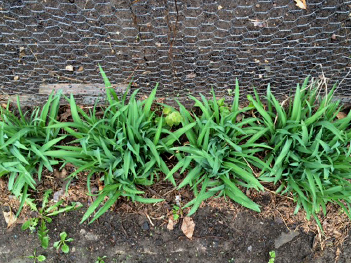
Elsewhere in the yard, a very young False Indigo has been guarded by a wire form. If he hadn’t lovingly cleared out around it, I may never have noticed. And I would never have known that at this young stage, a False Indigo looks exactly like asparagus poking up into the world.

April_False_Indigo

Teeny-tiny Forget-Me-Nots are up in force, but so small they’re easy to miss.

April_Forget-Me-Nots

Just outside the vegetable garden, fresh green Stella d’oro daylilies are preparing for the show.

April_Stellas

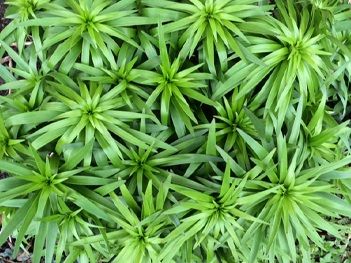
Before the red Asiatic lilies appear, the foliage makes a pretty green star pattern.

April_Lilies

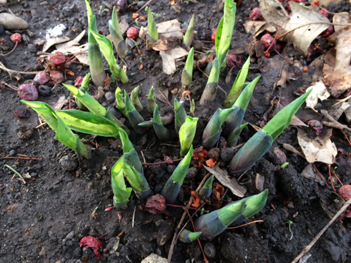
And it wouldn’t be a Minnesota yard without a host of different hosta varieties peeking up.

April_Hosta

In all the brownness, our bright pink Magnolia tree tries to hold its own.

April_Magnolia_budApril_Magnolia

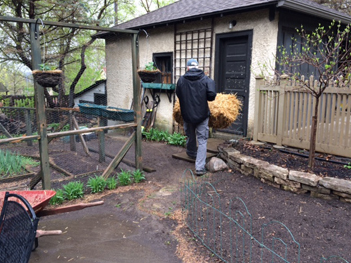
And the April rain reveals that all the loving preparation has it’s own beauty.

April_brown_yard

In the coming months, the garden will begin bursting with vegetation. The gate will be dripping with a bean vine so prolific, it makes you want to laugh. This place will get so lush and beautiful, coming home every evening will be a celebration.

And, once again, we’ll all be reminded why we put up with Minnesota winters.

April_Summer_Beauty

IDEA 82: GO HOMEMADE

Maple_Syrup_Sunny

I remember reading a spoof on Martha Stewart where she purportedly had a recipe for making your own water. And this comes close. But.

When you live in the Midwest, well, when you have kids, sometimes you do things you never dreamed you would in the name of adventure.

We live in Minneapolis, the “South Metro”. We are a stone’s throw from the city in an urban neighborhood. And we have several mature maple trees, including a majestic Sugar Maple. When our neighbor called a tree trimmer to help remove a large branch from one of his trees, we observed from next door. Where the limb was removed, a veritable river of sap flowed out.

Huh, we said.

The next thing I knew, my husband had drilled two holes in our maple and began collecting bucket after bucket of pure maple tree sap.
Maple_Syrup_Buckets

He went online to discover that any maple tree can produce beautiful maple syrup, and our sugar maple would produce at the rate of 40 gallons of sap to one of syrup. Why not?

According to the online recipe, the time to sap the sap is when temperatures drop below freezing at night and rise into the 40s during the day. In Minnesota these conditions typically occur during the month of March, but depending on where you live, it could be anywhere from mid-February to April.

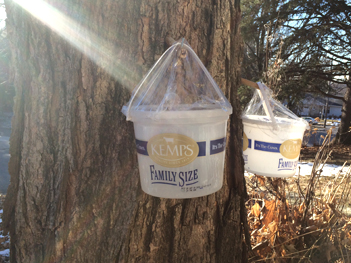
And get this: you probably have everything you need to produce maple syrup right in your house. Basically, what my hubby did was: Collect the sap in ice cream buckets, emptied each night into a 5 gallon paint bucket from Home Depot.

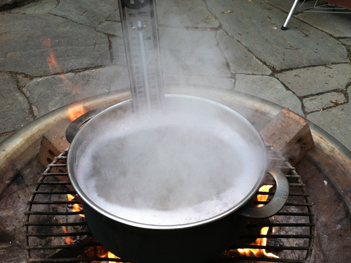
Once he got a bunch (and the sap seemed to be slowing down) he set up a boiling station out on our back patio. It seems there is a lot of boiling and evaporation, (which means doing it in the kitchen is not a good idea, unless, I guess, if you have a lot of wallpaper you’d like to remove).
Maple_Syrup_Boil

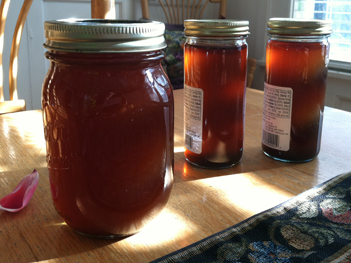
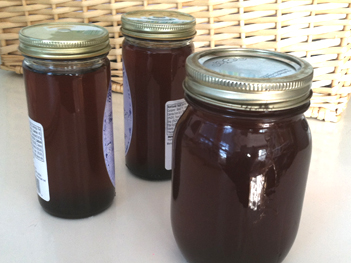
He filled my big soup pot with sap and brought it to a boil. Then he sat and monitored. As the liquid boiled down, he added more, always keeping a steady boil. Our 5-gallon Home Depot bucket of sap translated itself into one pint jar and two more little jars of delicious maple syrup. Enough to keep this family in homemade maple syrup until next spring.
Maple_Syrup_Bounty

So, was it worth it? Well, if you were just looking at the money savings, you would answer no, not even close. But what value would you put on creating something as magical as maple syrup straight from your yard, with no special tools at all? I’ll leave that one up to you. But if you do decide to give it a whirl, you must let me know! You are a sparkle in an otherwise world of practical, Martha!
IDEA 81: COMBINE THE POSIES WITH THE SWEETS

Apple_Rose_box_of_R

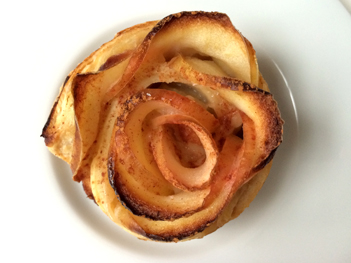
I just had to make this the February tutorial because, what‘s better than sweets AND flowers to celebrate Valentines Day? Whether you make these for someone else or yourself, you’ll feel the love.

Sometimes a food recipe photo or tutorial is super-pretty and looks so easy. But when you try to make it, the result is much more difficult, and less attractive than in the picture. Well, this one is different! It really is that easy, and these turn out as cute as they say.
Apple_Rose_O

You may have seen this fun link for “Apple Roses” .

I wondered if it was really as simple and wonderful as it looked so I tried it. And, contrary to what I was expecting, they turned out every bit as beautiful and delicious as the picture.

I used peach preserves instead of apricot, just because of personal preference, but I bet you could substitute any marmalade or preserve you like. And I prefer to do a double recipe so you use exactly one package of puff pastry. Besides, six roses just isn’t enough! So, here would be your ingredient list for 12 roses:

4 apples (any kind you like but the red skin color makes pretty roses)

1 lemon

6 tablespoons preserves (I used peach)

4 tablespoons water

I package puff pastry containing two sheets

Cinnamon

Powdered sugar for a sprinkle at the end, if you like

Follow the fun tutorial and see what you think. I then packaged mine in a simple pastry box tied with a narrow grosgrain ribbon. The ultimate in taste for any deserving Valentine.

Including yourself, of course.

Apple_Rose_ribbon_box

Red Leaf_Mother_Child


IDEA 79: HONOR THE SURPRISE

Surprise_cake_2

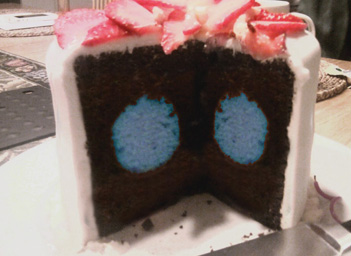
My daughter, the teenage baker, got an intriguing assignment from one of her teachers. This teacher has become pregnant and she has decided to find out the sex of the baby. But her plan is to have her doctor put the results in a sealed envelope. She will then deliver said sealed envelope to my daughter who will bake a tiny cake with a surprise inside. If the results are a girl, the filling will be pink. For a boy, blue. The teacher will then, with her husband, celebrate one evening by cutting the tiny cake, and thereby discovering if they are having a boy or a girl.

There are so many things about this that I love. First of all, the thought that this teacher is allowing my daughter, her 17 year old student, to see the news before she herself does. But even better, the fact that the discovery of this news is becoming a bit of celebration.

Believe me, I understand some of us just can’t stand waiting for baby to be born before decorating the nursery. But what a great way to make more of a deal about unveiling the surprise!

Surprise_boy

IDEA 77: MAKE A GRAND ENTRANCE

Entrance_1

The decision to redecorate our entry wasn’t exactly a decision. Or at least, not one made by us.

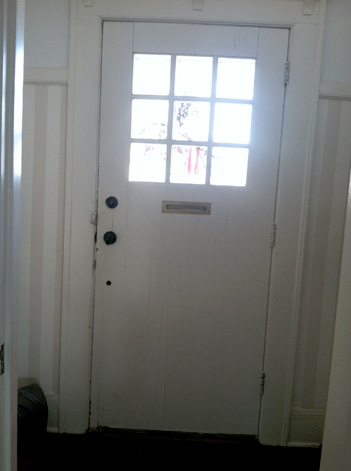
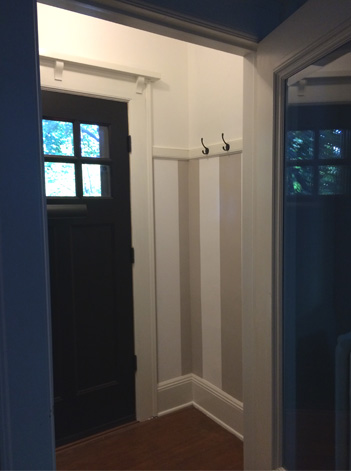
One spring morning at the tail end of a particularly grueling winter we opened the interior door to the front vestibule only to find a waterfall coursing down our exterior front door. There had been an ice dam in our roof (a very Minnesota thing) and the springtime version of an ice dam is a (damn) waterfall just where no one wants one. In this case, it completely and spectacularly totaled the door. The good news is that while it was purportedly original to our 1912 house, our door wasn’t particularly wonderful. It was made with veneer, which in 1912 was about 1/4 inch thick. And even without the help of the waterfall, the layers had begun to separate and curl as if the door had been made out of giant potato chips.

Entrance_before

What followed was one of those projects you would never bother to do, but end up being so glad you did.

If I were to prioritize all the things I would like to do to the house, redecorating that four by six foot space between the outer and inner front door would not be too far up on the list. But once there were huge holes in the walls (opened up to ensure there would be no trapped moisture), suddenly a little sprucing up seemed like a capital idea. The room had been wallpapered, so removing that was another project I never would have bothered with (but had to, because of said holes in wall).

Entrance_Ug

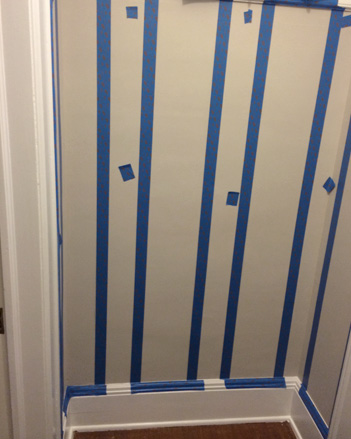
In the end I decided to have some fun with the wall moulding. It’s like a chair rail, except at about eye-level. I painted the wall dove gray below and white above. And then decided I kinda missed my striped wallpaper (although after all the trouble to remove it, I wasn’t about to paper again). So I taped off some lovely wide stripes and painted them white.

Entrance_tape_cropped

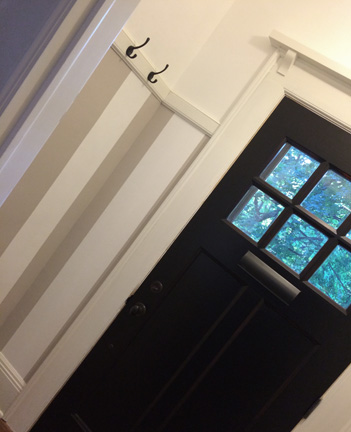
Then I screwed hooks all around the room on that railing.

Entrance_Hooks

We ordered a new door, and this one was so gorgeous I stained it a deep color, such a change from the old door that had myriad coats of white paint on the inside.

Entrance_4

Now our entrance is fit for royalty. Complete with plenty of cute hooks to hang up their cloaks.

Or, in the case of our visitors, hoodies.

IDEA 76: MAKE A CHERISHED HAND-ME-DOWN

Hand_Ben_Notype

What is it about our off-spring’s little hand and footprints that look to us like one of nature’s most beautiful design motifs?

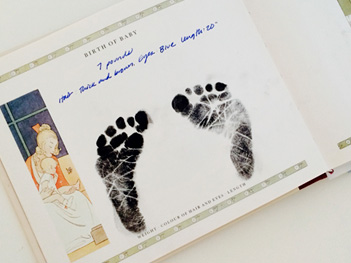
When my firstborn came back from the hospital nursery with inky feet, I was thrilled to see that the nurses had captured the one-day-old feet on a beautiful document, and I requested they put another set right onto the page of his baby book.

Foot_Nell_Book

When my baby daughter got to day-care, I received a “corsage” made by one of the teachers. It was for Mother’s Day, and was made using my daughter’s tiny handprint in pink paint, cut out, laminated with a pin back, and festooned with small pink ribbons. I wore that corsage on Mother’s Day for years.

That’s why, when my colleague Jen told me about her handprint project, I knew I had to share it. It’s just SUCH a BellaPamella idea!!

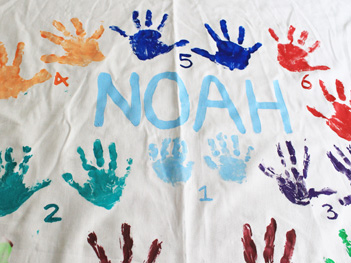
With each child’s first birthday, she purchased a white tablecloth. The birthday kid was allowed to put a painty set of his/her handprints on the cloth, which was then labeled with their age (1). As the birthdays commenced, the handprints collected. Each cloth is different, reflecting the “design sensibility” of each child.

Hand_Noah_Tablecloth

The original idea was to bring out the special tablecloth to decorate the birthday party table. But, very quickly, Jen realized this keepsake was way too precious to expose it to spilled Kool-Aid and ice cream.

So, it still comes out. It gets it’s annual set of prints, and becomes a wall hanging or other decorative drape for the duration of the celebration. Then it’s safely stowed, away from flinging food, until the next year. And one day, it just may provide a favorite story for her grand kids.

Helping_Hands_Link


IDEA 74: MAKE A HOLIDAY KITCHEN TREE

Kitchen_Tree_Dec_Bistro

Many years ago, at a kitchen shop, I was enticed by a silver-plated Christmas ornament in the shape of a miniature colander. It was at that very moment I decided to give my beloved kitchen a Christmas tree of its own.

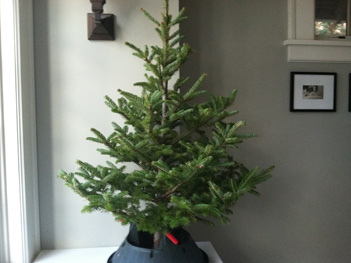
Of course, there isn’t a lot of extra room in my kitchen, so I bought the smallest tree I could find, about 2 ½ feet high.

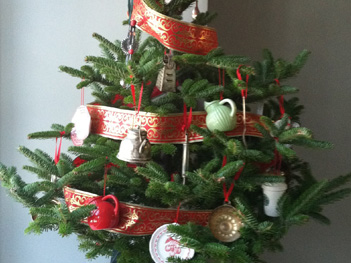
Over the years I have collected special kitchen themed ornaments for this tree, which has now become an annual tradition, brought home along with the regular sized family Christmas tree.

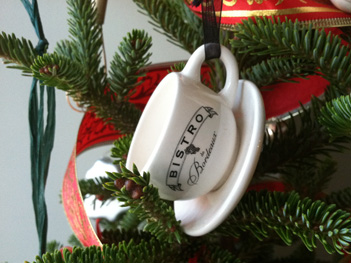
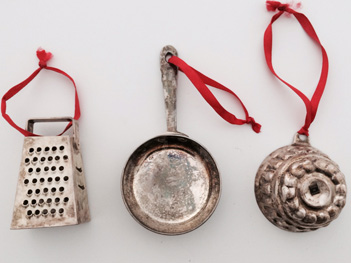
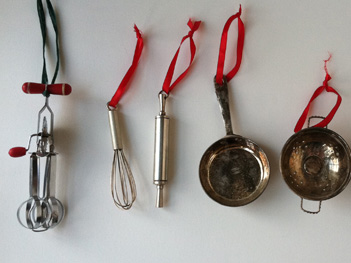
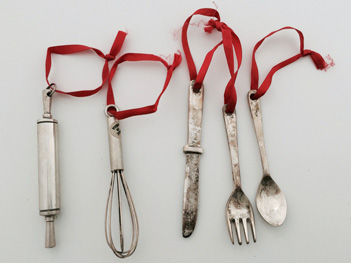
Kitchen_Tree_silver_3Kitchen_Tree_UtensilsKitchen_Tree_Silver

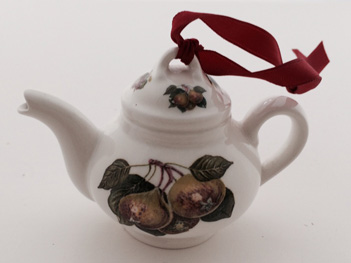
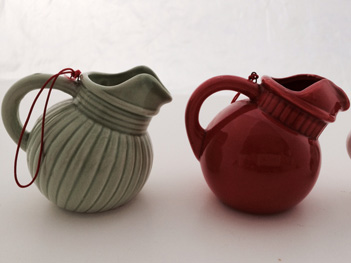
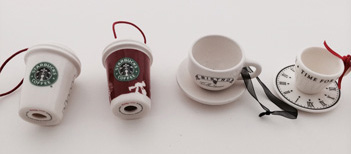
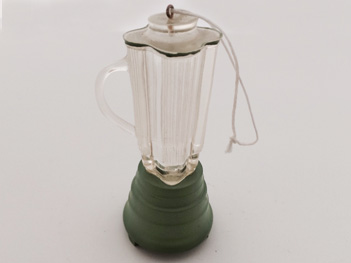
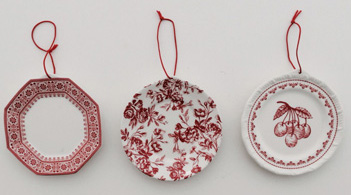
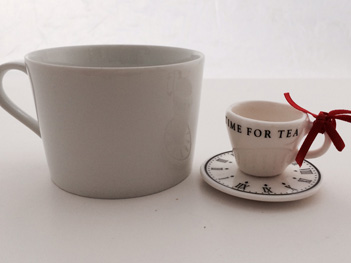
I’ve got a tiny old fashioned egg beater, a whisk, rolling pin, fry pan, cheese shredder, kettle, a mini spoon, knife and fork, a tiny blender and myriad plates, cups and teapots.

Kitchen_Tree_Pear_TeapotKitchen_Tree_pitchersKitchen_Tree_CoffeesKitchen_Tree_BlenderKitchen_Tree_Plates

Kitchen_Tree_Time4Tea

To make your own kitchen tree, you’ll need a small tree stand with a water reservoir. The one I use is much bigger than it needs to be, but it was one we had around so I use it. Look for a nicely shaped “table top” tree. They are much less expensive than a full sized one, although I usually have to shop around a couple places to find them.

Kitchen_Tree_Bare

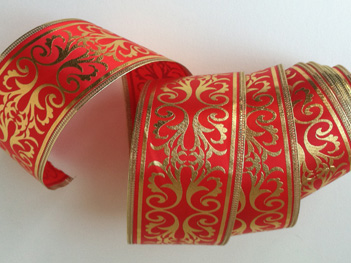
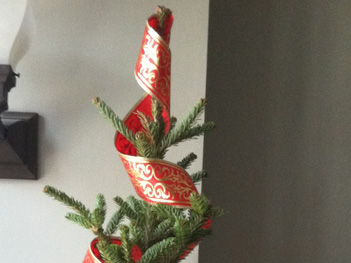
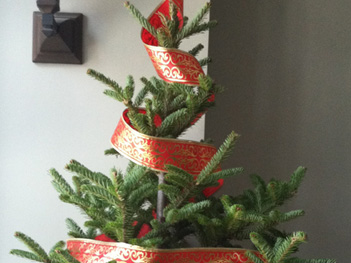
I like to start by winding a beautiful ribbon on the tree. I don’t use any lights. But you could if you want to.

K_T_RibbonKitchen_tree_ribbon_CUKitchen_tree_Ribbon_2

My wide ribbon has wire in the edges. This makes it very easy to just sort of unwind the ribbon down the tree. It naturally wants to curve that way.

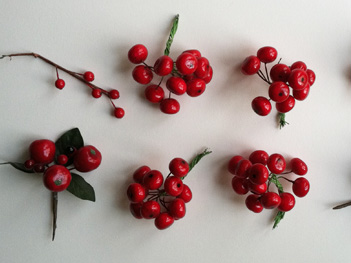
Then I insert several “fruit picks”. I keep these with my ornaments and just stick them right into the tree.

Kitchen_Tree_Berry_picks

You don’t need everything right away. In fact, it’s more fun to add a new ornament to your kitchen tree each year.

Kitchen_Tree_Dec_cropped

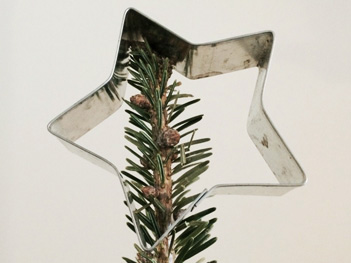
So what do you put on the treetop? A star shaped cookie cutter, of course.

Kitchen_Tree_Star_noribbon