IDEA 70: CELEBRATE THE FINISH

CELEBRATE_BATHROOM

About a year ago, I posted about our DIY bathroom project that followed the premise “When there is no money, throw time at the problem”. That, in part, explained why after several months work, the bathroom looked pretty much like we’d just started. We live in a 1912 house, and this bathroom had been remodeled somewhere around 1950. Ever since we moved in, I’d wanted to make it a beautiful ommage to 1912 (with all the modern amenities, of course), so we took it down to the studs.

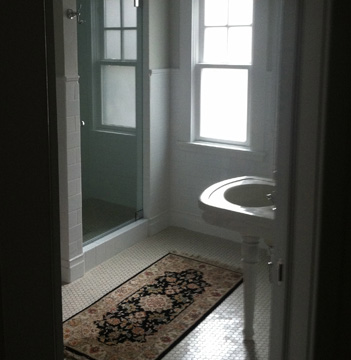
Well, a grueling 16 months after it began I’m happy to report the bathroom is finished! And, as promised, I’m now posting “afters”. I adore my new bathroom. But remodeling to return a room to it’s former glory comes with one potential downside: If you do your work too well, no one will know you did anything at all. So, for those interested in old house details, here are a few highlights.

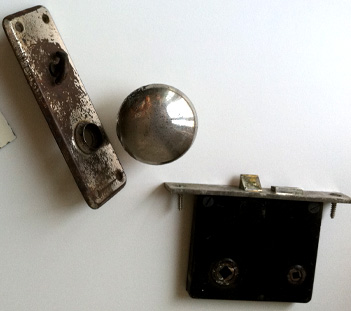
Remember the doorknob?
Old_Chrome

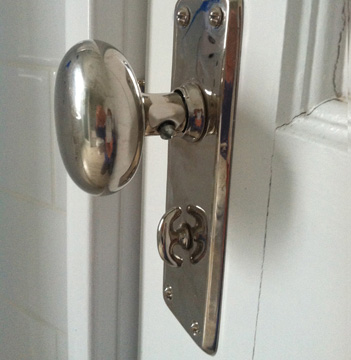
I was all set to buy a new one, thinking this one was a badly worn artifact of the mid century remodel. It did not match the other knobs in our house; in fact it didn’t even look to me like it would have come from 1912. But a painter that had been working in our house told me that it was indeed original. Although the hall knob (on the other side of the door) was quite ornate, the inside bathroom knob and the inside kitchen knobs were simple and smooth, in an early twentieth century attempt to create a more sterile environment. And since chrome was not the finish of the day, these knobs were usually plated in polished nickel. The story intrigued me so much, I had the knob re-plated in nickel, even though everything else in the bathroom is chrome. I guess I’m not a purist—or maybe that means I am…
CELEBRATE_KNOB

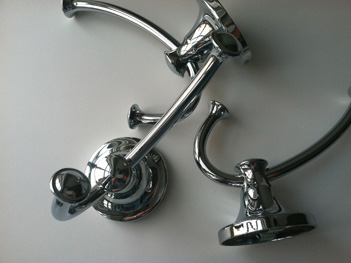
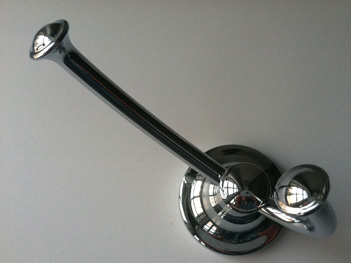
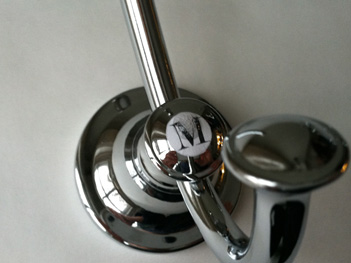
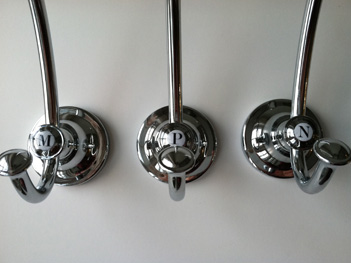
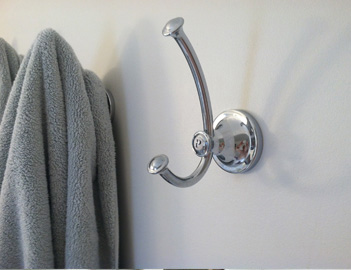
You might recognize the towel hooks from a past blog entry. That easy project adds just the right detail to the new space.
CELEBRATE_HOOK

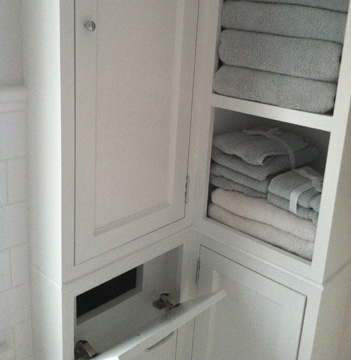
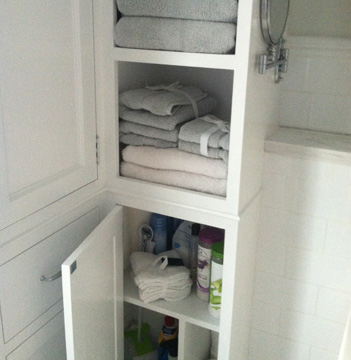
I am in awe of the beautiful yet practical storage my husband built, including open shelves for towels, closed deep cupboards for cleaning supplies, shallow storage for small items and a built in hidden laundry chute!
CELEBRATE_CUPBOARD

CELEBRATE_STACK_TOWELS


CELEBRATE_LAUNDRY_CHUTE

Above the tub and shower, a row of new-to-look-old cupboards stash anything you don’t care to see for a while.

CELEBRATE_UPPERS

Our original commode looks right at home here.
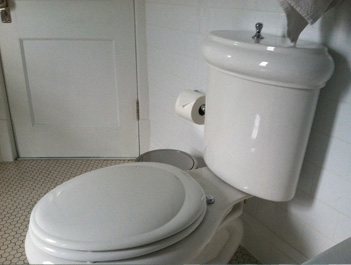
CELEBRATE_COMMODE

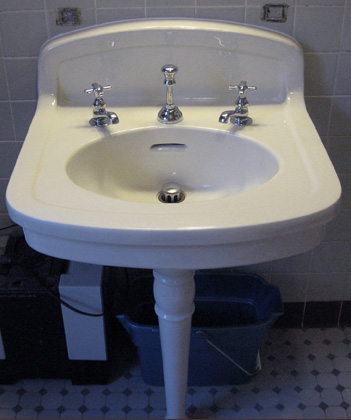
As does the vintage sink we snagged at the salvage yard.

CELEBRATE_SINK

We found a beautiful, simple cast iron drop-in tub from Waterworks at a local shop. The person that had ordered it changed their mind and I was thrilled to see the exact item I was lusting after online (lusting after, but not being able to afford). The shop gave me a deep discount, and I didn’t have to pay to have it shipped either. Since I was looking for a solution that would marry a modern drop-in tub with a 1912 house, we ended up cutting 18” square marble tiles from Home Depot in half to create an oversized brick pattern to mimic the subway tile.
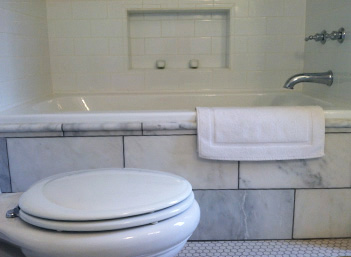
CELEBRATE_TUB

By moving the tub to the corner, we were able to fit in a separate shower, something I have always wanted. An almost invisible glass door keeps the corner clean and understated, even though it’s a bit of a departure from 1912. Trying to match the age of a house can be tricky with kitchens and bathrooms. My philosophy: strike a balance between comfort and style. You want to live in a house, not a history museum. But I do think the chrome knob on the shower (rather than the standard towel bar) adds a little old-timey class.

CELEBRATE_TUB_SHOWER

The sink is mounted on a short wall sporting a marble cap. This was a feature I chose for practicality as well as authenticity. I found the marble piece at a scrapyard, and my husband (with the help of a few extra saw blades) was able to cut it down to size. Above that, we installed the Restoration Hardware Framed Medicine Cabinet.

CELEBRATE_MEDECINE_CABINET

Quite possibly, the most difficult decision was what lights to install. My husband (my lighting expert) suggested two lights, one on each side of the mirror, with the bulbs pointing up, for a “soft bounce” off the ceiling. It was the perfect idea. This set-up provides beautiful, flattering light that easily removes ten years from your age when you look in the mirror. So, that was decided, but where to find just the right lights that celebrate the vintage without looking too fussy? I finally landed on lights from one source and glass shades from another. I got the lights online because I liked the vintage style. Then I bought an inexpensive two armed wall light from Home Depot because I really liked the modern looking straight-sided oval glass shades. I put those with my vintage lamps and they are (in my opinion) the perfect balance of old and new. (or maybe I just like to mettle). At any rate, it was an inexpensive way to get a unique look.
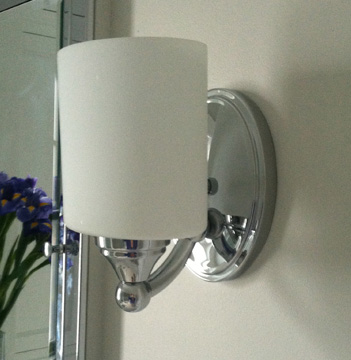
CELEBRATE_LIGHT

And speaking of lights, doesn’t every bathroom need a nightlight? I came across this sweet one online, and couldn’t resist.
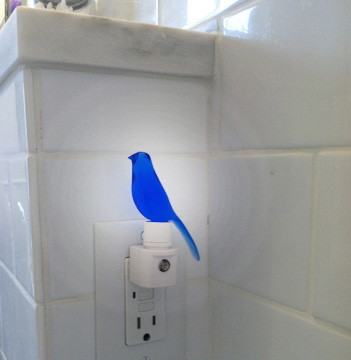
CELEBRATE_BIRD

I framed black and white pictures of my kids in the old bathroom, bringing these sweet, nostalgic moments to my current bathroom. And now they adorn the three walls surrounding my tub.
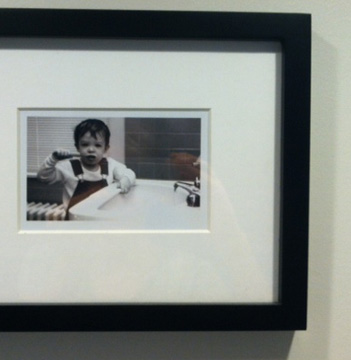
CELEBRATE_PHOTO

CELEBRATE_TUB_PHOTOS

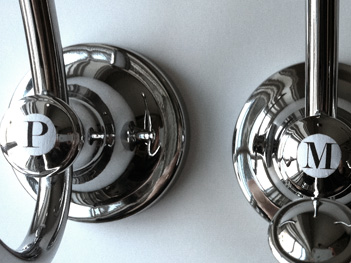
Just for fun, here’s where I found our tub spout, tub handles, shower handles, laundry chute pull and cupboard door knobs.

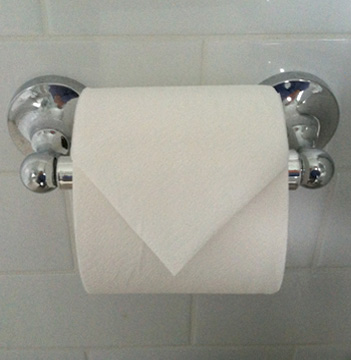
I’m so giddy about my bathroom remodel I don’t even mind the fact that some people may not know I did anything. The hotel-like amenities and soaking tub provide a welcome retreat in which I will celebrate this finish for years to come!
CELEBRATE_TP

IDEA 69: HELP YOURSELF BY HELPING SOMEONE ELSE

Inside_bike

This morning I put my bike up on rollers in my sunroom. Even though there is still a couple feet of (old, dreary) snow outside, I’m determined to be bike-trained by June. See, I’ve committed to ride in the MS 150; a hundred and fifty mile bike ride over two days, to help generate money for a cure for Multiple Sclerosis. So, what does this have to do with the price of eggs? Well, as moms, it’s difficult for us to carve out “me time.” It seems there is always something or someone else that is more important than ourselves to consider. And so, we ignore our needs and tend to the squeakiest wheel.

But, child-rearing time is also a great time to consider helping out a charity. It’s your perfect excuse to lean a little harder on your husband or support system, because after all, it’s not for you. It’s for the charity.

When my kids were small, our church often held sewing nights. All interested persons with a sewing machine would show up and spend an evening making diapers out of old T-shirts. Day care was provided by somebody’s older child, and it was a great way to catch up with like-minded-freedom-deprived moms.

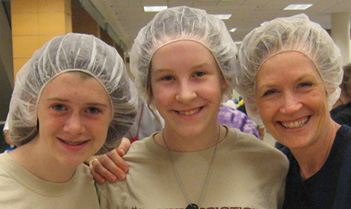
When my kids got a little older, they enjoyed pitching in to the cause. Which was, of course, a great way to teach kids about giving back. A local chapter of Feed My Starving Children held a 24 hour marathon in our town. Anyone could sign up for a shift bagging beans and rice for the less fortunate. The task was easy for my daughter and her friend to learn, but the best part was picking our shift, from 2:30 to 4:00 A.M.

We set our alarm clocks and drove in the dark to the facility. It was the most inspiring thing I’d done–especially in a hairnet. And I’ll never forget how, after our shift as we stepped out of the building, we were greeted by the most beautiful sunrise.

Feed_My_Starving_Children

So, this June I’ll do my best to ride my butt off for MS. Along with that comes the quest of getting myself in shape, and a goal to get on that bike every morning without fail for the next several weeks. It’ll be a little something for MS. And it’ll be a great big deal for me.

Win-win.

IDEA 68: STAY POSITIVE

Chocolate_Butterfly_cake_top

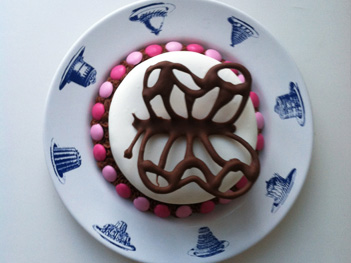
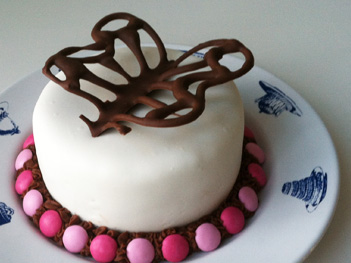
We all have our coping mechanisms, and it’s a good thing we do. Here in Minnesota, winter brings a boat-load of snow and this year, record below zero temperatures to boot. That’s why I was so delighted to see this sweet extra-curricular project my daughter fashioned. Here, in the midst of snow days and the occasional power outage, she didn’t just bake a cake. She baked a pink-and-chocolate-and-white cake with a lacy chocolate butterfly on top.

The cake is tiny, only about four inches across. It’s white cake, covered in chocolate buttercream frosting, with rolled white chocolate over that. She piped a ring of frosting around the bottom into which she pressed alternating light and dark pink m&m candies. But the true genius is the butterfly. After melting the chocolate, she folded a piece of parchment paper and placed it, unfolded, onto an open book. The parchment paper took the shape of the curved pages underneath, as did the chocolate, drizzled in a butterfly shape. Once cooled (in the fridge), the resulting winged creature stands 3-D atop the cake as if it just alighted temporarily before moving on to the next posy.

I can’t decide which was the more gratifying winter escape: The beautiful butterfly, or gobbling it up! Yum!

Chocolate_Butterfly_Cake_side

IDEA 67: TEACH SAVING

Ice_cream_Saving_2

Now that my kids are quite grown (are they ever ALL grown?), it occurs to me that when it came to teaching saving we did two things right.

The first I got from my own parents: Open a savings account for each child. Once the child is old enough to get the concept of money, tell her about her account and show her the balance. Then when your child receives money, tell them that whatever they put in their savings account, you will match. A child that receives $20.00, and is told that if they put 10 of it in the bank, you will put in 10 to make 20, will usually do it and be happy spending the other 10. We did this with all three kids. (The matching in our family continues until the child collects an actual paycheck). By that time the savings account has grown enough for them to want to keep and protect it. Not to mention they now have a long established habit of putting some of their money in the bank. When you think about it, it’s not unlike a 401K contribution that’s matched by your employer. Why not get them into the swing of things early?

My other saving tip didn’t start out about saving at all. It started out about fairness. When some tasty treat would come into the house (like a package of cookies or carton of ice cream), it became impossible for it to last more than a day. Why? Because each child figured he’d better get his before the other two devoured it. Treats disappeared at a frenzied pace because no one wanted to be the one left with an empty carton. So one day I brought home three identical packages of cookies. I put a child’s name on each one and put them in the cupboard. Then I told them they could do with them what they wanted but they were not to touch anyone else’s, and they would not get another package for two weeks. I was amazed how long those cookies lasted. Who knew those kids had so much restraint? But without the threat of poachers they were able to consume the treats at a normal pace. And, the little “lucky strike extra”? Another lesson in saving was born.

IDEA 66: GO FOR THE WIN-WIN

Holiday_Dillybeans

Those of us with gardens are plagued by at least one fact: If we have enough of something, we more than likely have WAY too much of it.

Each year our family finds ourselves up to our eyeballs in SOMETHING. This year it was green beans. My husband planted a dandy crop of beans to climb his chicken-wire fence and form a natural shade wall to our patio. Once the beans appeared, it was lovely to snap off a few and munch while doing yard duty. But somewhere along the way, we realized we were LOUSY with green beans.

Greenbean_Haul

Keeping up with the harvest was no small feat. But worse was concocting ways to eat them all. I brought a few bag-loads to work and it was satisfying to watch them disappear. But the beans kept coming. And that’s how he (ingenious husband) came up with the idea to make Dilly Beans.

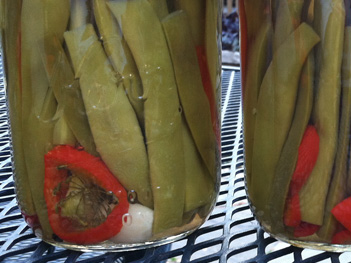
I can take absolutely no credit. He bought numerous flats of canning jars and we had everything but the vinegar. Using a few other things he either grew or got from the CSA, he put these together, lovely in their simple and organic manifestation of red and green. The recipe he used was from The Ball Complete Book of Home Preserving. But if you don’t have the book, the recipe is very much like this one.

Dillybeans_2

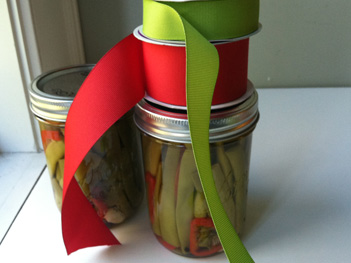
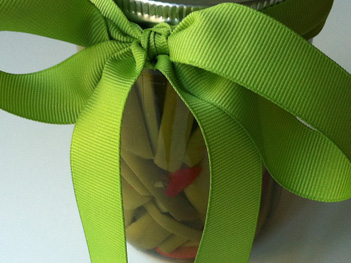
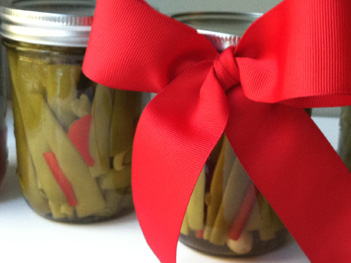
The addition of red bell pepper slices to the lovely green prompted my declaration that they were now holiday gifts. And, of course, he made multiples of the recipe. Add some red or green grosgrain ribbon bows and if you’re feeling snappy, tie on a little card.

Dillybeans_ribbonDillybeans_red_ribbon

If you didn’t happen to grow green beans this year, you now have time to plan, plant, harvest and can for NEXT holiday season. But no need to wait. Just get your beans from the grocer. Then, spend one afternoon canning beans and you can wrap up a dozen of the same pretty packages. Just think. You could have your holiday shopping done in one weekend. Now that’s a BellaPamella idea if I’ve ever heard one!

Holidays can't happen

By the way, care to look stunning as you create your holiday gifts? How about buying yourself a gift of a BellaPamella apron here?!

IDEA 65: REMEMBER TOGETHER

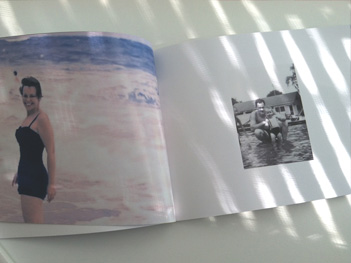
Memorial_book_1

Recently, we lost a very dear friend and relative. My mom’s sister, my sweet “Aunt Liz”.

Lizzie had a condition that wore her down slowly, with very little pain. So we were all blessed with a little time. Time to visit. Time to get used to the idea. Time to say good-bye.

And my sister had a really amazing idea. The idea was to create a book of Lizzie’s wonderful life. Creating a book of this sort isn’t the amazing part. Online publishers like My Publisher and Shutterfly make it a snap. But the ingenious part was, instead of doing so after she passed, we worked on it with her, while she was still with us.

Together, Liz and my mom combed photo albums to pick out favorites. Family members would create spreads, or send in thoughts and photos for the rest of the “editors” to make use of. Liz wrote wonderful detailed passages about her work, her travels, and her dreams, and of course corrected the occasional errant fact.

The wonderful pages full of her life stacked up. As her strength waned, we printed a copy so she could have it and share it with visitors at hospice. And once she was gone, we printed many copies, giving each person a means to reminisce.

By the way, you don’t even have to wait until someone is ill. A treasure like this can be started any time. Either way, why wait till someone is gone to express how very much they mean to you?

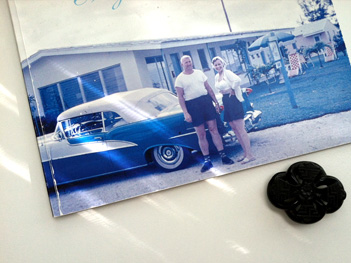
Memorial_book_2

IDEA 64: SHARE YOUR WISDOM

Phil's-osophy_Book

If you have kids, one day they will be moving on from your nest. When this started happening at my house I found myself wondering if I had really covered all the topics. Had I sufficiently marinated them in my philosophy of life? And did any of it stick?

For this reason I had a bit of an epiphany while watching the episode of Modern Family called “Phil’s-osophy”. (By the way, if you are a parent, this show should be required viewing. I have often noticed that in the throes of raising a family, your first defense is a sense of humor). Anyway, in this episode, The family’s oldest daughter sets off for college. The dad, Phil, creates a book for her called Phil’s-osophy. (If you are Phil Dunphy, this title makes perfect sense). Since Phil is Phil, his words of wisdom are kind of hilarious. But, while it’s all loads of fun, that’s not my point. My point is this: Why not create your own book of philosophy to send along to college with your grad!

I just finished a small (5.75″ x 7.75″) 20 page book from My Publisher that cost only $12.99 and it was beautiful! Another very popular book making site is Snapfish. And I know there are many others. The idea is to put together a book of your own words of love and wisdom for your kids flying the coop.

Of course you don’t have to use an online publisher, although they are simple, inexpensive, and do a beautiful job with photos. You could consider making a handmade book. It all depends on your inclination, and artsy-crafty prowess.

So, in my haste to get this idea to you in time for school starting this fall, I’m writing this without my example to show you. In lieu of that, we’ll just have to take a look at a few of Phil’s pages:

Phil's-osophy_8

Phil's-osophy_3

Phil's-osophy_2

And a few more of my favorites:

The most amazing things that can happen to a human being will happen to you if you just lower your expectations.

Take a lesson from parakeets: If you’re ever feeling lonely, eat in a front of a mirror.

Watch a sunrise at least once a day.

If you’re ever in a jam, a crayon scrunched up under your nose makes a good pretend mustache.

Never be afraid to reach for the stars because even if you fall, you’ll always be wearing a Parentchute™.

IDEA 63: SUBSTITUTE TIME FOR MONEY

Tile_1

My husband and I have been doing a bathroom remodel. Not the kind you see on HGTV that starts on Saturday and finishes on Sunday. Not even the kind that involves a contractor and subs that click along and finish in four weeks (only two later than intended). No, this bathroom remodel happens on weekends, and occasional weeknights after work, and around dinner and homework. THIS remodel is taking months. So far it has been about 3 1/2 months since we took the walls down to the studs and the floor down to the beams.

But here’s the thing. Everyone that knows me knows I have been working on this bathroom for YEARS. I’ve been clipping, then downloading, then Pintresting bathroom pictures for-freakin-ever. We just couldn’t afford to remodel the bathroom and frankly, although it didn’t go with the rest of the hundred-year-old house, (it had been remodeled fifty years ago) it was functioning, and we were busy. But it made me a little crazy and so I started preparing for my fantasy bathroom.

Not long after we moved into the house someone opened the bathroom door too hard and it swung in and cracked a corner off the toilet tank. I realized if there was a toilet with a tank just an inch or two narrower, the swinging door would miss the tank entirely. A search revealed the perfect toilet that not only fit the bill size-wise, but was the most awesome toilet ever, and cute as a bug and fit perfectly into my fantasy of what a bathroom in a 1912 house should look like. So we bought and installed the Worlds Cutest Toilet (Kohler Revival). This became the first piece of my new bathroom.

zaa59914

At some point, our sink died and we were still nowhere near ready to do the Big Remodel. My husband was going to put in a temporary sink, the smallest, cheapest thing available at Home Depot. But I talked him into going with me to a salvage place to see if there was a sink that would be fitting for our old house. We completely lucked into a vintage wall sink with a single, centered, porcelain leg. I couldn’t believe my luck. I was pricing out reproduction sinks of this look and the price tags were astronomical. But here was this beauty, and since it was authentic, it was a little smaller than the ones they are making for people’s now-a-days palatial bathrooms. We used that sink for the past year, and it will go back into this remodel.

Vintage_sink

About five years ago I found towels on sale that would fit perfectly into my fantasy bathroom. I bought them and stowed them in a plastic bin in the attic. To this bin I added towel bars, ring hooks and TP holder and toilet seat. I kept my eye out for the perfect medicine cabinet, tub and lights. With the sink, I discovered a chrome plater in our town. The old pieces came back gleaming, and so I decided to do the same with the door hardware. Here’s the before hardware, which will gleam when I get it back.

Old_Chrome

So far we (meaning my husband) have removed a radiator, soldered plumbing pipes, strung all new wiring, installed a heated floor, insulated walls, built two niches in the walls, built a bump-out for the sink to be mounted to, sheet-rocked, backer-boarded, poured many bags of leveling cement and removed the old window and installed a new one. After all these months if you glance in the door it looks very much like a project that’s just starting. I have no idea how the home improvement shows do it. There is no way this would make very entertaining TV.

Current_bathroom_project

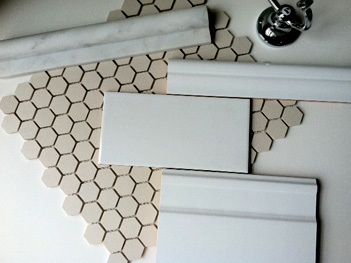
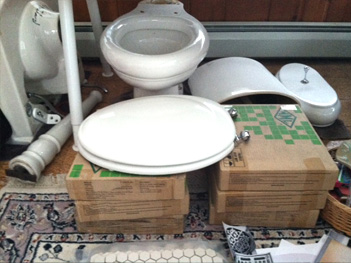
But I have been busily stockpiling all the fun stuff in my sewing room/office. Currently, I keep company with: Our toilet and sink, some boxes of hexagonal floor tile, boxes of honed marble, several chrome pieces including the wall hardware, faucets, and hooks, and many life-size printouts of various lights I was using to try to decide which one.

Stash

Our family has definitely had to demonstrate a bit of patience. The five of us have been traipsing down to the basement to shower and dividing teeth brushing between the basement and the main floor powder-room.

It may not be everyone’s ideal, to go this long without the family bathroom, but here’s the cool part. Doing it this way, there was no need to take out a loan. No need even to save up for it. The cost of this remodel has spread over all this long time, and we pay as we go. And that’s a perfect example of one of my guiding principles: If you don’t have the time, throw money at the problem. And if you don’t have the money, throw time at it. Life isn’t always perfect. But at least it’s not without options.

And yes. If we ever get this sucker done, I’ll post pictures of it!

IDEA 62: INITIALIZE THE TOWEL HOOKS

Initial_Hooks_all_blank

Once upon a time we had four people using a bathroom that had one towel bar. Those family members who lived on the edge simply used whatever towels were hanging on the bar and hung them back. Those more fastidious in nature used a clean towel every day and deposited it in the laundry. Neither solution was optimal. Who wants to dry off wondering where that towel has been? And who wants to launder towels that much? So, one day I hung four lovely hooks, one for each user of that bathroom.

Initial_Hooks_blank

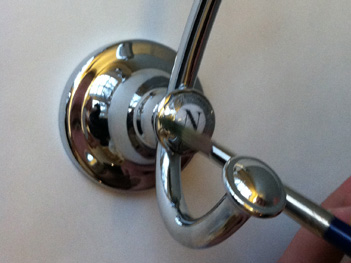
Even though we decided whose hook was whose, I often noticed my towel might be damp even if I hadn’t used it. Which led me to the obvious conclusion that people were confused about which hook was theirs. So I went on the hunt for a way to attach an initial to the lovely domed round at the center of the hook. I was inspired by the multitude of initial “buttons” available in the scrap-booking aisle. And if you happen to find hooks with a flat spot, this might be a great solution. But the flat buttons would not adhere to my domed hooks, so I made up this slightly more involved, but incredibly satisfying project.

Initial_Hooks_Materials

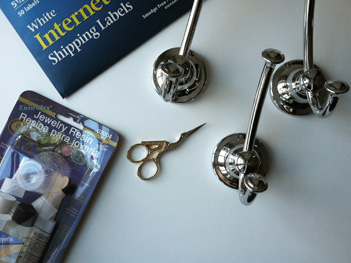
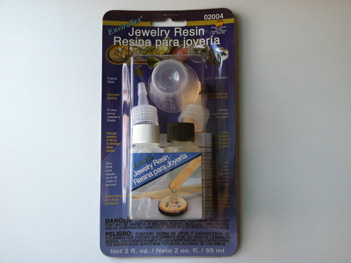
Here’s how I did it. You’ll need a printer and printing labels. I used my half-sheet shipping labels. You also need tiny scissors, like embroidery scissors and hooks that have a nice spot for an initial. Then at the craft store I bought this small “Jewelry Resin” kit.

Initial_Hooks_Epoxy

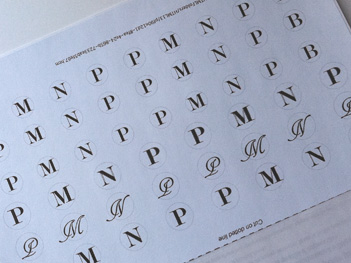
I knew the general size and typeface I wanted for my hooks, but I typed out a variety of sizes and even an alternative typeface because I wasn’t sure EXACTLY what size or type style would work best.

Initial_Hooks_Label_print

I also printed a pale circle around each letter so I would have a line to cut on.

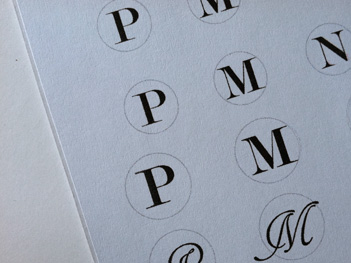
Initial_Hooks_label_CU

The absolutely trickiest part of the project is to cut the paper sticker in a smooth circle. Just take your time, use the tiniest scissors possible, and very small snips. Once you have your cutout, peel off the paper on the back and stick it to the hook. It tuned out it was good I tried multiple sizes. Because the spot was domed, the sticker had to be quite small or it creased and wrinkled when I tried to smooth it down. It took a little trial and error, but I was able to cut a very small round, and then “burnish” the edges down with the back of my thumbnail.

Initial_Hooks_Paper_Initial_CU

Next, comes the jewelry resin. Read the instructions in the kit. The one I had came with little cups that you mix the epoxy in. Once it was thoroughly mixed, I dropped the resin down onto the paper sticker using a flat wooden stick provided in the kit.

Initial_Hooks_Epoxy_drop

I dropped just a few drops, enough to make sure the paper sticker was covered. Don’t worry about the air bubbles trapped in the resin. They will find their way out by the time it dries. I made sure everything was covered down to the bottom of the dome, where there was a natural stopping point. I used a small paintbrush to help with this.

Initial_Hooks_brush

Once it looks like a thin coat of resin is covering everything, stop and leave it alone. It takes many hours for the resin to harden completely, and for all the bubbles to disappear.

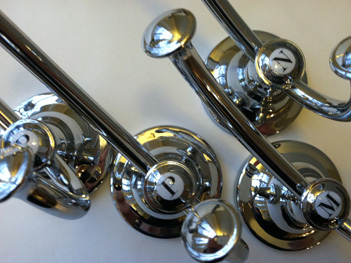
But look how pretty the finished hooks are!

Initial_Hooks_all_finishedInitial_Hooks_3_Finished

And just think how lovely it will be to know you have a clean towel without laundering seven loads of towels a week!

IDEA 61: WORLD’S SIMPLEST BIRDFEEDER

Sunflower_Bird_Feed_2

The other day I came home to see my clever husband had come up with a very BellaPamella idea. In the summer he had grown sunflowers, in part to have something for the birds to nibble on. When the season ended, the top-heavy flowers eventually flopped over, so he snipped them all and hung them in the garage to dry out.

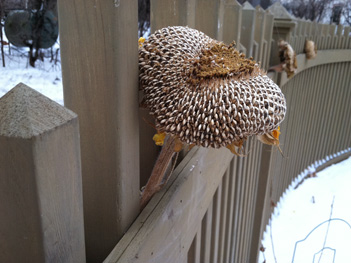
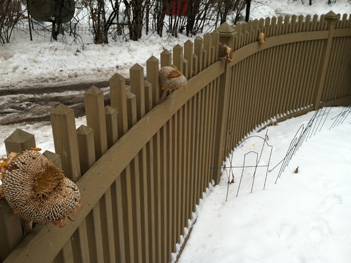
And that’s how, here in mid-winter, he had some ready snacking for the yard birds. He simply tucked the flower heads into our fence at even intervals. The result is not just a wild bird food station, but a lovely, natural seasonal decoration for our fence!

Sunflower_Bird_Feed_1