Archived Ideas for ‘Kids’

IDEA 33: COLOR ME ORGANIZED

Marker_Organize_2

It’s September. Which means you very well have replenished the stock of colored markers, pens, and pencils. Let’s face it. When you have an organized environment it really does inspire use.

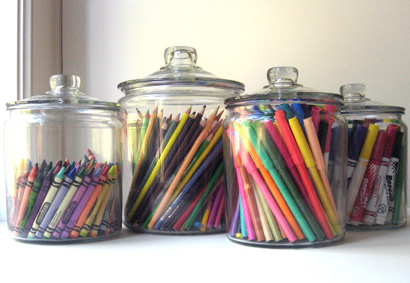
This simple and sweet idea comes from my friend Anne who, like me and probably you, is thrilled to figure out a clever way to keep kid-stuff organized. Anne’s boys had a jumble of colored markers, pencils, crayons and pens. The supplies were a big hit when they were first purchased, but soon became spread all over the house, buried in various drawers, lost in the general chaos of life at home.

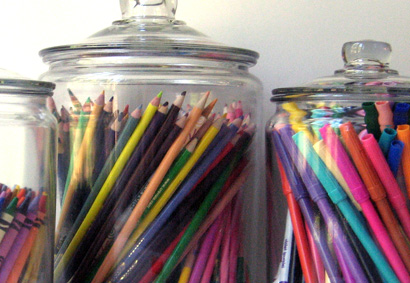
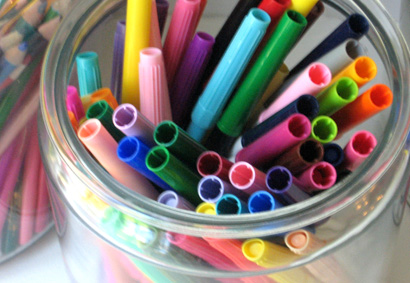
Then Anne got the idea to purchase clear glass jars from the kitchen department of a local big box store. The jars came in two sizes, so she chose a selection to house the various supplies. All the crayons went in one, the colored markers in another, and so on.

Marker_Organize_4

The resulting jars now inspire her boys to create. They bring a jar to their room, and when they’re done, they bring it back to the shelf in an open cupboard in their sunny front room where the display looks as great as it is functional. (How many kid-stuff solutions can you think of that not only clean things up, but add to your decor as well)!

I don’t know about you, but now I’m inspired to go out and buy all new pens just to do this.

Marker_Organizer_1

IDEA 31: DO SUMMER LIKE A KID

Summer_kids

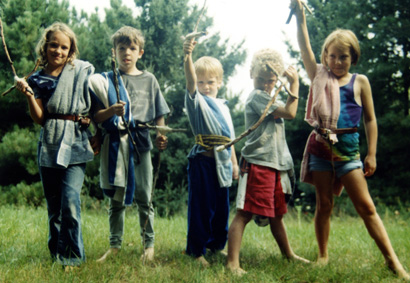
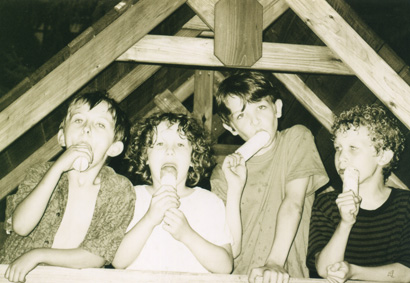
The combination between the end of school and summer’s warm weather provide the perfect opportunity for an annual family trip. Here in the mid-west, countless families head “North to the Cabin”, and I’m not the first to notice how time slows down these hazy lazy days.

We take the annual summer vacation to the family farm in northern Michigan. And since our children were born, it has become the time and place that, once a year, they bond with their cousins.

Northern Michigan cherry orchards, sand dunes, and lakes have been the backdrop for relationships that have been playing out two weeks a year for the duration of their young lives. And as a parent, it’s one of my favorite things. It has not only cemented the relationships of the children, but of myself, my siblings, parents, and in-laws.

Jacqueline M. deMontravel, editor of Romantic Homes Magazine, in her letter from the editor, expressed what I consider a near perfect reflection on summer. I had to share it with you. Here is Jacqueline’s letter, with a title that could have been the title of today’s idea. May everyone reading this take a moment to breathe in and quietly savor summer, whether you choose to travel to the woods, or just the back yard.

Let It Go

July follows the loose, relaxed style of a past-season sundress. Fully entrenched in summer, stray towels, flip-flops and all the necessities brought back from beach day can wait an hour, or day, to be tidied up.

July is the coffee break of the calendar year. Urgent matters become less urgent. Casual conversation lingers into the evening. The style of the summer follows these tenets. You are less likely to succumb to modern conveniences, opting for the entertainment provided by the season. There are many: falling asleep outdoors, losing a day to the garden and listening to the sounds of night.

At home you cook more. Meals are made with fewer ingredients but fresher foods. People come over frequently. There is more of a desire to entertain when you are so relaxed, feel less strained and have no qualms if a guest may spot a basket of laundry.

It is a forgiving season. It is also fleeting, which is what July is about.

IDEA 30: REPURPOSE THE PLAY-SET

Garden_2

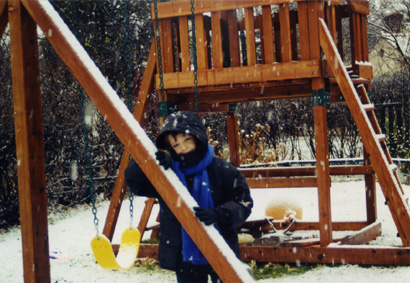
After saving up for the kids, the house and the yard, like many, our next investment was the play-set. In my neighborhood, this means one or two swings with optional monkey bar, fort, sandbox or slide, all held up by a structure made of 4×4 timbers. The whole thing cost a ton and weighed about that much too.

Garden_PL1

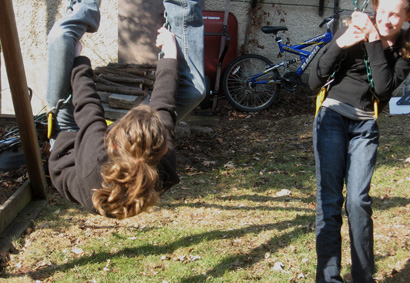
My husband lovingly put the play-set together (cheaper than having it assembled by the play-set guys) and the kids enjoyed countless hours swinging, digging and holing up in their tiny room just above our heads.

Then one day we noticed that all our kids had become teenagers. Despite my youngest child’s opposition, talk of wanting to reclaim some of the yard turned to talk of getting rid of the play-set. It was a sad notion, until close inspection revealed that the bottoms of the beams had begun to rot, and although it hadn’t created a danger yet, prudence dictated it be dismantled before anything happened. And so, I took about 100 more photos than needed of the last fun day on the play-set, and it was taken down.

Play_set_2

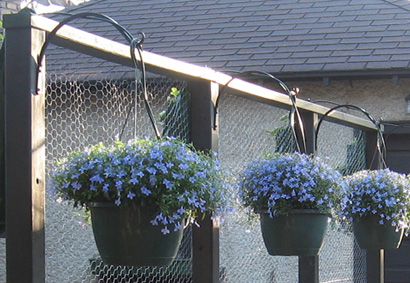
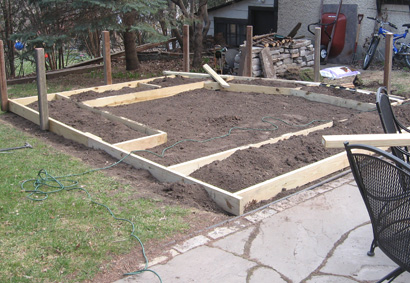
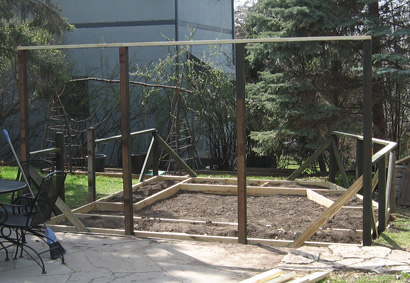
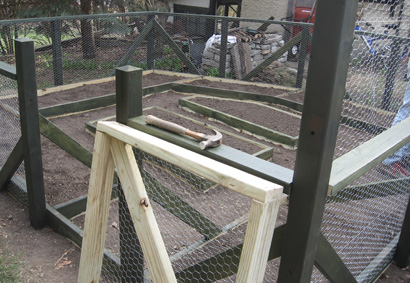
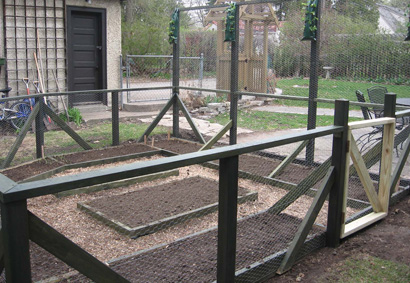
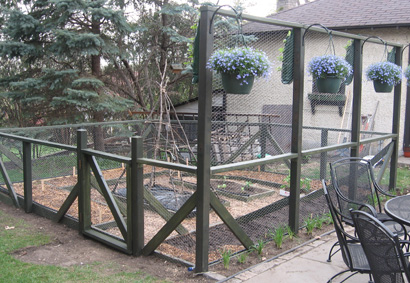
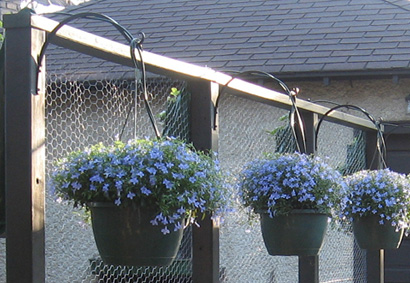
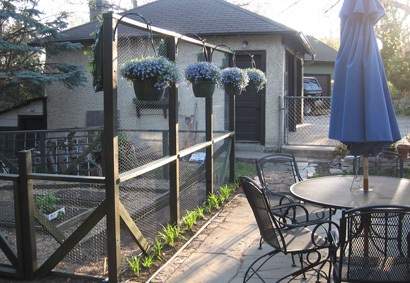
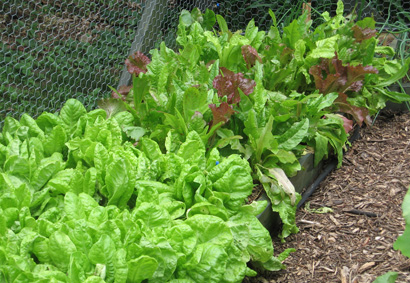
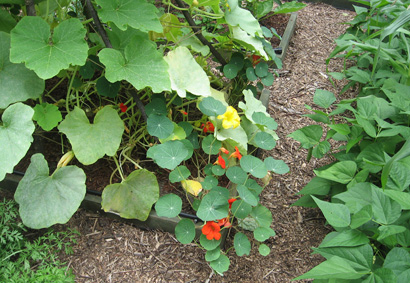
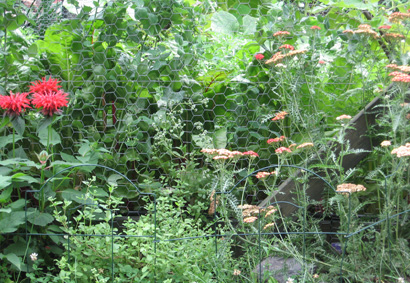
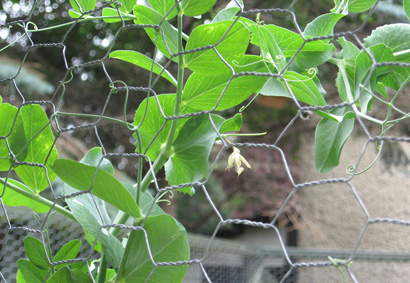
I’m not saying my husband (the gardener) had an ulterior motive, (he WAS the one who pointed out the rotten beams), but once the play-set was dismantled, he created the snappiest bunny-proof garden out of the lumber.

Garden_4Garden_5Garden_6Garden_7Garden_1

Full disclosure, he did have to buy some 2×4’s to complete the plan, but it was really nice that all those big beautiful beams did not just go to waste.

Garden_2Garden_3Garden_lettuceGarden_NasGarden_squashGarden_wire_2Garden_wire

So, for any gardeners out there anticipating an empty nest, a little bit of DIY inspiration for you. Our resulting garden gives us so much beautiful bounty, we’ve never looked back.

Okay, maybe a little.

Garden_PL2

IDEA 29: DOOR HANGER DIALOG

Door_dialog

You probably feel like there are things that would go smoother if the members of your family would just listen and retain. No one likes to hear themselves constantly repeating things like a parrot only to have the sentiment go unheeded.

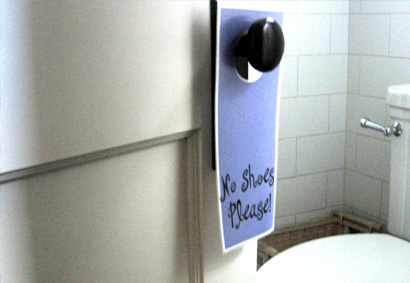
After spending the evening on my knees scrubbing a particularly grimy bathroom floor near our back door, it occurred to me that if people were not wearing shoes in there I wouldn’t have to do it again so soon. So I printed a cute door hanger on my printer and cut a circular hole and hung it on the knob. It said simply: No Shoes Please. And then a funny thing happened. Everyone took their shoes off. Even the guests. Even the repair man. And all the floors of the house stayed a little cleaner.

You have knobs all over your house that are just waiting to display a “suggestion.” A closet door could say “Hang it up, Please!” The pantry could say “No snacks before dinner.” For the laundry room: “Fold it and take it.” And maybe a second, “Just sayin’.”

You get the idea.

IDEA 28: CELEBRATE 365 MOTHER’S DAYS A YEAR

Rain_kids_1

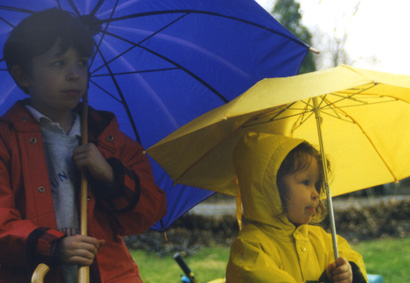
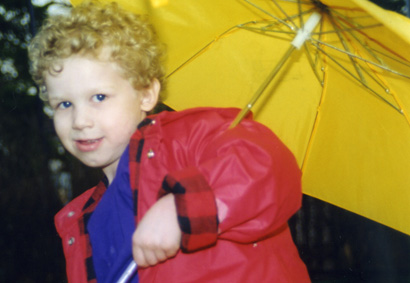
When my kids were about 2, 4 and 6 we decided to take a rain walk one rainy afternoon. We donned raincoats and umbrellas and took a walk around the neighborhood. Of course my goal was to get the kids to run off a little energy, but the whole thing proved to be quite a thrill, as we splashed through big puddles and marveled that no one else was out.

Rain_kids_2

But the real value of the rain walk didn’t make itself known to me until I was back at the office, later that week. A friend and coworker of mine mentioned that she saw us parade past her house. I don’t remember the conversation exactly, but she had a very real appreciation of the whole thing. The kids. The bright colored raincoats and umbrellas. The joyous abandon. Little did I know that she had been trying to have a baby. Some time later, that friend ended up adopting a little baby girl.

I don’t have to remind moms of the treasures that have been dropped in our laps (literally). But when we have sleep, food and shower deprivation, or we’ve been up all night with a sick child, or have just been screamed at by an angry teenager, it’s nice to take a moment to remember just how incredibly lucky we are.

Rain_kids_3

We knew the job was tough when we signed up. And amazingly, we find ourselves up to the challenge. So, to every person who has raised, cared for, or been touched by a child,

have a Happy Mother’s Day. (I know, I didn’t have to tell you that).

Pam

IDEA 27: GRADUATION CELEBRATION

Grad_cake_marble

I think I began stressing about the dreaded “Graduation Open House” when my kids entered kindergarten. I had been invited to a few, during which the main topic of conversation was how much the parents went through to get their house in order and make it all happen. One family attempted a remodel before the big day, and another decided to power-wash the house. Needless to say the whole thing had me in denial. When my oldest was nearing graduation, I pretty much decided we wouldn’t do anything. (Did I mention I have an aversion to stressful situations and avoid them at all cost)?

Over spring break we happened to be visiting out of town relatives. My sister-in-law stated that if we would have a grad party, they would come. The offer was just too good to pass up. Besides, I figured a family party was something that I might even be able to handle. There is something much safer about that prospect.

I am not a big party expert but I do know that if I give myself a few small, creative tasks to accomplish, I can throw a party that I won’t worry over, too much. The truth is, anyone who comes to your home to a party is not passing judgment on you, but quite happy to be there. And if you throw in a few creative touches, the whole thing is just more interesting and memorable. I’m not saying you HAVE to make things. But if you tend to be a crafty person, I say, go with your strengths! It will calm you down about the whole thing.

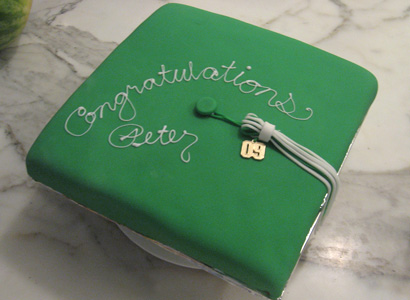
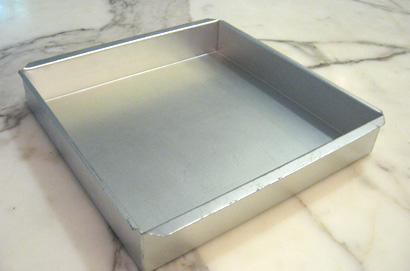
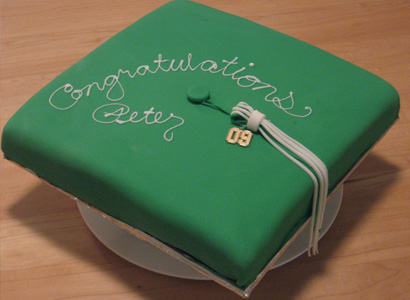
I knew I wanted to make a “theme” cake, and when my husband suggested the shape of a “mortar board” (graduate’s hat) I was thrilled. I happened to have a very large, very square pan, but you could always make a smaller one with a regular square pan.
Grad_pan

One of the easiest ways to make a very professional looking cake is to use fondant icing. And the best part is, it’s more like a craft project than cooking. Buy a box of pre-made fondant from the cake decorating isle of your local craft store. It comes in a package roughly the size of cake mix. Inside is a plastic bag containing a moist material that resembles white play-dough. The same store will also carry paste-based food colors. Depending on your school colors you may be able (as I was) to get away with buying only one color.

Now make and cool a square cake. I cut a piece of foam-core the exact size of the cake and covered it with foil, but you could also use corrugated cardboard covered with foil. Place the cooled cake on the square so no edge is showing, and ice the whole cake with your favorite butter cream frosting. Instead of placing the fondant directly on the cake, it’s preferable to ice the cake first with fluffy butter cream frosting. This not only helps keep a smooth surface, but tastes much better!

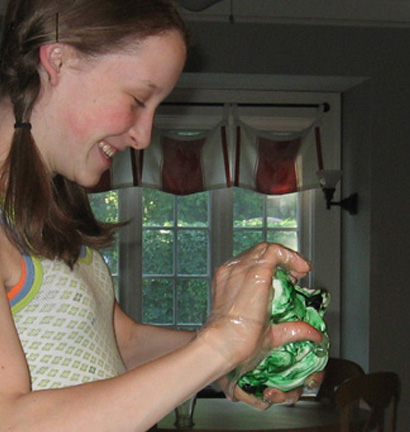
Here’s the fun part–you actually use your hands to squish and knead the color into the fondant. We used plastic gloves so that our hands weren’t dyed green. But make sure it’s not a latex or rubber glove which could transfer an unwanted flavor. We used thin plastic gloves, the kind you get in a box of home hair dye. When you start this, you have the impression the color will never even out, but have patience, eventually it will.
Grad_mix

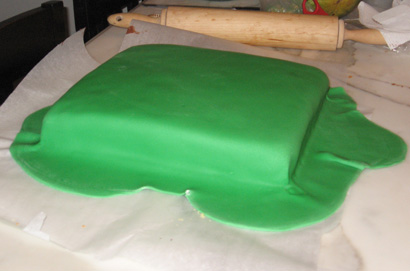
Once the color is even, the fondant is rolled out like a pie crust. Roll it as thin as you can, stopping to lift and turn over much like you would a crust. Rolling between two sheets of parchment paper makes lifting easier. Then it’s ‘easy as pie’ to lift the fondant and place it over the cake.
Grad_fondant

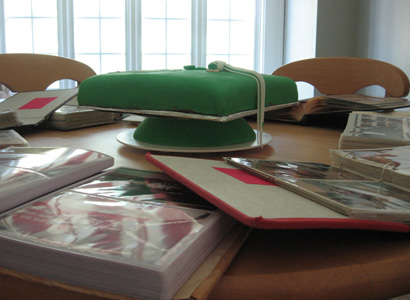
Trim the fondant around the bottom edge with a knife. Then, use extra fondant to cover an upside-down bowl for the “hat” part of the mortar board (seen in the book display photo below). Make sure to affix the cake board on top of the overturned bowl well, with more blobs of fondant as glue.

Flatten a ball of fondant for the button. Cut fondant strips for the tassel, and letter your message on top in your fanciest script with tube frosting. I then carefully removed the gold year charm from my grad’s hat and used it to temporarily decorate the cake, but this charm is also probably available at the craft store.
Grad_cake_wood

Now, you have worked so hard on this masterpiece it deserves to be displayed. And this leads me into the next little grad party detail. I’m sure you have heard of all kinds of photo boards parents have made of their grad so guests can take a little stroll down memory lane. Well a simpler solution is to decorate the cake table with memorabilia. I surrounded the cake with photo albums, each with a ribbon bookmark (school color, green) at a particularly significant (or embarrassing) page. Guests could do a whole lot of browsing simply walking around the cake table.
Grad_cake_books

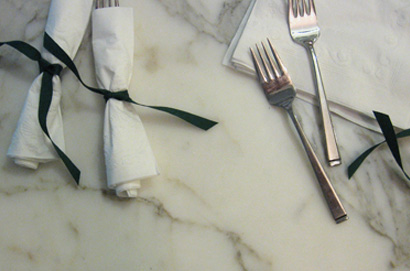
Another very simple decoration is to wrap white napkins around the flatware and tie with a ribbon of the school color. So, what’s so great about it? Don’t they look like little diplomas! (And if you point that out to your guests they will look even more like diplomas).
Grad_diplomas_d

And of course, I shouldn’t have to tell you to photograph your lovely accomplishments. If for no other reason, it will be a handy reference for when the next kid graduates!
IDEA 26: HAPPY EASTER BASKETS

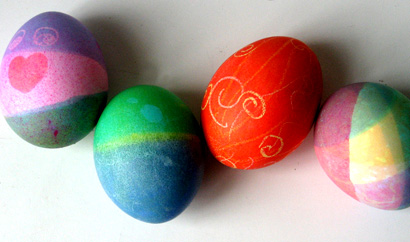
Easter_eggs

When I was a kid I just loved Easter morning, which ranked way up there, somewhere between Christmas and Halloween. My mom is a practical soul and it became pretty obvious she did not believe in investing in a new brightly colored, plastic grass-filled Easter basket every year for each of four kids, that would eventually find its way to the basement (or worse).  So, on Easter morning the hunt would begin, but we never knew exactly what we would find. In the name of practicality, my Easter surprise would be housed in something that was already around the house. My mom is a potter, so often, those sweet chocolate eggs would be nestled in a hand thrown bowl.

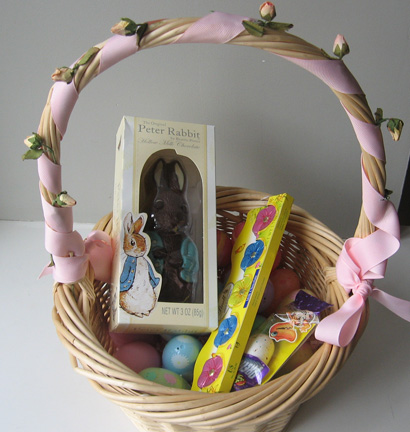
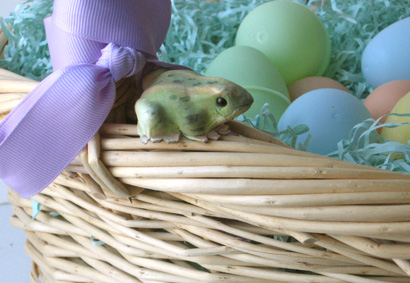
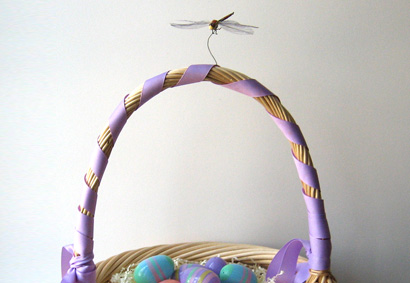
I didn’t inherit my mom’s talent for ceramics, but I do think I adopted her penchant for practicality. When it came to my kids, rather than fall for the “temporary” Easter baskets that line the shelves every spring, I chose a special basket for each child. I wrapped the handle in grosgrain ribbon and attached findings from the craft store floral isle. My eldest son got a dragon fly that will forever hover one-and-a-half inches over the handle via a wire. My second son got a frog at each point where the handle attaches to the basket, and my little daughter got a row of paper rosebuds tucked into the ribbon that wrapped her handle. The baskets were thus decorated, and then christened as each child’s permanent basket.

Easter_basket

Basket_frog

Basket_Dfly

Much like their Christmas stockings, the children learned to recognize their familiar basket, alleviating any pressure to designate whose basket was whose.  And the plastic eggs and even the pastel shredded paper “grass” have gotten reused countless times.

In the off-season they reside in a big bin in the attic where I can get a glimpse of Easter any time I need it. So, maybe it’s not the most earth-shattering idea. But I do think my mom’s thinking was way before her time. And that she taught a lesson that was “green” before people even knew what that was.

IDEA 25: EASTER SURPRISE CAKE

Easter_cake

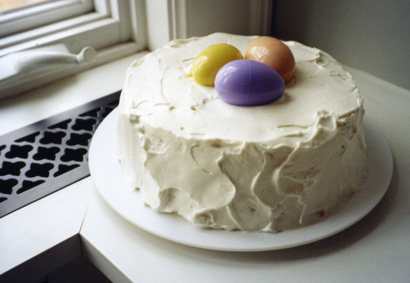
This Easter, why not make a special cake adorned with a little surprise? This recipe is from my Aunt Liz who called it Snowball Cake and often decorated it with fresh strawberries. While that is an extraordinary way to make this cake, and highly recommended, here is a fun Easter version of it. The cake is the same, but nestled on top, we put one plastic Easter egg for each child. Hiding inside the eggs can be candy treats or small toys, anything that says Happy Easter to you!

Of course if you are the type of domestic goddess who prefers to have your local bakery make the cake, the idea still works! You can still steal the show by adorning it with the filled Easter eggs. After all,  BellaPamella style is all about making it creative,  not adding undue stress.
The recipe that follows is also here for you to download. Just print one of the pdfs on card stock and, either cut out for your file [recipe card] or hole-punch for your notebook [page].

Enjoy!
No Bake Easter Cake

2 envelopes unflavored gelatin

1 cup crushed pineapple, drained (keep the juice)

1 cup pineapple juice (add water, if needed to make cup)

1/2 cup sugar

1/8 teaspoon salt

1 tablespoon lemon juice

1 tablespoon lemon zest if available

2 cups whipping cream (+1 more for topping)

4 teaspoons sugar

2 teaspoons vanilla

1 store-bought Angel Food Cake

optional, 1/2 pint of fresh strawberries, sliced

Whipped Cream Topping

1 cup whipping cream

2 teaspoons sugar

1 teaspoon vanilla

Dissolve gelatin in 4 tablespoons cold water. Add 1 cup boiling water, and stir till lumps are gone. Add pineapple, pineapple juice, sugar, salt and lemon juice. Mix well and refrigerate to cool, about an hour. When partly gelled, beat 2 cups of whipping cream, 4 t sugar and 2 t vanilla in a cold bowl just until peaks form. Fold the whipped cream into the gelled mix.

Break up the angel food cake into 1” chunks. In an angel food cake pan or Bundt or other round pan, make layers of the cake, the gelled mixture and if using, sliced strawberries, ending with the gelled mixture. Refrigerate over night. When set, loosen around the edges and turn onto a plate. Frost with the whipped cream topping, made as you made the other whipped cream.

Fill most of the hole with whipped cream and nestle your surprise filled eggs in the indent. Best when kept refrigerated until ready to serve.

IDEA 23: FOREVER VALENTINE

Val_4

My daughter was born in February, which meant I had one very pregnant Valentine’s Day. So that may have been the reason I got this idea. But never-the-less it’s one worth sharing. Who, but your new born baby could possibly be your best Valentine ever?

Val_2

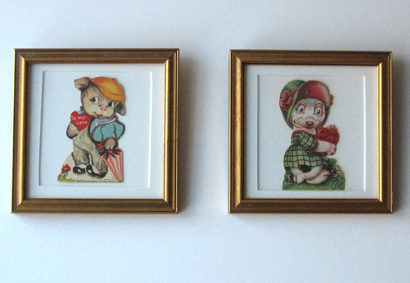
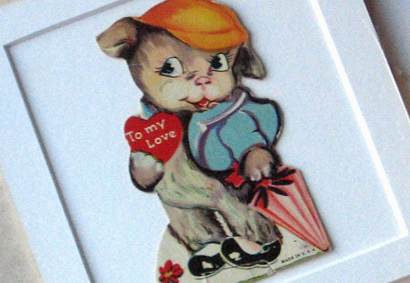
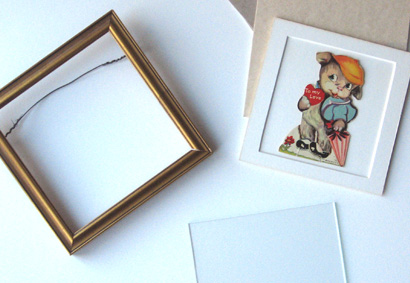
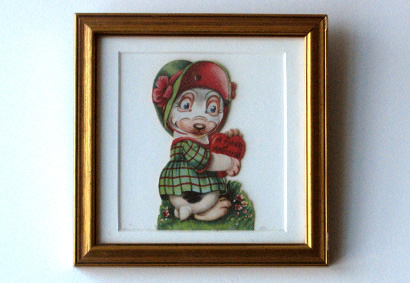
Look for some sweet old fashioned Valentines at an antiques shop and frame two of them for the nursery wall. Frames are available everywhere, but I liked these vintage gold leafed ones. Many come equipped with a mat, but since I wanted very small pictures, I took mats from a larger frame and cut them down to fit small frames. This way I got the fine professional bevel of the mat and I just had to cut the outside to make it fit my small frame. You can also have small mats custom cut at the craft and floral store. Or, cut your own mat from a piece of wrapping or wallpaper. I used another matching solid white piece of mat board under the card and stuck it down with a little double stick tape.

Val_3

Of course you don’t have to use antique cards for this. Any Valentine you love will do. And when it comes to your little one, it’s sweet sentiment really does last all year long!

Val_1

IDEA 21: IDENTIFY WITH SOMETHING

Paint_number

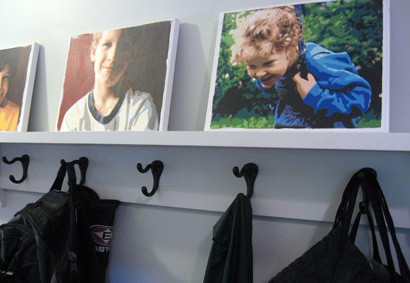
One day I discovered that you could order a Paint-by-number kit of your own photos. I sent in a picture of my daughter and the resulting painting was so beautiful and fun to do, I did the rest of our family. Now, the five portraits identify the hooks in our mudroom. Each picture sits above two hooks belonging to the person in the picture.

Of course it would have been much easier to write their names. But, that’s not the point is it?!