Archived Ideas for ‘03 March’

IDEA 95: GET CREATIVE WITH 2X4s

2x4_Bench_Top

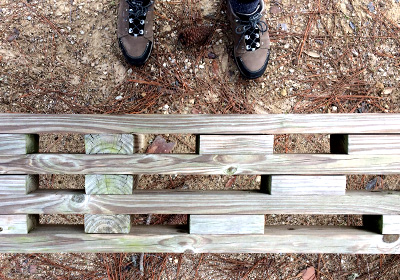
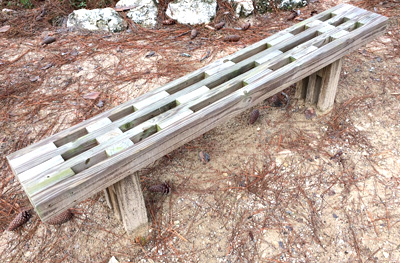
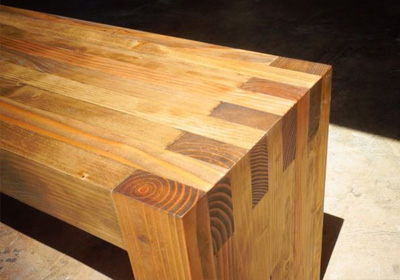
A few weeks ago my husband and I decided we needed to get out of the frozen tundra, so we took a road trip south to Wakulla Springs near Tallahassee Florida. It was there, on a hike, that I came across this beautiful, elegantly designed bench made entirely from 2x4s.
2x4_Bench_3-4

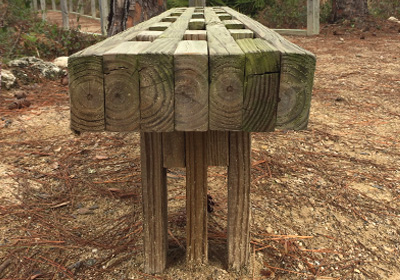
There wasn’t an ounce of give in the bench. It was permanently fastened in place, presumably the legs were set into poured cement footings underground, much like a fence post would be.
2x4_Bench_End

It goes without saying, this solution was as sturdy as you like. After all, the 2×4 is the building block of most every house and building on the block. But what I really loved was the thoughtful way the bench was conceived, using no more and no less wood than was absolutely perfect.

And it made me wonder what else could be made out of 2x4s. So, of course, I Googled it.

I shouldn’t be surprised that there are tons of posts about making things from 2x4s. After all, this is such an available and affordable source for wood. A 2×4 costs about $3. And it can be easily bought, brought home in your car, and cut up.

But in my opinion there is a big difference in the project ideas out there. And I decided to collect and present to you MY idea of the coolest 2×4 projects. My criteria includes:

•Finished piece has to be attractive, and un-2×4-like. (Crates, picnic tables and things like that are items I consider to be too 2×4-like).

•There has to be a reason to use a 2×4 as opposed to another form of wood (many designs call for slicing the 2×4 to make it into boards. In my book that’s too hard, and I would just buy boards. Or carving it into fancy moulding-again would make more sense just to buy the right molding).

•It can’t just be things cut into chunks and painted to look cute. (These are fine, but they’re more about the painting and less about the 2×4).

I noticed many (but not all) these tutorials “square up” the 2×4 first. I think removing those rounded edges looks awesome and makes a huge difference.

So, here are a few projects some amazingly clever people are doing out there. In each case I’m linking to their tutorial as they need to get credit for such fine ideas!
2x4_Vase_Shanty_2

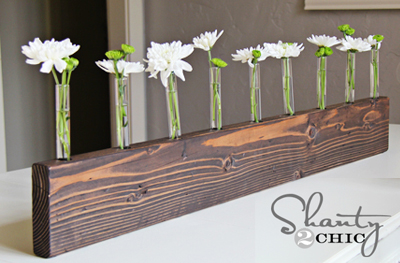
This beautiful vase idea is so elegant. You may say it broke one of my rules as this is not a 2×4, it’s actually a 2×6. But I think it would be lovely in a 2×4, and IMO even nicer if you sharpened the corners so they were perfectly crisp. But kudos to Shanty Chic for the idea and tutorial.

Here is another vase, this one a little more complicated to make, but equally elegant. Find the tutorial for this one here.
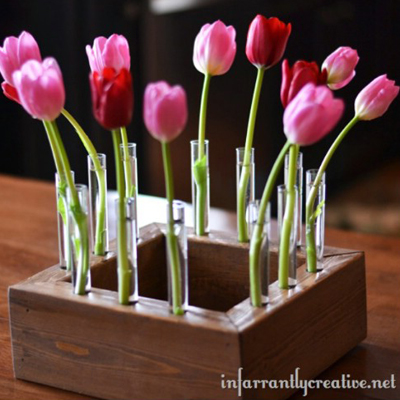
2x4_SQ_Vase_inf

I love how this coffee table manages to be 2×4 and modern sculpture all at once. Find how to make it here.
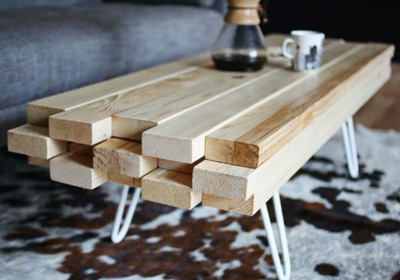
2x4_Coffee_Table

The couple who made it was inspired by this table. I thought it very astute of them to make the connection between this table and their coffee table need.
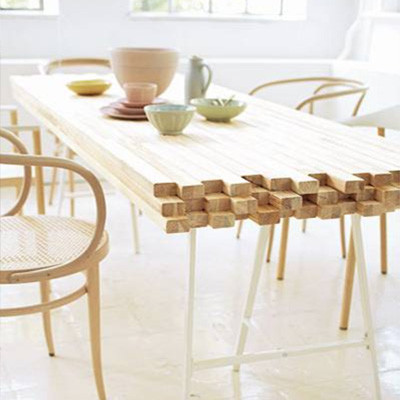
2x4_SQ_Table

2x4_Modern Bench

As the tutorial says: Less is more! This bench shows how classy the 2×4 looks when the edges are sharpened. And I love how the interlaced wood makes for a dovetail joint look. This thing is gorgeous.

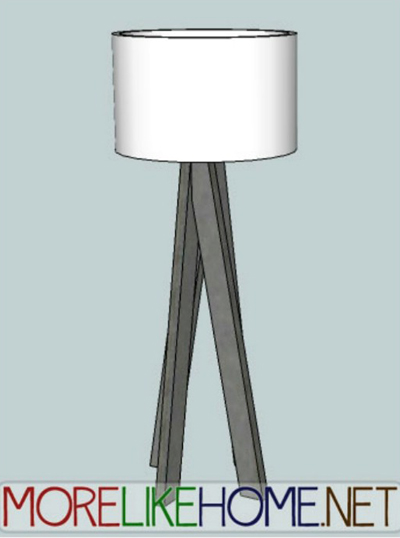
I absolutely love this lamp idea. If anyone makes this please send me the photo! So far there is just the drawing. Find the brilliant tutorial here.
2x4_TALL_Lamp

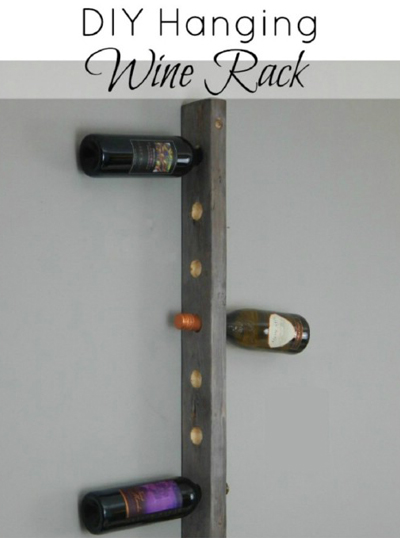
What’s not to love about this extremely minimal wine rack? I would probably sharpen up the edges and put the paint or stain inside the drilled holes as well. While I love the 2×4 idea, I would also want to hide its identity just a little more!
2x4_TALL_WineRack

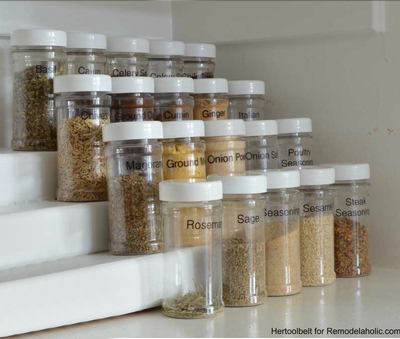
While we’re talking simple, these 2x4s are cut and attached to form stair steps for the spice bottles to be displayed. While the idea is simple, I like how care was taken to finish the project in a clean white semi-gloss, and the bottles were labeled so the spice names can be read in any row.
2x4_SQ_Easy TieredNOTYPE

Anyone who follows my posts knows I just love a project that looks far more expensive or difficult than it was. I can’t wait to try out some of these!
IDEA 94: WELCOME TO THE FAMILY

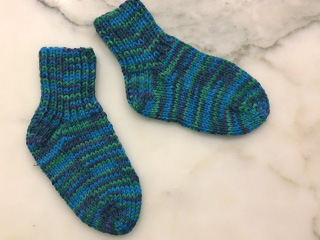
Sock_Family_baby

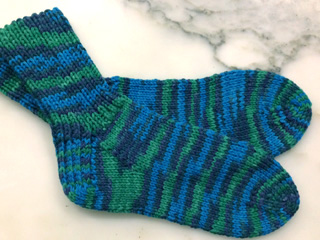
Second baby gifts can be tough to figure out. Having a baby can result in a cornucopia of baby stuff, so much so, the baby can grow faster than all the tiny outfits can be worn, let alone get worn out. Often, second and third babies already have lots of great stuff to wear and use. So, when my sweet niece had her second baby, it was tough to come up with something practical, yet special to celebrate this newest family member.

Serendipitously, last time I was visiting home, my mom asked me if I’d like some skeins of beautiful yarn she had bought, but never used. My answer to her was, of course. I’ll make you a pair of socks.

Sock_Family_8cc

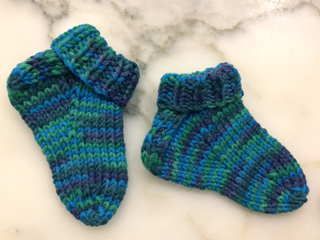
I knit the socks for my mom and found I still had lots of the yarn left, so I asked her if she would like multiple pairs. Her answer to me was, why don’t you make a matching pair for my great grandbaby?

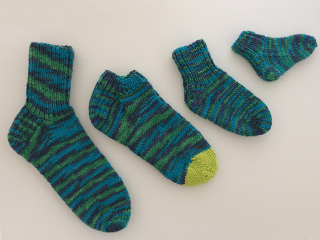
You can see where this is going. I Made baby socks, and big sister socks.

Sock_Family_babySock_Family_9cc

By the time I was done I had made socks for the whole new family.

Sock_Family_4

Now, even though great-grandma and great-grandbaby are states apart, everyone will feel just a little bit closer when they wear their special socks. And this new little one will have no trouble telling what family she belongs to!

IDEA 82: GO HOMEMADE

Maple_Syrup_Sunny

I remember reading a spoof on Martha Stewart where she purportedly had a recipe for making your own water. And this comes close. But.

When you live in the Midwest, well, when you have kids, sometimes you do things you never dreamed you would in the name of adventure.

We live in Minneapolis, the “South Metro”. We are a stone’s throw from the city in an urban neighborhood. And we have several mature maple trees, including a majestic Sugar Maple. When our neighbor called a tree trimmer to help remove a large branch from one of his trees, we observed from next door. Where the limb was removed, a veritable river of sap flowed out.

Huh, we said.

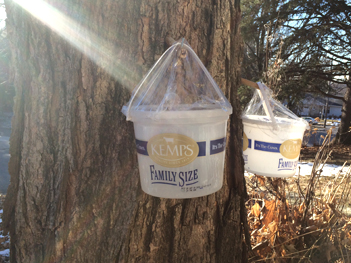
The next thing I knew, my husband had drilled two holes in our maple and began collecting bucket after bucket of pure maple tree sap.

Maple_Syrup_Buckets

He went online to discover that any maple tree can produce beautiful maple syrup, and our sugar maple would produce at the rate of 40 gallons of sap to one of syrup. Why not?

According to the online recipe, the time to sap the sap is when temperatures drop below freezing at night and rise into the 40s during the day. In Minnesota these conditions typically occur during the month of March, but depending on where you live, it could be anywhere from mid-February to April.

And get this: you probably have everything you need to produce maple syrup right in your house. Basically, what my hubby did was: Collect the sap in ice cream buckets, emptied each night into a 5 gallon paint bucket from Home Depot.

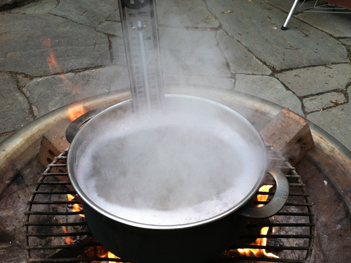
Once he got a bunch (and the sap seemed to be slowing down) he set up a boiling station out on our back patio. It seems there is a lot of boiling and evaporation, (which means doing it in the kitchen is not a good idea, unless, I guess, if you have a lot of wallpaper you’d like to remove).

Maple_Syrup_Boil

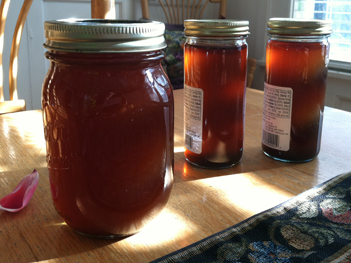
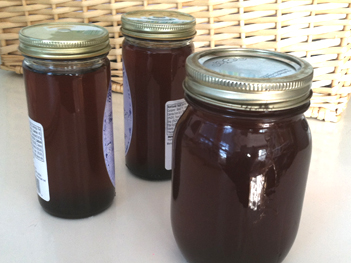
He filled my big soup pot with sap and brought it to a boil. Then he sat and monitored. As the liquid boiled down, he added more, always keeping a steady boil. Our 5-gallon Home Depot bucket of sap translated itself into one pint jar and two more little jars of delicious maple syrup. Enough to keep this family in homemade maple syrup until next spring.

Maple_Syrup_Bounty

So, was it worth it? Well, if you were just looking at the money savings, you would answer no, not even close. But what value would you put on creating something as magical as maple syrup straight from your yard, with no special tools at all? I’ll leave that one up to you. But if you do decide to give it a whirl, you must let me know! You are a sparkle in an otherwise world of practical, Martha!

IDEA 69: HELP YOURSELF BY HELPING SOMEONE ELSE

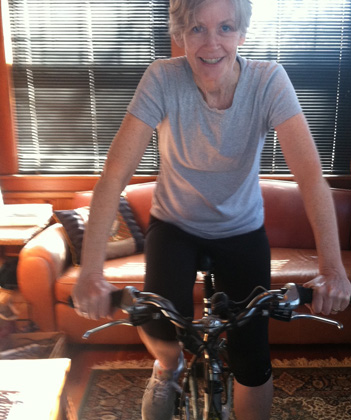
Inside_bike

This morning I put my bike up on rollers in my sunroom. Even though there is still a couple feet of (old, dreary) snow outside, I’m determined to be bike-trained by June. See, I’ve committed to ride in the MS 150; a hundred and fifty mile bike ride over two days, to help generate money for a cure for Multiple Sclerosis. So, what does this have to do with the price of eggs? Well, as moms, it’s difficult for us to carve out “me time.” It seems there is always something or someone else that is more important than ourselves to consider. And so, we ignore our needs and tend to the squeakiest wheel.

But, child-rearing time is also a great time to consider helping out a charity. It’s your perfect excuse to lean a little harder on your husband or support system, because after all, it’s not for you. It’s for the charity.

When my kids were small, our church often held sewing nights. All interested persons with a sewing machine would show up and spend an evening making diapers out of old T-shirts. Day care was provided by somebody’s older child, and it was a great way to catch up with like-minded-freedom-deprived moms.

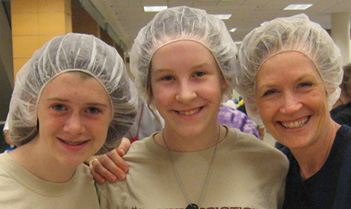
When my kids got a little older, they enjoyed pitching in to the cause. Which was, of course, a great way to teach kids about giving back. A local chapter of Feed My Starving Children held a 24 hour marathon in our town. Anyone could sign up for a shift bagging beans and rice for the less fortunate. The task was easy for my daughter and her friend to learn, but the best part was picking our shift, from 2:30 to 4:00 A.M.

We set our alarm clocks and drove in the dark to the facility. It was the most inspiring thing I’d done–especially in a hairnet. And I’ll never forget how, after our shift as we stepped out of the building, we were greeted by the most beautiful sunrise.

Feed_My_Starving_Children

So, this June I’ll do my best to ride my butt off for MS. Along with that comes the quest of getting myself in shape, and a goal to get on that bike every morning without fail for the next several weeks. It’ll be a little something for MS. And it’ll be a great big deal for me.

Win-win.

IDEA 61: WORLD’S SIMPLEST BIRDFEEDER

Sunflower_Bird_Feed_2

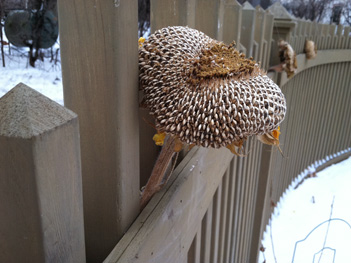
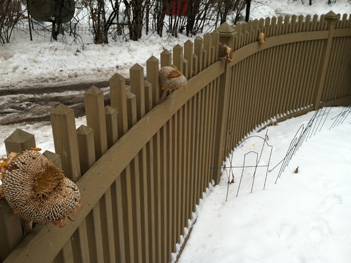
The other day I came home to see my clever husband had come up with a very BellaPamella idea. In the summer he had grown sunflowers, in part to have something for the birds to nibble on. When the season ended, the top-heavy flowers eventually flopped over, so he snipped them all and hung them in the garage to dry out.

And that’s how, here in mid-winter, he had some ready snacking for the yard birds. He simply tucked the flower heads into our fence at even intervals. The result is not just a wild bird food station, but a lovely, natural seasonal decoration for our fence!

Sunflower_Bird_Feed_1

IDEA 52: HONOR THE ROAD TRIP

Souvenir

For many spring breaks our family of five has hit the road for the annual Road Trip.

Once my oldest began college, he had a different spring break week. So, we just hadn’t gone in what seemed like a very long time. But this year, we decided to go with what’s left of our dwindling family.

My middle son is 18. And I’m sure it’s no surprise that a few days before we were to leave he began making his case to stay home. And no one I complained to, (husband, office-mates) gave me the satisfaction of even humoring me, let alone agreeing that I was right, that he should feel excited, or at the very least obligated to go.

But here’s the thing. I really wanted my son to go with us. Not because I didn’t trust leaving him for a week (with his older brother and our dog), but because I just wanted very much to be with him. And somehow, miraculously, he saw the light and came along.

Not surprisingly, the road trips, whose photos fill to overflowing my many photo albums, really are some of the most dear memories we have. He’ll never admit it to me, but I think this son, in the very back of his mind, cherishes those memories too.

So, we headed off to Texas because we hadn’t done that trip, and it was somewhere we could drive to and back in a week (which is, of course, the first requirement of a Road Trip).

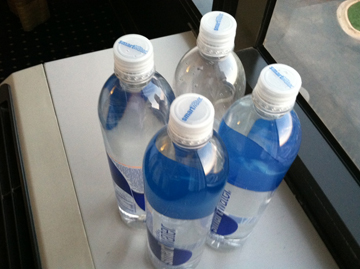
Several hours speeding along America’s highways gives one ample time to ruminate, and I began thinking about how different a road trip with grown children is than one with little kids. I remember one trick that worked so well when they were little. I actually wrapped six small “gifts”, two for each kid. The point was, just when things would get out of hand I would distract them, one child getting to open something. It would be something the whole lot could play with, like a deck of cards, or colored pens and paper. They were things I would have brought along anyway, plopped in a bag, but the fact that they were wrapped like presents put a whole different spin on things. It got their attention and made their trip much more exciting. Now, with teenagers, I brought a different kind of trail mix for each, (Target has an awesome variety) and marked big bottles of water with their initial. It’s not wrapped prizes, but the kids still respond to the love.

Water_bottles

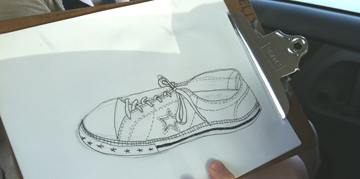
I’ll be the first to admit there was a bit of nostalgia to planning this trip. So I tucked in a binder we’ve been adding to for years. The binder is filled with drawing paper. And there’s room for a zip-lock bag of pencils, erasers and colored pencils. A big rubber-band keeps it all together. And it’s usually packed with a few clipboards. This book of drawings spans many years of car trips and it’s priceless. I was happy to see the attraction of making drawings is still there, as my daughter sketched a lovely rendition of her shoe.

Car_Art

This same smart daughter also came up with what I thought was a dandy car activity. She took a close-up (well, as close as you can get while speeding along the highway) photo of every different color car we passed. The object being to make a rainbow of all the car pictures at the end of the trip.

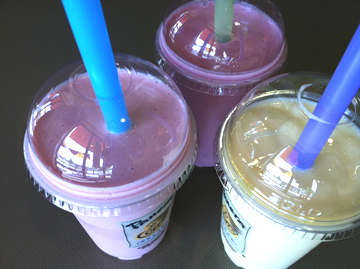
We’ve gotten smarter about car food, as we kept the snacks generally healthy, and stopped for the most photogenic smoothies, one strawberry, one Very Berry and one mango–all with different color straws.

Smoothies

And even though we’re all so “mature”, there’s something about a car trip that just brings out the family in you. We all marvel at the amazing things you can see as you roll along. We saw a hot-rod called “Godzlla” being hauled in a trailer. We realized we were in windmill territory when we saw three semis each carrying one blade of a windmill, hitting home just how gigantic those things really are.

Windmill_Truck

And we saw some cattle standing and walking along in what must have been a large, very shallow body of water. As the animals moved in the late afternoon light, it looked as if they were walking on water.

Honor the road trip tradition. You won’t be sorry you did.


IDEA 42: WRITE IT DOWN

Book_of_Stories

This morning my teenage son was telling me about a wrong number he received on his cell phone. The caller, apparently attempting to reach a landlord said “The toilet is backing up! I need help here!” My son asked “Is it still running?” the caller said it was, so my son said, “Do you see a little knob down underneath on the left side? Turn it all the way until the water stops.” The caller did so, and the water stopped. “OK,”  the caller said, “now what do I do?” to which my son replied, “I don’t know. You have the wrong number.”

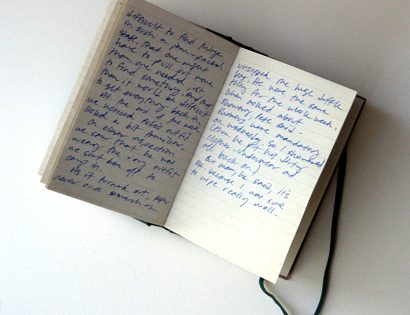
I just about choked on my Cheerios, I was laughing so hard. Let’s face it, every now and then one of your kids will say or do something that is either so funny, or so sweet it practically blows your mind. And I know we are all so very busy. But this is my plea to get you to dedicate a small notebook to writing these things down.

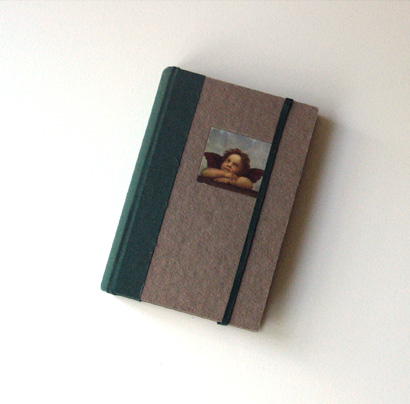
Buy a small “blank book.” This is not hard to do. We have all seen them, fallen in love with them, then couldn’t think of anything good enough to write in them, right?

If something one of your kids does strikes you as funny, write it in there.  If you can’t think of anything, (or nothing funny has happened yet), write the story of giving birth or adopting them. This book will become a personal bedtime story for the kids. You wouldn’t believe how they love to hear stories about themselves. If it’s funny, and it’s about their sibling, even better. Since it’s being written for the kids, you don’t really have to worry about the quality of writing. It’s the stories that matter. I have been recording stories in our book since the kids were quite small. Eventually it will end up being a keepsake, and possibly inspire them to do the same for their kids.

So, to my friend who’s daughter asked him, “Daddy, is that a REAL clown, or just a guy dressed like a clown?” I say: Write it down!

Book_of_Stories_cover

IDEA 26: HAPPY EASTER BASKETS

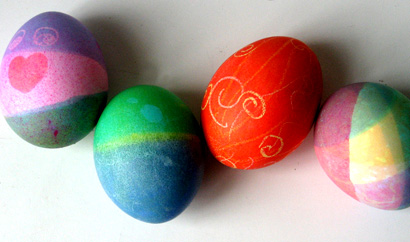
Easter_eggs

When I was a kid I just loved Easter morning, which ranked way up there, somewhere between Christmas and Halloween. My mom is a practical soul and it became pretty obvious she did not believe in investing in a new brightly colored, plastic grass-filled Easter basket every year for each of four kids, that would eventually find its way to the basement (or worse).  So, on Easter morning the hunt would begin, but we never knew exactly what we would find. In the name of practicality, my Easter surprise would be housed in something that was already around the house. My mom is a potter, so often, those sweet chocolate eggs would be nestled in a hand thrown bowl.

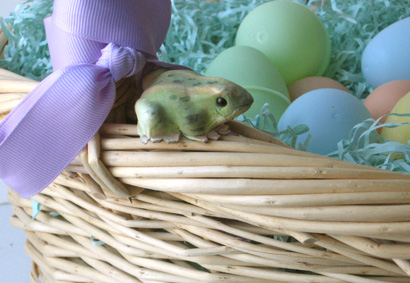
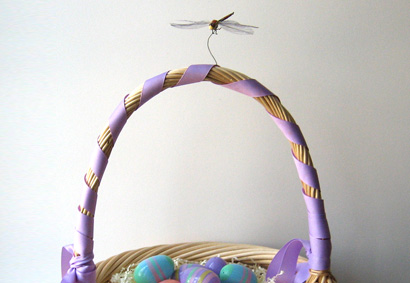
I didn’t inherit my mom’s talent for ceramics, but I do think I adopted her penchant for practicality. When it came to my kids, rather than fall for the “temporary” Easter baskets that line the shelves every spring, I chose a special basket for each child. I wrapped the handle in grosgrain ribbon and attached findings from the craft store floral isle. My eldest son got a dragon fly that will forever hover one-and-a-half inches over the handle via a wire. My second son got a frog at each point where the handle attaches to the basket, and my little daughter got a row of paper rosebuds tucked into the ribbon that wrapped her handle. The baskets were thus decorated, and then christened as each child’s permanent basket.

Easter_basket

Basket_frog

Basket_Dfly

Much like their Christmas stockings, the children learned to recognize their familiar basket, alleviating any pressure to designate whose basket was whose.  And the plastic eggs and even the pastel shredded paper “grass” have gotten reused countless times.

In the off-season they reside in a big bin in the attic where I can get a glimpse of Easter any time I need it. So, maybe it’s not the most earth-shattering idea. But I do think my mom’s thinking was way before her time. And that she taught a lesson that was “green” before people even knew what that was.

IDEA 25: EASTER SURPRISE CAKE

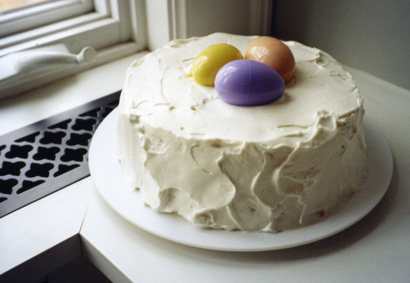
Easter_cake

This Easter, why not make a special cake adorned with a little surprise? This recipe is from my Aunt Liz who called it Snowball Cake and often decorated it with fresh strawberries. While that is an extraordinary way to make this cake, and highly recommended, here is a fun Easter version of it. The cake is the same, but nestled on top, we put one plastic Easter egg for each child. Hiding inside the eggs can be candy treats or small toys, anything that says Happy Easter to you!

Of course if you are the type of domestic goddess who prefers to have your local bakery make the cake, the idea still works! You can still steal the show by adorning it with the filled Easter eggs. After all,  BellaPamella style is all about making it creative,  not adding undue stress.

The recipe that follows is also here for you to download. Just print one of the pdfs on card stock and, either cut out for your file [recipe card] or hole-punch for your notebook [page].

Enjoy!

No Bake Easter Cake

2 envelopes unflavored gelatin

1 cup crushed pineapple, drained (keep the juice)

1 cup pineapple juice (add water, if needed to make cup)

1/2 cup sugar

1/8 teaspoon salt

1 tablespoon lemon juice

1 tablespoon lemon zest if available

2 cups whipping cream (+1 more for topping)

4 teaspoons sugar

2 teaspoons vanilla

1 store-bought Angel Food Cake

optional, 1/2 pint of fresh strawberries, sliced

Whipped Cream Topping

1 cup whipping cream

2 teaspoons sugar

1 teaspoon vanilla

Dissolve gelatin in 4 tablespoons cold water. Add 1 cup boiling water, and stir till lumps are gone. Add pineapple, pineapple juice, sugar, salt and lemon juice. Mix well and refrigerate to cool, about an hour. When partly gelled, beat 2 cups of whipping cream, 4 t sugar and 2 t vanilla in a cold bowl just until peaks form. Fold the whipped cream into the gelled mix.

Break up the angel food cake into 1” chunks. In an angel food cake pan or Bundt or other round pan, make layers of the cake, the gelled mixture and if using, sliced strawberries, ending with the gelled mixture. Refrigerate over night. When set, loosen around the edges and turn onto a plate. Frost with the whipped cream topping, made as you made the other whipped cream.

Fill most of the hole with whipped cream and nestle your surprise filled eggs in the indent. Best when kept refrigerated until ready to serve.