IDEA 30: REPURPOSE THE PLAY-SET

Garden_2

After saving up for the kids, the house and the yard, like many, our next investment was the play-set. In my neighborhood, this means one or two swings with optional monkey bar, fort, sandbox or slide, all held up by a structure made of 4×4 timbers. The whole thing cost a ton and weighed about that much too.

Garden_PL1

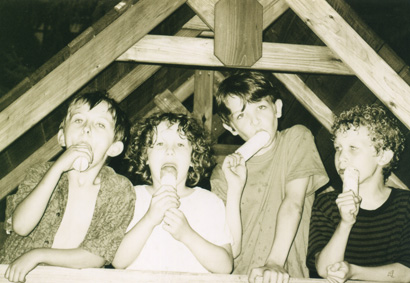
My husband lovingly put the play-set together (cheaper than having it assembled by the play-set guys) and the kids enjoyed countless hours swinging, digging and holing up in their tiny room just above our heads.

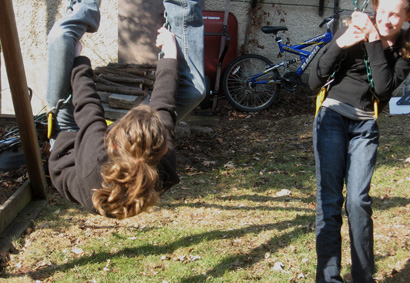
Then one day we noticed that all our kids had become teenagers. Despite my youngest child’s opposition, talk of wanting to reclaim some of the yard turned to talk of getting rid of the play-set. It was a sad notion, until close inspection revealed that the bottoms of the beams had begun to rot, and although it hadn’t created a danger yet, prudence dictated it be dismantled before anything happened. And so, I took about 100 more photos than needed of the last fun day on the play-set, and it was taken down.

Play_set_2

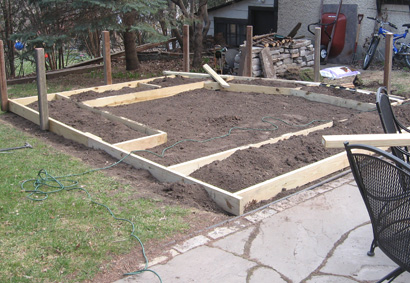
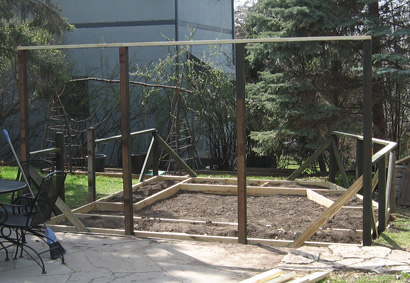
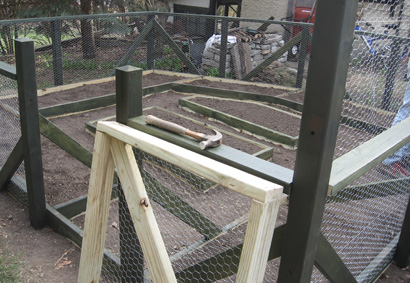
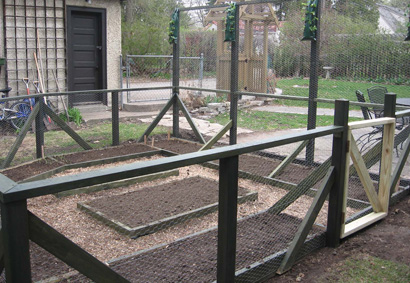
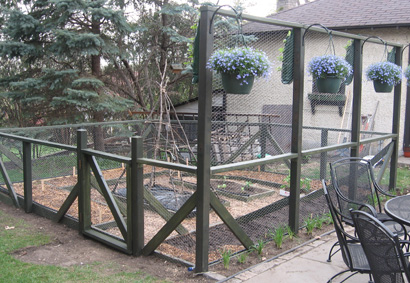
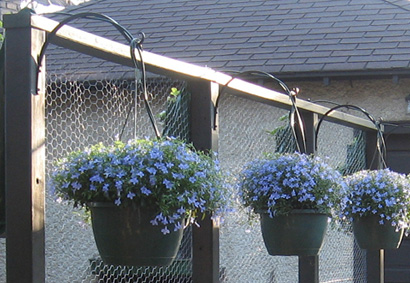
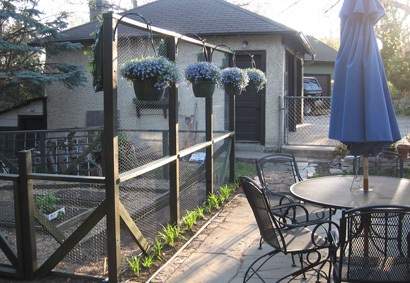
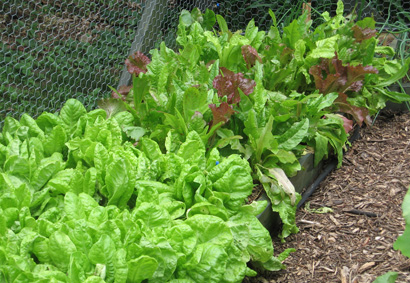
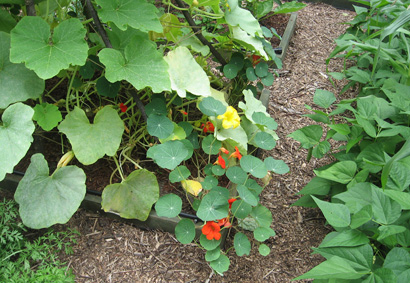
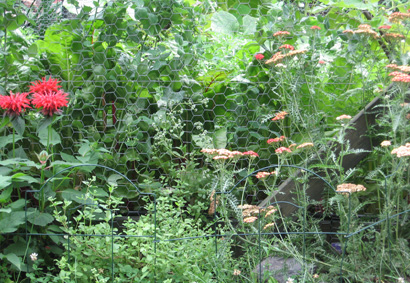
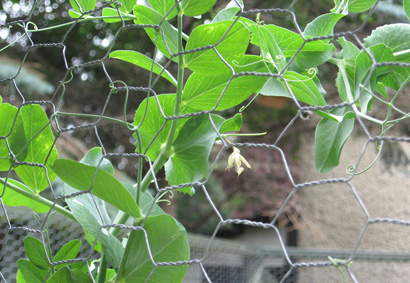
I’m not saying my husband (the gardener) had an ulterior motive, (he WAS the one who pointed out the rotten beams), but once the play-set was dismantled, he created the snappiest bunny-proof garden out of the lumber.

Garden_4Garden_5Garden_6Garden_7Garden_1

Full disclosure, he did have to buy some 2×4’s to complete the plan, but it was really nice that all those big beautiful beams did not just go to waste.

Garden_2Garden_3Garden_lettuceGarden_NasGarden_squashGarden_wire_2Garden_wire

So, for any gardeners out there anticipating an empty nest, a little bit of DIY inspiration for you. Our resulting garden gives us so much beautiful bounty, we’ve never looked back.

Okay, maybe a little.

Garden_PL2

IDEA 29: DOOR HANGER DIALOG

Door_dialog

You probably feel like there are things that would go smoother if the members of your family would just listen and retain. No one likes to hear themselves constantly repeating things like a parrot only to have the sentiment go unheeded.

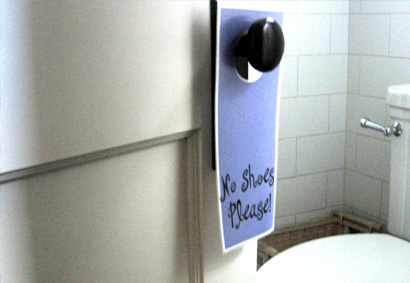
After spending the evening on my knees scrubbing a particularly grimy bathroom floor near our back door, it occurred to me that if people were not wearing shoes in there I wouldn’t have to do it again so soon. So I printed a cute door hanger on my printer and cut a circular hole and hung it on the knob. It said simply: No Shoes Please. And then a funny thing happened. Everyone took their shoes off. Even the guests. Even the repair man. And all the floors of the house stayed a little cleaner.

You have knobs all over your house that are just waiting to display a “suggestion.” A closet door could say “Hang it up, Please!” The pantry could say “No snacks before dinner.” For the laundry room: “Fold it and take it.” And maybe a second, “Just sayin’.”

You get the idea.

IDEA 28: CELEBRATE 365 MOTHER’S DAYS A YEAR

Rain_kids_1

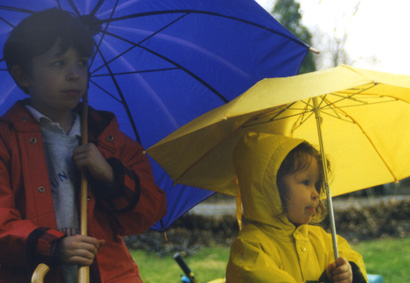
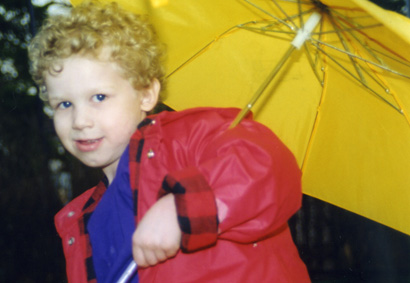
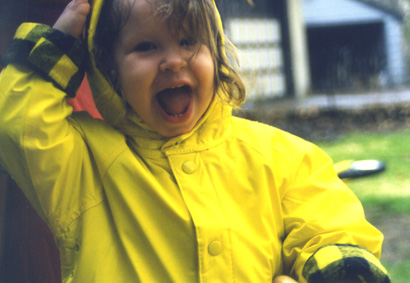
When my kids were about 2, 4 and 6 we decided to take a rain walk one rainy afternoon. We donned raincoats and umbrellas and took a walk around the neighborhood. Of course my goal was to get the kids to run off a little energy, but the whole thing proved to be quite a thrill, as we splashed through big puddles and marveled that no one else was out.

Rain_kids_2

But the real value of the rain walk didn’t make itself known to me until I was back at the office, later that week. A friend and coworker of mine mentioned that she saw us parade past her house. I don’t remember the conversation exactly, but she had a very real appreciation of the whole thing. The kids. The bright colored raincoats and umbrellas. The joyous abandon. Little did I know that she had been trying to have a baby. Some time later, that friend ended up adopting a little baby girl.

I don’t have to remind moms of the treasures that have been dropped in our laps (literally). But when we have sleep, food and shower deprivation, or we’ve been up all night with a sick child, or have just been screamed at by an angry teenager, it’s nice to take a moment to remember just how incredibly lucky we are.

Rain_kids_3

We knew the job was tough when we signed up. And amazingly, we find ourselves up to the challenge. So, to every person who has raised, cared for, or been touched by a child,

have a Happy Mother’s Day. (I know, I didn’t have to tell you that).

Pam

IDEA 27: GRADUATION CELEBRATION

Grad_cake_marble

I think I began stressing about the dreaded “Graduation Open House” when my kids entered kindergarten. I had been invited to a few, during which the main topic of conversation was how much the parents went through to get their house in order and make it all happen. One family attempted a remodel before the big day, and another decided to power-wash the house. Needless to say the whole thing had me in denial. When my oldest was nearing graduation, I pretty much decided we wouldn’t do anything. (Did I mention I have an aversion to stressful situations and avoid them at all cost)?

Over spring break we happened to be visiting out of town relatives. My sister-in-law stated that if we would have a grad party, they would come. The offer was just too good to pass up. Besides, I figured a family party was something that I might even be able to handle. There is something much safer about that prospect.

I am not a big party expert but I do know that if I give myself a few small, creative tasks to accomplish, I can throw a party that I won’t worry over, too much. The truth is, anyone who comes to your home to a party is not passing judgment on you, but quite happy to be there. And if you throw in a few creative touches, the whole thing is just more interesting and memorable. I’m not saying you HAVE to make things. But if you tend to be a crafty person, I say, go with your strengths! It will calm you down about the whole thing.

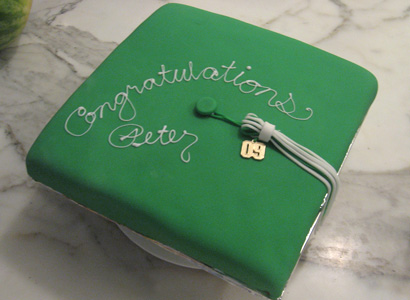
I knew I wanted to make a “theme” cake, and when my husband suggested the shape of a “mortar board” (graduate’s hat) I was thrilled. I happened to have a very large, very square pan, but you could always make a smaller one with a regular square pan.
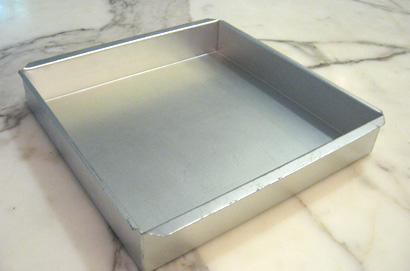
Grad_pan

One of the easiest ways to make a very professional looking cake is to use fondant icing. And the best part is, it’s more like a craft project than cooking. Buy a box of pre-made fondant from the cake decorating isle of your local craft store. It comes in a package roughly the size of cake mix. Inside is a plastic bag containing a moist material that resembles white play-dough. The same store will also carry paste-based food colors. Depending on your school colors you may be able (as I was) to get away with buying only one color.

Now make and cool a square cake. I cut a piece of foam-core the exact size of the cake and covered it with foil, but you could also use corrugated cardboard covered with foil. Place the cooled cake on the square so no edge is showing, and ice the whole cake with your favorite butter cream frosting. Instead of placing the fondant directly on the cake, it’s preferable to ice the cake first with fluffy butter cream frosting. This not only helps keep a smooth surface, but tastes much better!

Here’s the fun part–you actually use your hands to squish and knead the color into the fondant. We used plastic gloves so that our hands weren’t dyed green. But make sure it’s not a latex or rubber glove which could transfer an unwanted flavor. We used thin plastic gloves, the kind you get in a box of home hair dye. When you start this, you have the impression the color will never even out, but have patience, eventually it will.
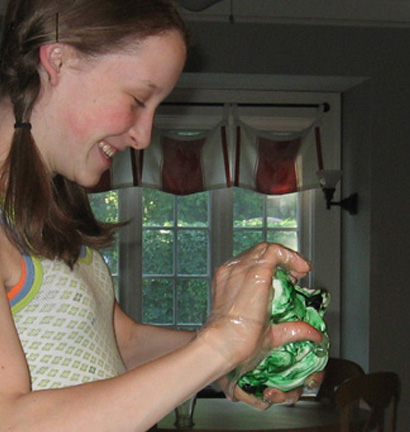
Grad_mix

Once the color is even, the fondant is rolled out like a pie crust. Roll it as thin as you can, stopping to lift and turn over much like you would a crust. Rolling between two sheets of parchment paper makes lifting easier. Then it’s ‘easy as pie’ to lift the fondant and place it over the cake.
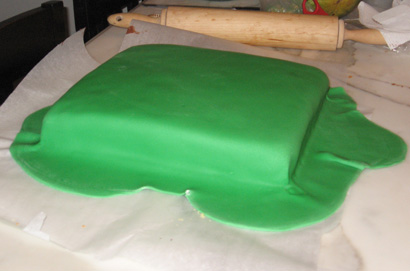
Grad_fondant

Trim the fondant around the bottom edge with a knife. Then, use extra fondant to cover an upside-down bowl for the “hat” part of the mortar board (seen in the book display photo below). Make sure to affix the cake board on top of the overturned bowl well, with more blobs of fondant as glue.

Flatten a ball of fondant for the button. Cut fondant strips for the tassel, and letter your message on top in your fanciest script with tube frosting. I then carefully removed the gold year charm from my grad’s hat and used it to temporarily decorate the cake, but this charm is also probably available at the craft store.
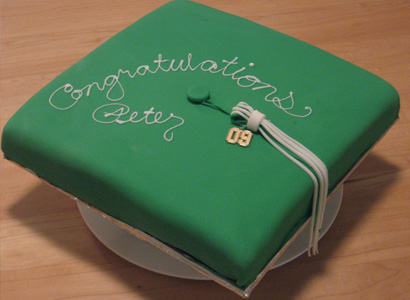
Grad_cake_wood

Now, you have worked so hard on this masterpiece it deserves to be displayed. And this leads me into the next little grad party detail. I’m sure you have heard of all kinds of photo boards parents have made of their grad so guests can take a little stroll down memory lane. Well a simpler solution is to decorate the cake table with memorabilia. I surrounded the cake with photo albums, each with a ribbon bookmark (school color, green) at a particularly significant (or embarrassing) page. Guests could do a whole lot of browsing simply walking around the cake table.
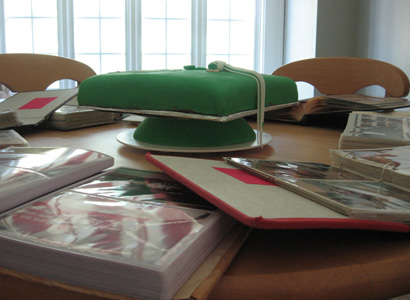
Grad_cake_books

Another very simple decoration is to wrap white napkins around the flatware and tie with a ribbon of the school color. So, what’s so great about it? Don’t they look like little diplomas! (And if you point that out to your guests they will look even more like diplomas).
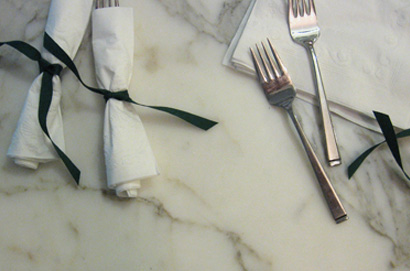
Grad_diplomas_d

And of course, I shouldn’t have to tell you to photograph your lovely accomplishments. If for no other reason, it will be a handy reference for when the next kid graduates!
IDEA 26: HAPPY EASTER BASKETS

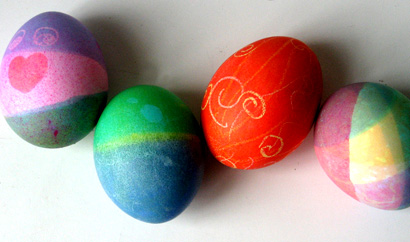
Easter_eggs

When I was a kid I just loved Easter morning, which ranked way up there, somewhere between Christmas and Halloween. My mom is a practical soul and it became pretty obvious she did not believe in investing in a new brightly colored, plastic grass-filled Easter basket every year for each of four kids, that would eventually find its way to the basement (or worse).  So, on Easter morning the hunt would begin, but we never knew exactly what we would find. In the name of practicality, my Easter surprise would be housed in something that was already around the house. My mom is a potter, so often, those sweet chocolate eggs would be nestled in a hand thrown bowl.

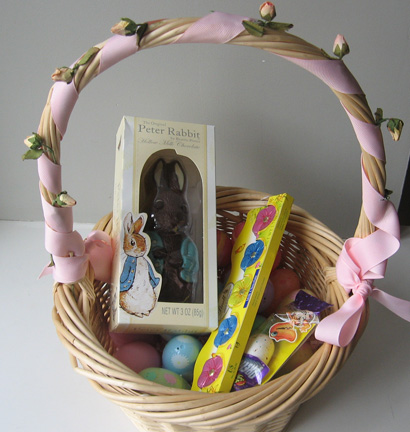
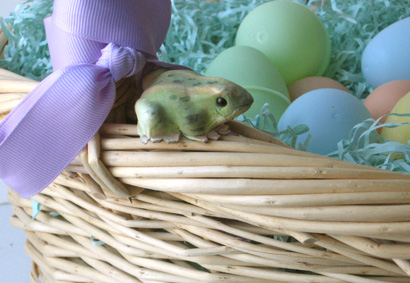
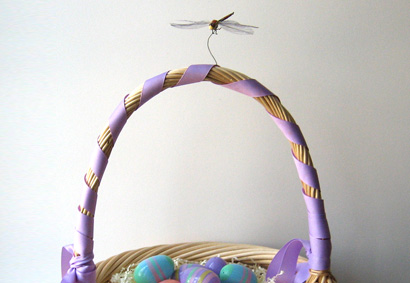
I didn’t inherit my mom’s talent for ceramics, but I do think I adopted her penchant for practicality. When it came to my kids, rather than fall for the “temporary” Easter baskets that line the shelves every spring, I chose a special basket for each child. I wrapped the handle in grosgrain ribbon and attached findings from the craft store floral isle. My eldest son got a dragon fly that will forever hover one-and-a-half inches over the handle via a wire. My second son got a frog at each point where the handle attaches to the basket, and my little daughter got a row of paper rosebuds tucked into the ribbon that wrapped her handle. The baskets were thus decorated, and then christened as each child’s permanent basket.

Easter_basket

Basket_frog

Basket_Dfly

Much like their Christmas stockings, the children learned to recognize their familiar basket, alleviating any pressure to designate whose basket was whose.  And the plastic eggs and even the pastel shredded paper “grass” have gotten reused countless times.

In the off-season they reside in a big bin in the attic where I can get a glimpse of Easter any time I need it. So, maybe it’s not the most earth-shattering idea. But I do think my mom’s thinking was way before her time. And that she taught a lesson that was “green” before people even knew what that was.

IDEA 25: EASTER SURPRISE CAKE

Easter_cake

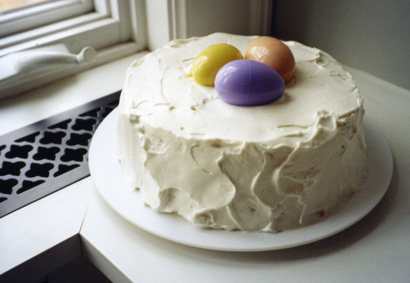
This Easter, why not make a special cake adorned with a little surprise? This recipe is from my Aunt Liz who called it Snowball Cake and often decorated it with fresh strawberries. While that is an extraordinary way to make this cake, and highly recommended, here is a fun Easter version of it. The cake is the same, but nestled on top, we put one plastic Easter egg for each child. Hiding inside the eggs can be candy treats or small toys, anything that says Happy Easter to you!

Of course if you are the type of domestic goddess who prefers to have your local bakery make the cake, the idea still works! You can still steal the show by adorning it with the filled Easter eggs. After all,  BellaPamella style is all about making it creative,  not adding undue stress.

The recipe that follows is also here for you to download. Just print one of the pdfs on card stock and, either cut out for your file [recipe card] or hole-punch for your notebook [page].

Enjoy!

No Bake Easter Cake

2 envelopes unflavored gelatin

1 cup crushed pineapple, drained (keep the juice)

1 cup pineapple juice (add water, if needed to make cup)

1/2 cup sugar

1/8 teaspoon salt

1 tablespoon lemon juice

1 tablespoon lemon zest if available

2 cups whipping cream (+1 more for topping)

4 teaspoons sugar

2 teaspoons vanilla

1 store-bought Angel Food Cake

optional, 1/2 pint of fresh strawberries, sliced

Whipped Cream Topping

1 cup whipping cream

2 teaspoons sugar

1 teaspoon vanilla

Dissolve gelatin in 4 tablespoons cold water. Add 1 cup boiling water, and stir till lumps are gone. Add pineapple, pineapple juice, sugar, salt and lemon juice. Mix well and refrigerate to cool, about an hour. When partly gelled, beat 2 cups of whipping cream, 4 t sugar and 2 t vanilla in a cold bowl just until peaks form. Fold the whipped cream into the gelled mix.

Break up the angel food cake into 1” chunks. In an angel food cake pan or Bundt or other round pan, make layers of the cake, the gelled mixture and if using, sliced strawberries, ending with the gelled mixture. Refrigerate over night. When set, loosen around the edges and turn onto a plate. Frost with the whipped cream topping, made as you made the other whipped cream.

Fill most of the hole with whipped cream and nestle your surprise filled eggs in the indent. Best when kept refrigerated until ready to serve.

IDEA 24: PHOTO ORG

Photo_Org_1

If you are looking for a photo album solution, it means you probably have boxes (or drawers, or computer files) of photos that have piled up. This tidbit is not exactly about organizing those. For now, I would either ignore them or if they have been printed, buy a whole bunch of matching photo boxes and at least get them all in one place. Once you have seen how clever you can be at photo org, you can go back and tackle them.

This is about This Day Forward. Because if the very next time you take pictures you start doing this, the number of organized pictures will eventually surpass the number of disorganized ones. And hopefully you will inspire yourself to one day work on the others. (Besides, by then you’ll be a pro).

Here’s the first key: In most of our lives there are really only a handful of photo events in any year. OK, if you have a newborn, there is a photo event every day. But generally, most of us haul the camera out a half a dozen times a year, usually centering on holidays or other significant ceremonies, etc. Even if you do snap away every day, use the big picture events to do this.

As soon as possible after the next picture event, download your camera to your computer. Right now, before getting up, you are going to decide which ones to print. Just start going through them. If you like the picture, either name it or put it in a folder (whichever works for you). If you don’t like the photo, just skip to the next one. Don’t worry about throwing it out. (That’s the part that makes it way too hard). All you’re doing is identifying the ones you LIKE. Once you are sure the files are all in your computer, delete everything on the camera.

Now, go to a photofinishing website. I use my local drugstore. On the site you will learn to send your photos to the store (you’ve just identified which ones to print with your naming or file system) and they will make prints which you will go pick up. There will be options for paying online and/or having the prints sent to you. Do as you wish, but I find checking the box that says I will pay when I pick up is the easiest.

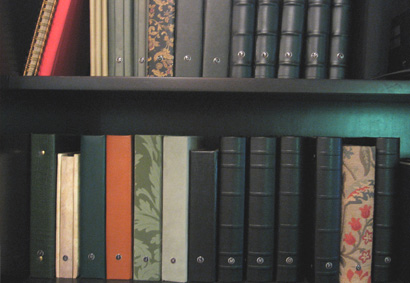
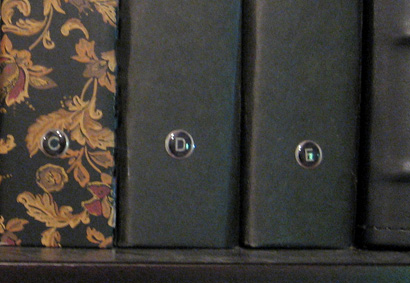
This next part can be done at the same drugstore, or in my case I like the big box stores: Find some reasonably priced photo albums and buy as many as you are comfortable, like a row as wide as your shelf. Do the albums HAVE to be the same? No. Get what you want. Sometimes sameness helps one to feel organized. And a whole row of identical albums is beautiful. My collection consists of chunks of like albums interspersed with the occasional fun surprise, partly because I like a little variety, and partly because of the way the collection has taken years to grow. Purchase a sheet of letters of the alphabet from the scrapbook aisle and letter the spines of the albums starting with A.

Photo_Org_2

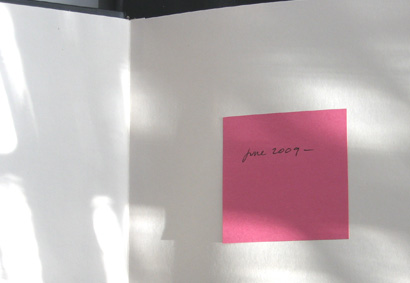
Then, attach a “sticky note” inside the cover of album “A” and write the month and year of the photo event followed by a dash. Now put in all those photos you picked up.

Photo_Org_3

Repeat the process immediately after each picture event, with all shots that are in the camera, deleting the camera files when you have downloaded them to your computer. When the album is filled, write the current month and year on the sticky note (after the dash) and move on to album “B.” Once you’re sure the album is done, if you like, you can write the dates directly on the album page and scrap the sticky.

I have used this system for years. The resulting books are a constant source of joy for me and for anyone who comes in my kitchen (where the albums are stored, taking up more shelf space than the cookbooks). Of course I started the system long before there was digital photography. The main thing is to just start putting the pictures in books. And making it part of the photo-taking experience. You don’t have to feel bad if you don’t want to print them all, or put them all in the book. I’ve had occasions where I used most of an album on one single occasion. And others where there were only one or two photos that told the whole story. Since you don’t throw out the computer files, you will always have them as back-up. So you can proceed without feeling the burden of getting it exactly right. You rest assured knowing you can always go back in for “revisions” if you want to. Although we both know, you never will!

IDEA 23: FOREVER VALENTINE

Val_4

My daughter was born in February, which meant I had one very pregnant Valentine’s Day. So that may have been the reason I got this idea. But never-the-less it’s one worth sharing. Who, but your new born baby could possibly be your best Valentine ever?

Val_2

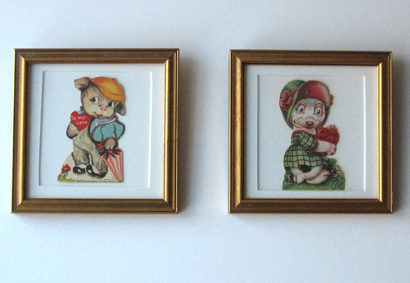
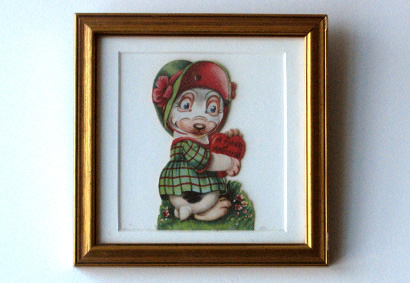
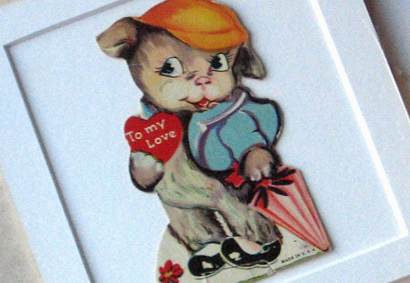
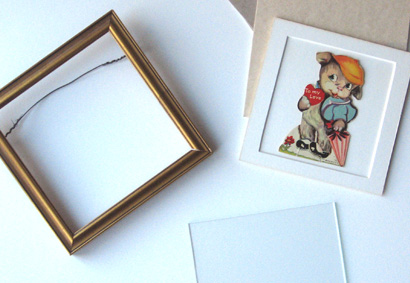
Look for some sweet old fashioned Valentines at an antiques shop and frame two of them for the nursery wall. Frames are available everywhere, but I liked these vintage gold leafed ones. Many come equipped with a mat, but since I wanted very small pictures, I took mats from a larger frame and cut them down to fit small frames. This way I got the fine professional bevel of the mat and I just had to cut the outside to make it fit my small frame. You can also have small mats custom cut at the craft and floral store. Or, cut your own mat from a piece of wrapping or wallpaper. I used another matching solid white piece of mat board under the card and stuck it down with a little double stick tape.

Val_3

Of course you don’t have to use antique cards for this. Any Valentine you love will do. And when it comes to your little one, it’s sweet sentiment really does last all year long!

Val_1

IDEA 22: CURE FOR CABIN FEVER

Snow_flake_1

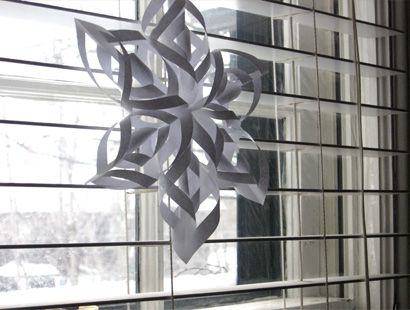
In many places across the nation, this winter has been one of the most, well, wintery on record. Some of us are having weather we’ve never seen before. Here in Minnesota the snow came early and stayed. Well, in true BellaPamella fashion, the following suggestion (on the order of “if you can’t beat ’em, join ’em”) is to embrace the weather. Celebrate the flakes.

Once we take down all the holiday stuff, the house takes on a certain simplicity, and I love that. For about a month. Then I start to wonder how long winter is going to linger. This year my daughter brought home a lovely snowflake project that she taught me how to do. We hung the flakes in the window in celebration (or was it defiance?) of a bright white yard that just refuses to melt.

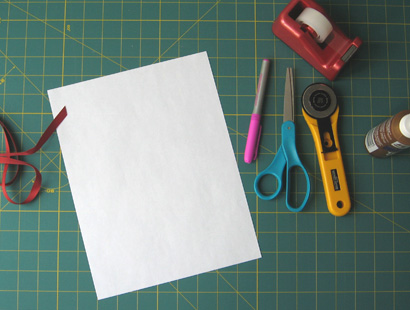
It’s one of my favorite kinds of projects because it requires only things we already have around: 8 1/2″ x 11″ white paper (printer paper is perfect), scissors or a rotary cutter and mat, tape and/or glue, and string or ribbon. We have a supply of fabric ribbon and so we used red grosgrain. You will also need a pen with a smooth, even barrel on it to form the first loop. For this size snowflake, a pen that’s a little fatter than a pencil works well.

SFP_1

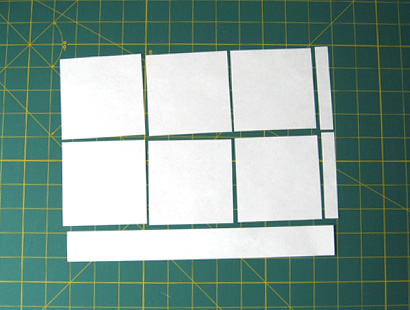
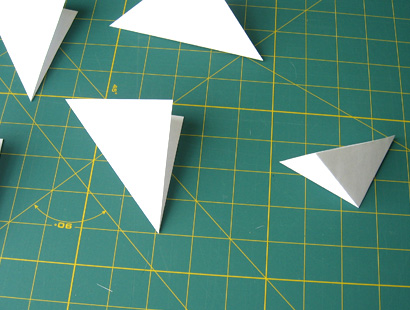
Start by cutting the paper into six 3 1/2 inch squares. Each snowflake will take one sheet of paper.

SFP_2

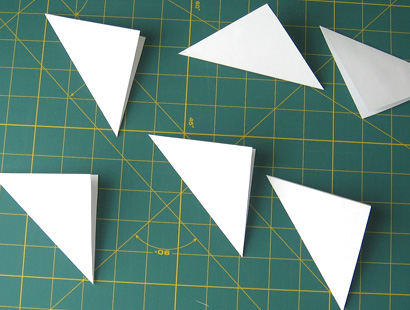
Fold each square in half diagonally, into a triangle.

SFP_3

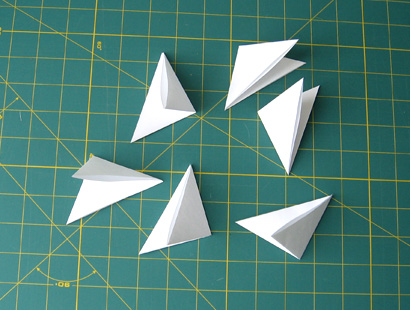
Then fold each in half again.

SFP_4

SFP_5

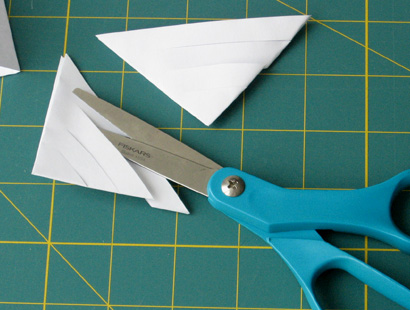
With scissors or the cutter, cut three slits on each triangle. Cut parallel to the cut edges (not the folded ones) and cut to about 1/4 inch before you reach the fold.

SFP_6

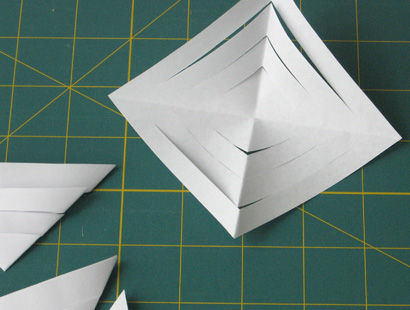
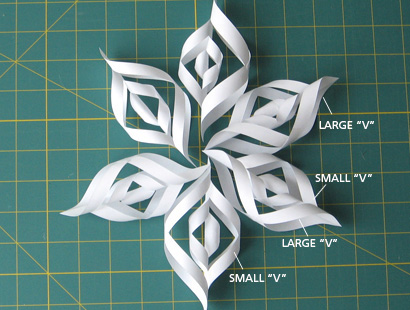
Carefully open the triangles back into squares. Each square should have six “V”s cut into it.

SFP_8

And gently smooth your finger along the middle crease to help flatten the paper. It’s best if you do the steps to each piece at the same time. You will have six squares for each snowflake.

SFP_9

Now, wrap the two corners of the innermost square around the pen and secure it with tape.

SFP_10

When you pull the pen out it looks like this.

SFP_11

Turn the square over and loop the next two corners and secure with tape. This loop will be bigger than the first, AND FACING THE OPPOSITE DIRECTION AS THE FIRST.

SFP_12

Turn over again, and tape the next corners the same direction you did the first loop.

SFP_13

They now look like this.

SFP_14

Now turn them over again and tape the last two (largest) corners.

SFP_15

From the side, your squares should now look like this

SFP_16

Notice how each piece has become a point of your flake. And also that each one has a large “V” on one side and a small “V” on the other side. Line up the six points with the large “V”s on the right. Now start to turn the points into a star. Make sure that each point is oriented the same way so that a large “V” is always next to a small “V”.

SFP_17

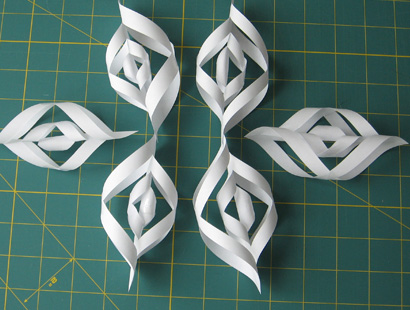
We found the easiest way to attach the points together was to first tape two “pairs” together as shown.

SFP_18

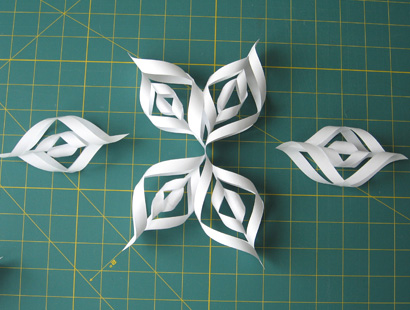
Fasten the pairs together.

SFP_19

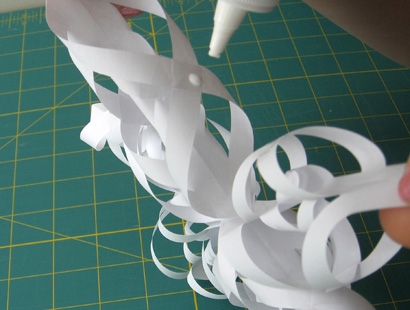
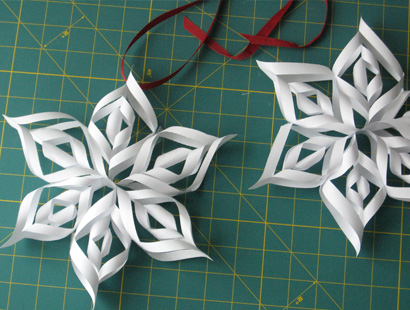
And then, tape on the last two points. You now have a full snowflake. But you will probably find if you try to hang it, gaps will form between the points that are pointing up. Hold the snowflake by it’s top point and let it hang. Where you see the gaps, put a dot of glue or a dab of glue stick, and pinch the spot together until it holds.

SFP_21

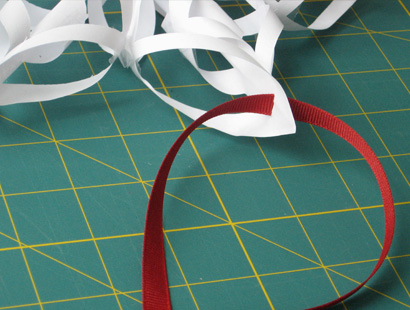
Finally, cut a small slit in the top point and lace your ribbon through.

SFP_22

Make as many snowflakes as will brighten your room and stave off the winter blues!
SFP_23

We have one snowflake hanging in each window. They make me smile every time I see them against that snowy yard. They serve as a reminder that there is beauty in all the seasons. You just have to look for it.

IDEA 21: IDENTIFY WITH SOMETHING

Paint_number

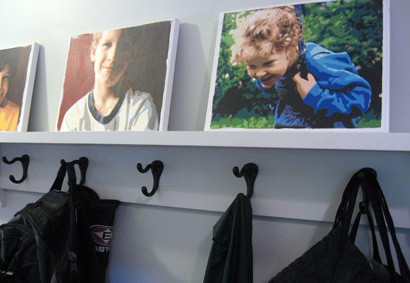
One day I discovered that you could order a Paint-by-number kit of your own photos. I sent in a picture of my daughter and the resulting painting was so beautiful and fun to do, I did the rest of our family. Now, the five portraits identify the hooks in our mudroom. Each picture sits above two hooks belonging to the person in the picture.

Of course it would have been much easier to write their names. But, that’s not the point is it?!