Archived Ideas for ‘Food’

IDEA 32: MAKE HEALTHY WORK FOR YOU

Vitamin_organize_3

Our family has taken to trust supplements and vitamins in a big way. It’s a great solution when you have kids running everywhere and you want to make sure they are getting their fair share of the good stuff. But if your kitchen counter is like mine, it has a way of looking cluttered even when you tidy up. The myriad bottles of vitamins, fish oil capsules and kelp were one thing, but when we started buying the mega-jars of whey protein it was getting a bit unsightly.

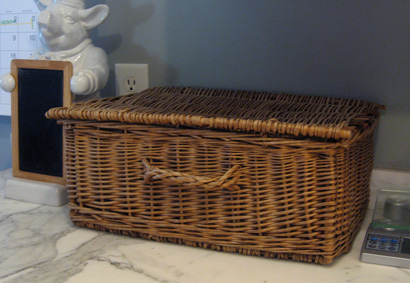
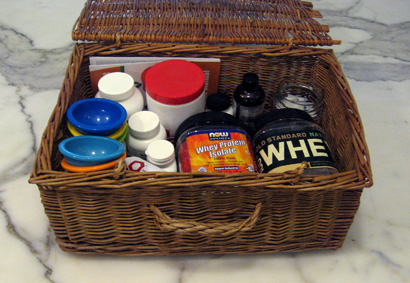
My solution? First, I found a sweet old basket with a lid at a tag sale. It used to be a picnic basket, I guess, but you could use any container with a lid that fits your decor.

All the little items went in without problem, then I found square jars that fit in the basket. I used peanut jars from Cosco. They are plastic and have large plastic lids. I cleaned the jars and removed the labels from the whey containers and taped them onto the smaller jars. Of course I had to cut the labels smaller to fit. I wanted to use the labels rather than just writing on the jars for two reasons: First, I wanted to keep the nutrition info, and second, I knew I would need the visual of the actual products so next time I would remember which one to buy! I scooped out enough of the whey to fill the smaller jars and the mongo ones went in the pantry.

Supplement_organizer_2

I used another empty jar to house small packets, and there was also room for a carb counting booklet. Everything fits inside and is easily accessible, then with a flip of the top, it’s all out of site!

Supplement_organization_1

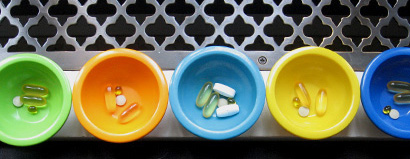
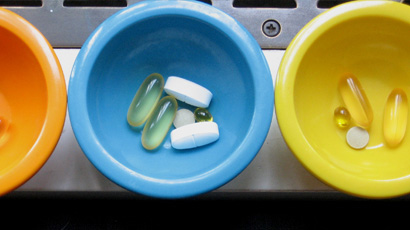
On the subject of ways to organize keeping the family healthy, we found a set of tiny, colored melamine bowls at the big box store. They came in a set of six, in six different colors. Since we have five in our family, we had each person pick their color. Now, in the morning, I divvy all the vitamins and supplements into the bowls. They sit there as a reminder to each family member whether or not they’ve taken their vitamins that day. By dinner time the last straggler has taken theirs and the next morning they all get refilled. An idea that not only beautifies your space but keeps you healthy? Now, that’s a very BellaPamella idea!

Vitamin_organization_5

IDEA 27: GRADUATION CELEBRATION

Grad_cake_marble

I think I began stressing about the dreaded “Graduation Open House” when my kids entered kindergarten. I had been invited to a few, during which the main topic of conversation was how much the parents went through to get their house in order and make it all happen. One family attempted a remodel before the big day, and another decided to power-wash the house. Needless to say the whole thing had me in denial. When my oldest was nearing graduation, I pretty much decided we wouldn’t do anything. (Did I mention I have an aversion to stressful situations and avoid them at all cost)?

Over spring break we happened to be visiting out of town relatives. My sister-in-law stated that if we would have a grad party, they would come. The offer was just too good to pass up. Besides, I figured a family party was something that I might even be able to handle. There is something much safer about that prospect.

I am not a big party expert but I do know that if I give myself a few small, creative tasks to accomplish, I can throw a party that I won’t worry over, too much. The truth is, anyone who comes to your home to a party is not passing judgment on you, but quite happy to be there. And if you throw in a few creative touches, the whole thing is just more interesting and memorable. I’m not saying you HAVE to make things. But if you tend to be a crafty person, I say, go with your strengths! It will calm you down about the whole thing.

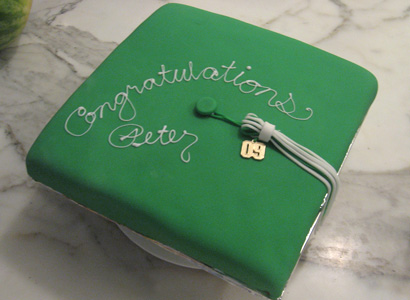
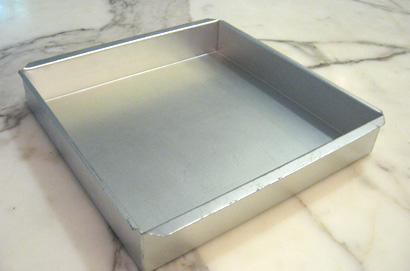
I knew I wanted to make a “theme” cake, and when my husband suggested the shape of a “mortar board” (graduate’s hat) I was thrilled. I happened to have a very large, very square pan, but you could always make a smaller one with a regular square pan.
Grad_pan

One of the easiest ways to make a very professional looking cake is to use fondant icing. And the best part is, it’s more like a craft project than cooking. Buy a box of pre-made fondant from the cake decorating isle of your local craft store. It comes in a package roughly the size of cake mix. Inside is a plastic bag containing a moist material that resembles white play-dough. The same store will also carry paste-based food colors. Depending on your school colors you may be able (as I was) to get away with buying only one color.

Now make and cool a square cake. I cut a piece of foam-core the exact size of the cake and covered it with foil, but you could also use corrugated cardboard covered with foil. Place the cooled cake on the square so no edge is showing, and ice the whole cake with your favorite butter cream frosting. Instead of placing the fondant directly on the cake, it’s preferable to ice the cake first with fluffy butter cream frosting. This not only helps keep a smooth surface, but tastes much better!

Here’s the fun part–you actually use your hands to squish and knead the color into the fondant. We used plastic gloves so that our hands weren’t dyed green. But make sure it’s not a latex or rubber glove which could transfer an unwanted flavor. We used thin plastic gloves, the kind you get in a box of home hair dye. When you start this, you have the impression the color will never even out, but have patience, eventually it will.
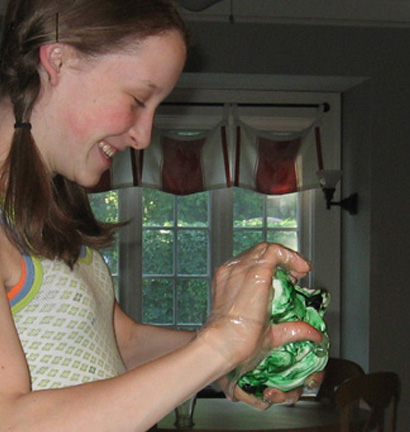
Grad_mix

Once the color is even, the fondant is rolled out like a pie crust. Roll it as thin as you can, stopping to lift and turn over much like you would a crust. Rolling between two sheets of parchment paper makes lifting easier. Then it’s ‘easy as pie’ to lift the fondant and place it over the cake.
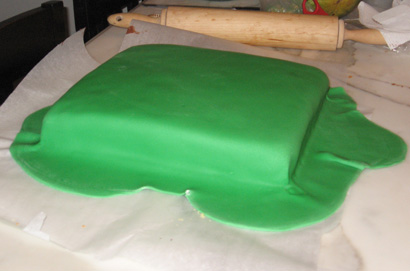
Grad_fondant

Trim the fondant around the bottom edge with a knife. Then, use extra fondant to cover an upside-down bowl for the “hat” part of the mortar board (seen in the book display photo below). Make sure to affix the cake board on top of the overturned bowl well, with more blobs of fondant as glue.

Flatten a ball of fondant for the button. Cut fondant strips for the tassel, and letter your message on top in your fanciest script with tube frosting. I then carefully removed the gold year charm from my grad’s hat and used it to temporarily decorate the cake, but this charm is also probably available at the craft store.
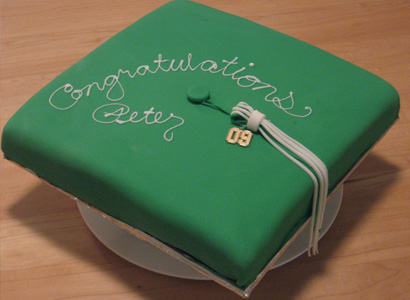
Grad_cake_wood

Now, you have worked so hard on this masterpiece it deserves to be displayed. And this leads me into the next little grad party detail. I’m sure you have heard of all kinds of photo boards parents have made of their grad so guests can take a little stroll down memory lane. Well a simpler solution is to decorate the cake table with memorabilia. I surrounded the cake with photo albums, each with a ribbon bookmark (school color, green) at a particularly significant (or embarrassing) page. Guests could do a whole lot of browsing simply walking around the cake table.
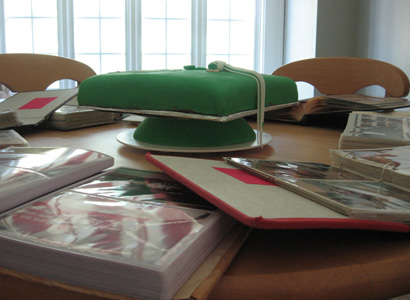
Grad_cake_books

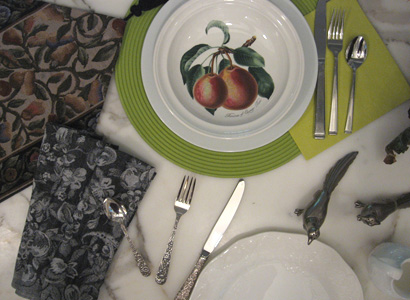
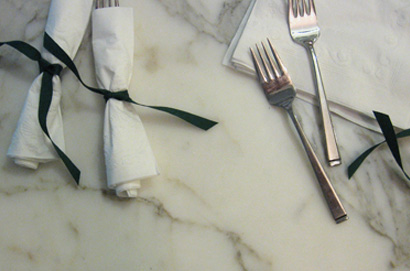
Another very simple decoration is to wrap white napkins around the flatware and tie with a ribbon of the school color. So, what’s so great about it? Don’t they look like little diplomas! (And if you point that out to your guests they will look even more like diplomas).
Grad_diplomas_d

And of course, I shouldn’t have to tell you to photograph your lovely accomplishments. If for no other reason, it will be a handy reference for when the next kid graduates!
IDEA 25: EASTER SURPRISE CAKE

Easter_cake

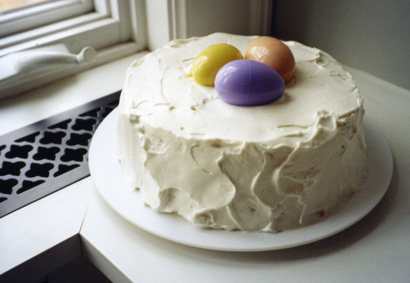
This Easter, why not make a special cake adorned with a little surprise? This recipe is from my Aunt Liz who called it Snowball Cake and often decorated it with fresh strawberries. While that is an extraordinary way to make this cake, and highly recommended, here is a fun Easter version of it. The cake is the same, but nestled on top, we put one plastic Easter egg for each child. Hiding inside the eggs can be candy treats or small toys, anything that says Happy Easter to you!

Of course if you are the type of domestic goddess who prefers to have your local bakery make the cake, the idea still works! You can still steal the show by adorning it with the filled Easter eggs. After all,  BellaPamella style is all about making it creative,  not adding undue stress.

The recipe that follows is also here for you to download. Just print one of the pdfs on card stock and, either cut out for your file [recipe card] or hole-punch for your notebook [page].

Enjoy!

No Bake Easter Cake

2 envelopes unflavored gelatin

1 cup crushed pineapple, drained (keep the juice)

1 cup pineapple juice (add water, if needed to make cup)

1/2 cup sugar

1/8 teaspoon salt

1 tablespoon lemon juice

1 tablespoon lemon zest if available

2 cups whipping cream (+1 more for topping)

4 teaspoons sugar

2 teaspoons vanilla

1 store-bought Angel Food Cake

optional, 1/2 pint of fresh strawberries, sliced

Whipped Cream Topping

1 cup whipping cream

2 teaspoons sugar

1 teaspoon vanilla

Dissolve gelatin in 4 tablespoons cold water. Add 1 cup boiling water, and stir till lumps are gone. Add pineapple, pineapple juice, sugar, salt and lemon juice. Mix well and refrigerate to cool, about an hour. When partly gelled, beat 2 cups of whipping cream, 4 t sugar and 2 t vanilla in a cold bowl just until peaks form. Fold the whipped cream into the gelled mix.

Break up the angel food cake into 1” chunks. In an angel food cake pan or Bundt or other round pan, make layers of the cake, the gelled mixture and if using, sliced strawberries, ending with the gelled mixture. Refrigerate over night. When set, loosen around the edges and turn onto a plate. Frost with the whipped cream topping, made as you made the other whipped cream.

Fill most of the hole with whipped cream and nestle your surprise filled eggs in the indent. Best when kept refrigerated until ready to serve.

IDEA 16: THANKSGIVING PLAN

Thanks_plan

Here is what I have come to believe about the Thanksgiving holiday:

The best part of this holiday is cooking the big meal with ones you love. And not only does it not matter if you make the same meal every year, everyone actually likes that. If you buy into these two things, Thanksgiving really can be the wonderful, not too stressful tradition you wish it were.

Here are some tips for cooking with a big group in your house:

1. Make YOUR quintessential Thanksgiving meal. Of course this means all recipes you like to eat, and equally important, you understand how to make. Mine is Roast Turkey, butter & sage stuffing, braided egg bread, ginger/pear cranberry sauce, mashed potatoes, gravy, baked squash with molasses, tarragon green beans, pumpkin pie and apple pie. It’s pretty much always the same meal and my kids have come to believe that braided egg bread (for example) is what one makes at Thanksgiving.

2. Record all the above recipes in a spiral notebook titled THANKSGIVING. Next year you will be so glad you did this. If you are really industrious, add the shopping list in the front. Honestly, you only have to do this once. Every year after that just pull out the notebook and make the same meal. Why reinvent the wheel?

3. When you get up on the big day (at the crack of dawn) make Belgian waffle batter (Yes, you can use the box kind). Get the waffle iron set up and the minute your family starts arriving put as many guests as necessary on waffle duty. Making, distributing, and munching on waffles is great because it creates easy jobs (which you need with a kitchen full of guests), and you won’t starve as you spend all day creating the big meal. No syrup necessary, just dust with powdered sugar and serve on a napkin.

4. Unless you are big football fans, buy a big jigsaw puzzle and have the kids start it on the coffee table. It’s more social than TV and doesn’t require non-interrupted time.

5. After dinner, invite everyone outside for a big family walk. 

Nothing too fancy, but it covers the important stuff.  You’ll be creating good memories. And with any luck you can manage being together without being at each other’s throats! Have a wonderful holiday. And don’t forget to say thank you!

IDEA 7: MONDAY BREAKFAST

Monday_breakfast


This is one my kids taught me. One Sunday night my daughter was mourning the end of the weekend. She just wanted something to look forward to. “Can you make us ‘special breakfast’?” she asked me. When I told her I could, it helped her put a close to the day. She went to bed happy that Monday morning we would have “special breakfast”.

The key here was something speedy yet impressive. (Save the pancakes or waffles for the weekends when you don’t mind monitoring a pan for an eternity). In order to have time I only set my alarm about 15 minutes earlier than usual. The smell of the bacon got the kids up lickety-split. And they were delighted and thrilled to have a special breakfast all set out for them. It wasn’t a big deal: Orange juice, scrambled eggs (which really takes nano-seconds) and toast, and bacon. And a place all set for them with a place-mat and napkin.

Thus was born Monday Breakfast. We don’t do it every Monday, in fact it’s about once a month. On all the other school days we are making lunches and grabbing toast or cereal or a bagel and yogurt. But about one Monday a month my kids get off to school with a belly full. And the benefit lasts all month.

IDEA 6: LUNCH BOX LOVE

lunch_love

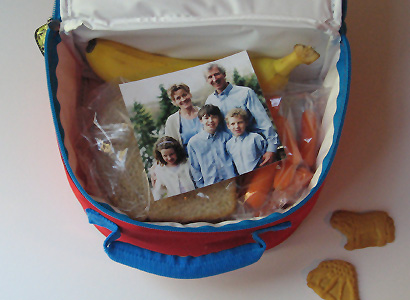
For young children the first day of school can be very exciting. It can also be very scary. Or maybe most common, a little of both. If you pack your child a lunch, slip a photo of you, your family or a favorite pet inside on top of the sandwich. When I did this in my kindergartner’s lunch box the report came back to me that he shouted “What’s this doing in here?!” But I know he loved it.

OK, maybe I was doing it for me!

IDEA 1: SOLVING SUPPER

rec_book

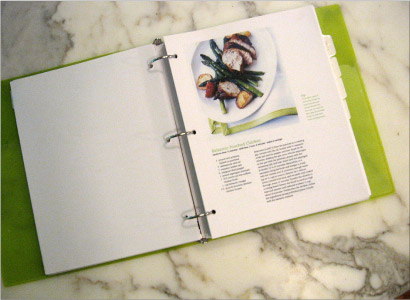
No matter how many fabulous cookbooks there are in the world, it seems the best ideas for that elusive problem called supper come from magazines. I went for years tearing out pages and stuffing them in a fat folder. When I’d look for a recipe it seemed like it was always the one at the bottom, so I’d spend half my precious time looking for it. I tried three-hole punching the pages, but alas the paper is just too thin to hold up to page turns.

One day I took my favorite pages and printed them out on card stock paper. If you are not inclined to spend an evening scanning and printing, drop them off at the copy shop. Once the recipes (one each page) are on the card stock, three-hole punch them and put them in a binder. You can also purchase section dividers for organization. My binder has become the most used book in the kitchen. And of course it expanded to include more than supper. My categories are: Supper, Pasta, Pizza, Side, Soup, Sandwich, Bread, Sweet. But you can choose whatever works for what you have collected.