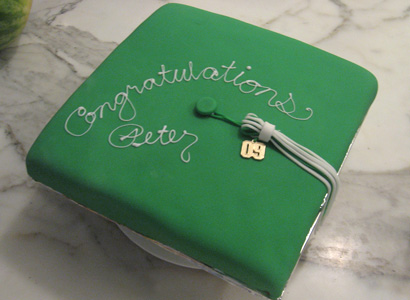
I think I began stressing about the dreaded “Graduation Open House” when my kids entered kindergarten. I had been invited to a few, during which the main topic of conversation was how much the parents went through to get their house in order and make it all happen. One family attempted a remodel before the big day, and another decided to power-wash the house. Needless to say the whole thing had me in denial. When my oldest was nearing graduation, I pretty much decided we wouldn’t do anything. (Did I mention I have an aversion to stressful situations and avoid them at all cost)?
Over spring break we happened to be visiting out of town relatives. My sister-in-law stated that if we would have a grad party, they would come. The offer was just too good to pass up. Besides, I figured a family party was something that I might even be able to handle. There is something much safer about that prospect.
I am not a big party expert but I do know that if I give myself a few small, creative tasks to accomplish, I can throw a party that I won’t worry over, too much. The truth is, anyone who comes to your home to a party is not passing judgment on you, but quite happy to be there. And if you throw in a few creative touches, the whole thing is just more interesting and memorable. I’m not saying you HAVE to make things. But if you tend to be a crafty person, I say, go with your strengths! It will calm you down about the whole thing.
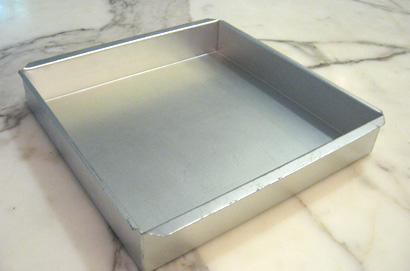
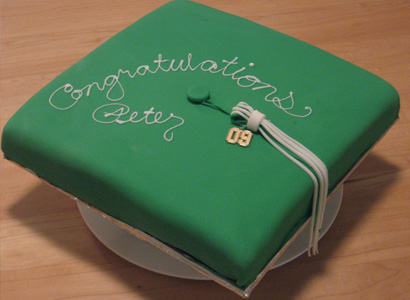
I knew I wanted to make a “theme” cake, and when my husband suggested the shape of a “mortar board” (graduate’s hat) I was thrilled. I happened to have a very large, very square pan, but you could always make a smaller one with a regular square pan.
One of the easiest ways to make a very professional looking cake is to use fondant icing. And the best part is, it’s more like a craft project than cooking. Buy a box of pre-made fondant from the cake decorating isle of your local craft store. It comes in a package roughly the size of cake mix. Inside is a plastic bag containing a moist material that resembles white play-dough. The same store will also carry paste-based food colors. Depending on your school colors you may be able (as I was) to get away with buying only one color.
Now make and cool a square cake. I cut a piece of foam-core the exact size of the cake and covered it with foil, but you could also use corrugated cardboard covered with foil. Place the cooled cake on the square so no edge is showing, and ice the whole cake with your favorite butter cream frosting. Instead of placing the fondant directly on the cake, it’s preferable to ice the cake first with fluffy butter cream frosting. This not only helps keep a smooth surface, but tastes much better!
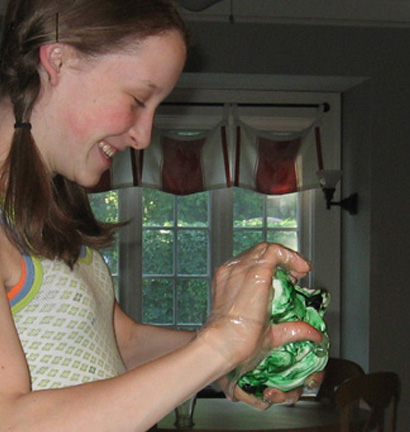
Here’s the fun part–you actually use your hands to squish and knead the color into the fondant. We used plastic gloves so that our hands weren’t dyed green. But make sure it’s not a latex or rubber glove which could transfer an unwanted flavor. We used thin plastic gloves, the kind you get in a box of home hair dye. When you start this, you have the impression the color will never even out, but have patience, eventually it will.
Once the color is even, the fondant is rolled out like a pie crust. Roll it as thin as you can, stopping to lift and turn over much like you would a crust. Rolling between two sheets of parchment paper makes lifting easier. Then it’s ‘easy as pie’ to lift the fondant and place it over the cake.
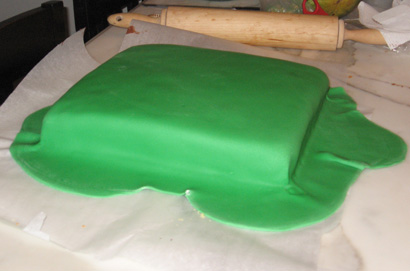
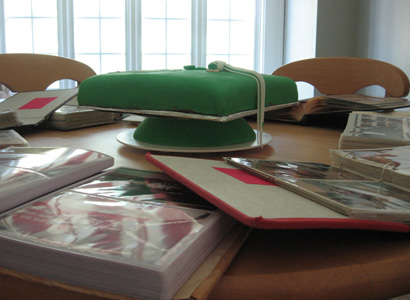
Trim the fondant around the bottom edge with a knife. Then, use extra fondant to cover an upside-down bowl for the “hat” part of the mortar board (seen in the book display photo below). Make sure to affix the cake board on top of the overturned bowl well, with more blobs of fondant as glue.
Flatten a ball of fondant for the button. Cut fondant strips for the tassel, and letter your message on top in your fanciest script with tube frosting. I then carefully removed the gold year charm from my grad’s hat and used it to temporarily decorate the cake, but this charm is also probably available at the craft store.
Now, you have worked so hard on this masterpiece it deserves to be displayed. And this leads me into the next little grad party detail. I’m sure you have heard of all kinds of photo boards parents have made of their grad so guests can take a little stroll down memory lane. Well a simpler solution is to decorate the cake table with memorabilia. I surrounded the cake with photo albums, each with a ribbon bookmark (school color, green) at a particularly significant (or embarrassing) page. Guests could do a whole lot of browsing simply walking around the cake table.
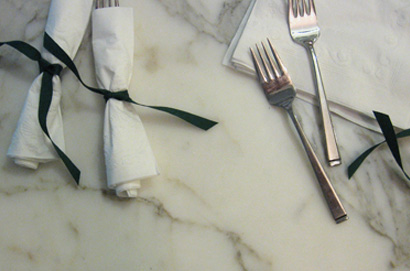
Another very simple decoration is to wrap white napkins around the flatware and tie with a ribbon of the school color. So, what’s so great about it? Don’t they look like little diplomas! (And if you point that out to your guests they will look even more like diplomas).
And of course, I shouldn’t have to tell you to photograph your lovely accomplishments. If for no other reason, it will be a handy reference for when the next kid graduates!
