Archived Ideas for ‘Keepsakes’

IDEA 96: HONOR A MEMORY

Charlie Bird_CU_LR

As a kid my siblings and I spent many summer days on the shores of Lake Michigan. My father was born in Northern Michigan, and his family’s farmhouse, a quarter mile from the bluffs, was our vacation home.

One summer day in my childhood, we were exploring the beach. And we found a seagull struggling to free himself from a tangle of fishing line. The three pronged hook had pierced and caught the web of his foot as well as one of his wings. He must have tried to peck his way free as the third prong was now stuck through his bill.

My dad was able to free the hooks and untangle the bird, a favor that was rewarded with a bite on the hand. But it was clear the gull was not able to fly. By the time we were heading back south, our patient hadn’t improved, so we brought him back home with us. He was dubbed “Charlie Bird”. And as our city home was on a large natural pond, we figured we would try nursing him back to health there. My mom fed him tunafish until a naturalist friend told her he’d much prefer a fish from the pond (which he gulped down without hesitation). His physical therapy was administered by my brother leading him by leash down to the pond where Charlie would swim out and be gently pulled back.

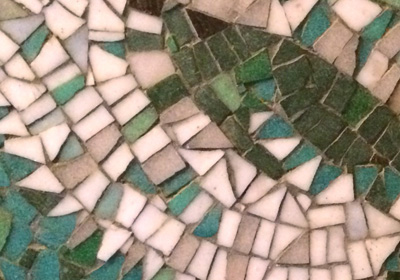
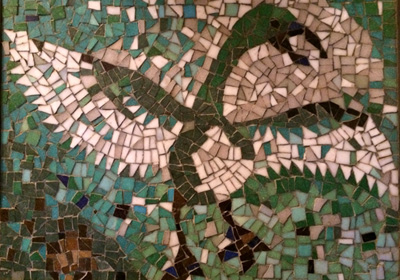
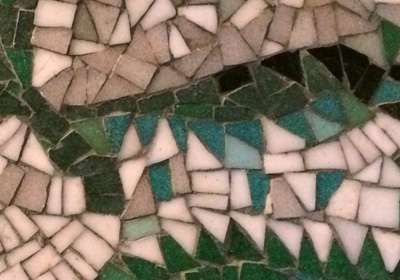
Charlie’s time spent with us inspired my artist mom to create a mosaic of him. With broken pieces of colored tile, my mom depicted Charlie with wings spread wide in a perfect picture of natural energy and freedom. I imagine this is Charlie, right when he was freed from his shackles and ready to bite the hand that freed him!

Charlie Bird_3


On a trip home to my parents house, I was reminded of this amazing mid-century work of art. It’s an image so familiar to me, yet I hadn’t thought of it in years. We are now building a communal kitchen with sleeping quarters on the “Up North” land and this Charlie Bird mosaic will be featured prominently. I’ll create a color palette pulling from the blues, greens, whites, darks and grays. The vibe will be simple and natural. Like the sand, the trees and the wildlife we came to love, the house will let nature in and not be so delicate as to be wrecked by sand dragged in on bare feet or water from wet swimsuits (or feathers). The windows will be more about what you are seeing outside than architectural details inside. The spaces will be big and welcoming, as we rarely congregate with less than 20 people. The surfaces will be low maintenance, (who wants to spend all our vacation repainting). The house will be more about accommodating the people that gather than about it’s own self. But it will be designed with simplicity, and good, smart, frugal but beautiful ideas.

Charlie Bird_CU_2_LR

This Charlie Bird mosaic may not be the sole inspiration for this project. But it’s influence, both as art and as memory, will be honored and fondly felt.
IDEA 94: WELCOME TO THE FAMILY

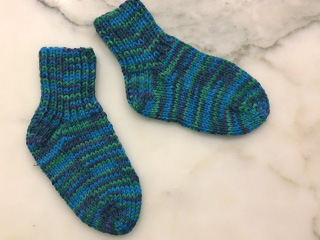
Sock_Family_baby

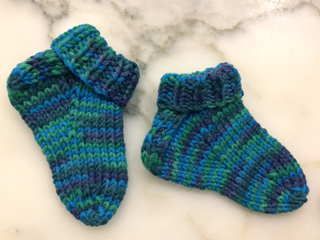
Second baby gifts can be tough to figure out. Having a baby can result in a cornucopia of baby stuff, so much so, the baby can grow faster than all the tiny outfits can be worn, let alone get worn out. Often, second and third babies already have lots of great stuff to wear and use. So, when my sweet niece had her second baby, it was tough to come up with something practical, yet special to celebrate this newest family member.
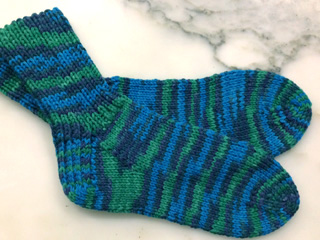
Serendipitously, last time I was visiting home, my mom asked me if I’d like some skeins of beautiful yarn she had bought, but never used. My answer to her was, of course. I’ll make you a pair of socks.

Sock_Family_8cc

I knit the socks for my mom and found I still had lots of the yarn left, so I asked her if she would like multiple pairs. Her answer to me was, why don’t you make a matching pair for my great grandbaby?

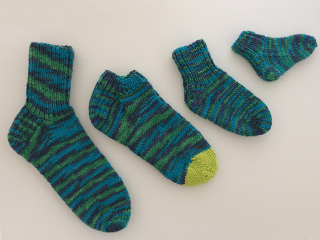
You can see where this is going. I Made baby socks, and big sister socks.

Sock_Family_babySock_Family_9cc

By the time I was done I had made socks for the whole new family.

Sock_Family_4

Now, even though great-grandma and great-grandbaby are states apart, everyone will feel just a little bit closer when they wear their special socks. And this new little one will have no trouble telling what family she belongs to!

IDEA 89: TAG THE TREES

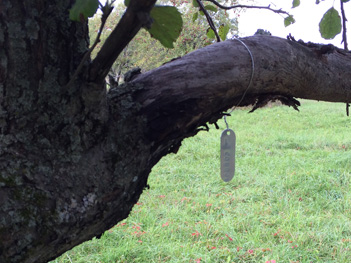
Tree_Tags_Branch_1

Up in northern Michigan, the farm my dad grew up on sports some ancient apple orchards. The trees still produce, and the varieties are heirloom, if there ever were some. There’s not just the Jonathans, Macintosh and Golden Delicious, but Wealthy, Wagener, King and Alexander. Even now I can’t remember all the names, which is why this fall we made the rounds with my dad and we tagged the trees.

And it occurred to me, the project was so satisfying (and educational), why shouldn’t everyone do this with their own trees?

Of course most people don’t have an apple orchard in the family. But there really isn’t any reason you can’t identify and mark the trees you do have. Here’s what I did:

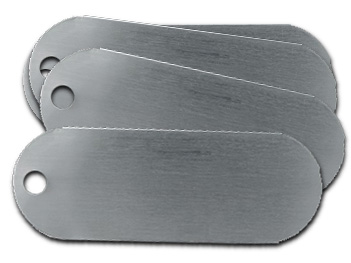
I bought aluminum tree tags online for the rich price of 100 for about ten bucks.

Tree_Tags_Blanks

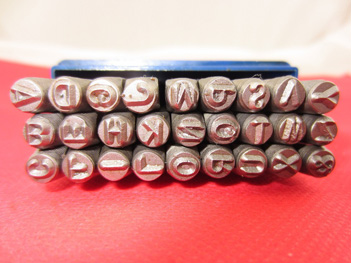
You can write on these with a Sharpie if you like, but, not wanting to make things too easy on myself, I opted to purchase a set of “punches”. You can purchase the whole alphabet for about a dollar and a half per letter. My letters were about 1/4″ tall. There are lots of sets available. Just put “Letter Punch Set” in the search.

Tree_Tags_Letter_Punches_1

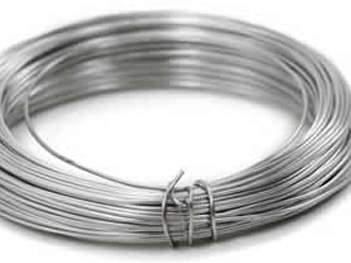
I bought aluminum wire and it came with a wire clipper in the package, which came in very handy.

Tree_Tags_Wire

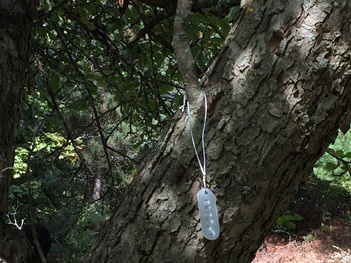
And we cut long pieces, making sure to allow lots of room around the branches. We hung our tags much like a loose bangle bracelet, so as not to disturb the tree’s growth.

Tree_Tags_Branch_2

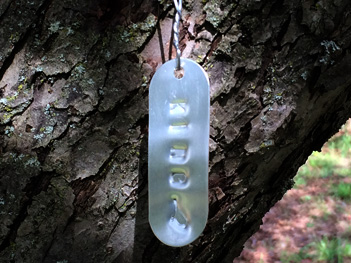
I learned a lot about our apple trees, but probably just as important, now our lovely trees sport shiny bangles that don’t just identify the fruit. Seeing the tags jiggle in the wind makes me smile as they betray the love with which these trees are cared for. It may not change the world, but it’s a very BellaPamella thing to do!

Tree_Tags_King

By the way, Happy Birthday, Dad. And thank you for sharing your knowledge, and your trees!

Tree_Tags_Dad

IDEA 76: MAKE A CHERISHED HAND-ME-DOWN

Hand_Ben_Notype

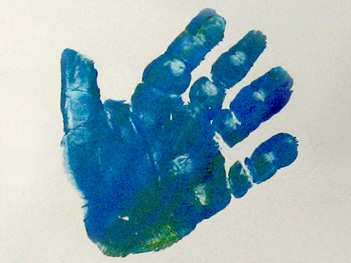
What is it about our off-spring’s little hand and footprints that look to us like one of nature’s most beautiful design motifs?

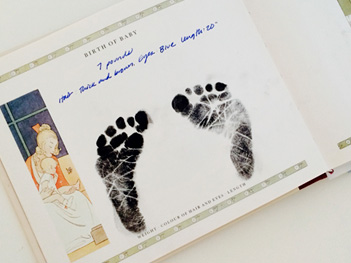
When my firstborn came back from the hospital nursery with inky feet, I was thrilled to see that the nurses had captured the one-day-old feet on a beautiful document, and I requested they put another set right onto the page of his baby book.

Foot_Nell_Book

When my baby daughter got to day-care, I received a “corsage” made by one of the teachers. It was for Mother’s Day, and was made using my daughter’s tiny handprint in pink paint, cut out, laminated with a pin back, and festooned with small pink ribbons. I wore that corsage on Mother’s Day for years.

That’s why, when my colleague Jen told me about her handprint project, I knew I had to share it. It’s just SUCH a BellaPamella idea!!

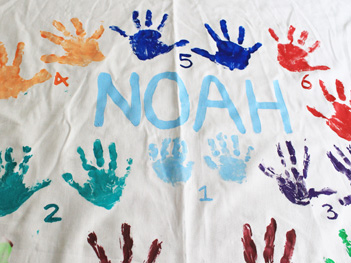
With each child’s first birthday, she purchased a white tablecloth. The birthday kid was allowed to put a painty set of his/her handprints on the cloth, which was then labeled with their age (1). As the birthdays commenced, the handprints collected. Each cloth is different, reflecting the “design sensibility” of each child.

Hand_Noah_Tablecloth

The original idea was to bring out the special tablecloth to decorate the birthday party table. But, very quickly, Jen realized this keepsake was way too precious to expose it to spilled Kool-Aid and ice cream.

So, it still comes out. It gets it’s annual set of prints, and becomes a wall hanging or other decorative drape for the duration of the celebration. Then it’s safely stowed, away from flinging food, until the next year. And one day, it just may provide a favorite story for her grand kids.

Helping_Hands_Link


IDEA 74: MAKE A HOLIDAY KITCHEN TREE

Kitchen_Tree_Dec_Bistro

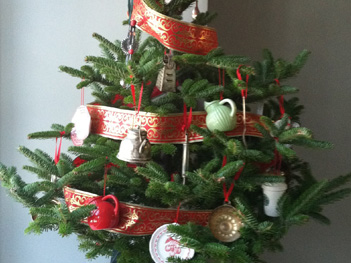
Many years ago, at a kitchen shop, I was enticed by a silver-plated Christmas ornament in the shape of a miniature colander. It was at that very moment I decided to give my beloved kitchen a Christmas tree of its own.

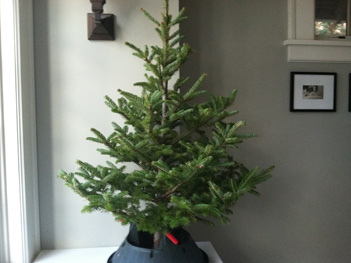
Of course, there isn’t a lot of extra room in my kitchen, so I bought the smallest tree I could find, about 2 ½ feet high.

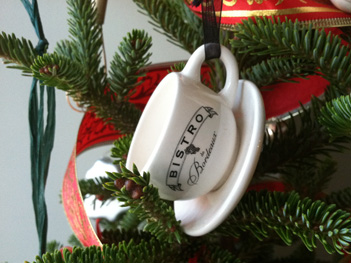
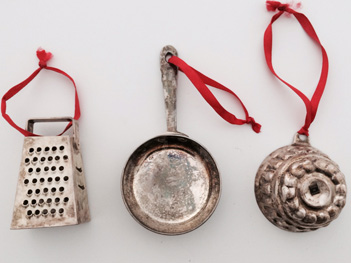
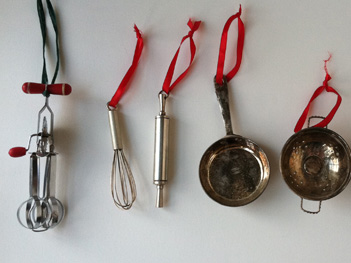
Over the years I have collected special kitchen themed ornaments for this tree, which has now become an annual tradition, brought home along with the regular sized family Christmas tree.

Kitchen_Tree_silver_3Kitchen_Tree_UtensilsKitchen_Tree_Silver

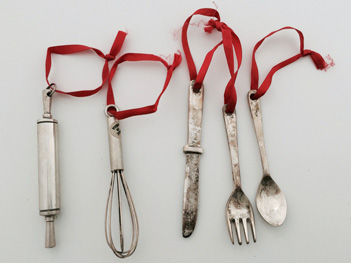
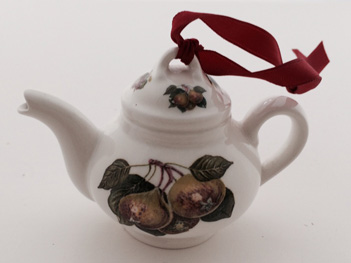
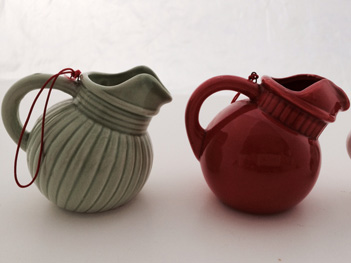
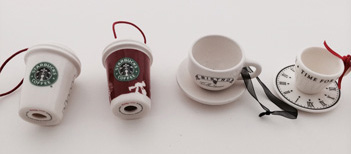
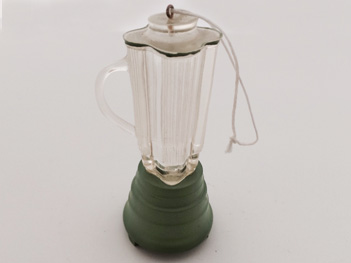
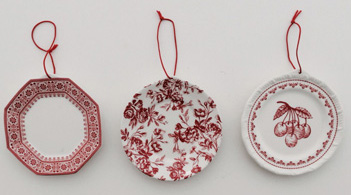
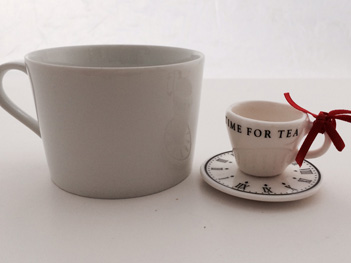
I’ve got a tiny old fashioned egg beater, a whisk, rolling pin, fry pan, cheese shredder, kettle, a mini spoon, knife and fork, a tiny blender and myriad plates, cups and teapots.

Kitchen_Tree_Pear_TeapotKitchen_Tree_pitchersKitchen_Tree_CoffeesKitchen_Tree_BlenderKitchen_Tree_Plates

Kitchen_Tree_Time4Tea

To make your own kitchen tree, you’ll need a small tree stand with a water reservoir. The one I use is much bigger than it needs to be, but it was one we had around so I use it. Look for a nicely shaped “table top” tree. They are much less expensive than a full sized one, although I usually have to shop around a couple places to find them.

Kitchen_Tree_Bare

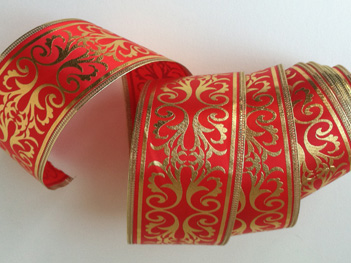
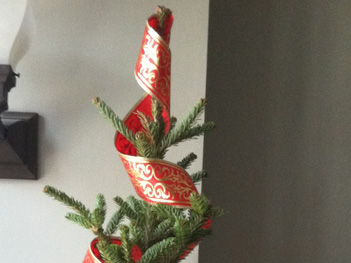
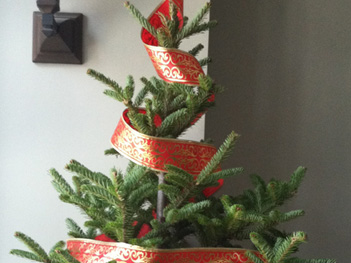
I like to start by winding a beautiful ribbon on the tree. I don’t use any lights. But you could if you want to.

K_T_RibbonKitchen_tree_ribbon_CUKitchen_tree_Ribbon_2

My wide ribbon has wire in the edges. This makes it very easy to just sort of unwind the ribbon down the tree. It naturally wants to curve that way.

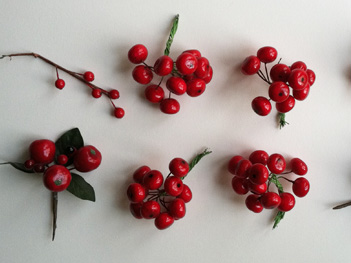
Then I insert several “fruit picks”. I keep these with my ornaments and just stick them right into the tree.

Kitchen_Tree_Berry_picks

You don’t need everything right away. In fact, it’s more fun to add a new ornament to your kitchen tree each year.

Kitchen_Tree_Dec_cropped

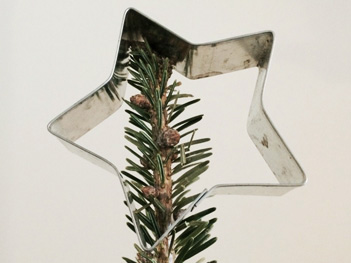
So what do you put on the treetop? A star shaped cookie cutter, of course.

Kitchen_Tree_Star_noribbon

IDEA 65: REMEMBER TOGETHER

Memorial_book_1

Recently, we lost a very dear friend and relative. My mom’s sister, my sweet “Aunt Liz”.

Lizzie had a condition that wore her down slowly, with very little pain. So we were all blessed with a little time. Time to visit. Time to get used to the idea. Time to say good-bye.

And my sister had a really amazing idea. The idea was to create a book of Lizzie’s wonderful life. Creating a book of this sort isn’t the amazing part. Online publishers like My Publisher and Shutterfly make it a snap. But the ingenious part was, instead of doing so after she passed, we worked on it with her, while she was still with us.

Together, Liz and my mom combed photo albums to pick out favorites. Family members would create spreads, or send in thoughts and photos for the rest of the “editors” to make use of. Liz wrote wonderful detailed passages about her work, her travels, and her dreams, and of course corrected the occasional errant fact.

The wonderful pages full of her life stacked up. As her strength waned, we printed a copy so she could have it and share it with visitors at hospice. And once she was gone, we printed many copies, giving each person a means to reminisce.

By the way, you don’t even have to wait until someone is ill. A treasure like this can be started any time. Either way, why wait till someone is gone to express how very much they mean to you?

Memorial_book_2

IDEA 64: SHARE YOUR WISDOM

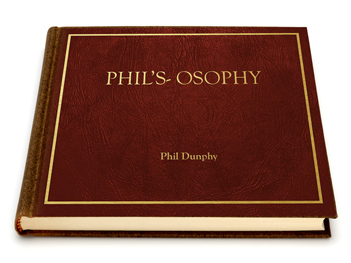
Phil's-osophy_Book

If you have kids, one day they will be moving on from your nest. When this started happening at my house I found myself wondering if I had really covered all the topics. Had I sufficiently marinated them in my philosophy of life? And did any of it stick?

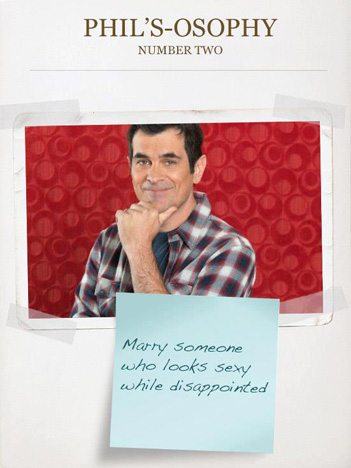
For this reason I had a bit of an epiphany while watching the episode of Modern Family called “Phil’s-osophy”. (By the way, if you are a parent, this show should be required viewing. I have often noticed that in the throes of raising a family, your first defense is a sense of humor). Anyway, in this episode, The family’s oldest daughter sets off for college. The dad, Phil, creates a book for her called Phil’s-osophy. (If you are Phil Dunphy, this title makes perfect sense). Since Phil is Phil, his words of wisdom are kind of hilarious. But, while it’s all loads of fun, that’s not my point. My point is this: Why not create your own book of philosophy to send along to college with your grad!

I just finished a small (5.75″ x 7.75″) 20 page book from My Publisher that cost only $12.99 and it was beautiful! Another very popular book making site is Snapfish. And I know there are many others. The idea is to put together a book of your own words of love and wisdom for your kids flying the coop.

Of course you don’t have to use an online publisher, although they are simple, inexpensive, and do a beautiful job with photos. You could consider making a handmade book. It all depends on your inclination, and artsy-crafty prowess.

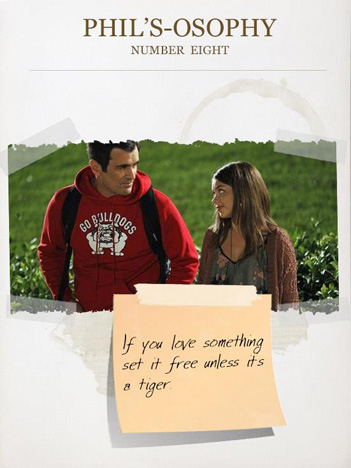
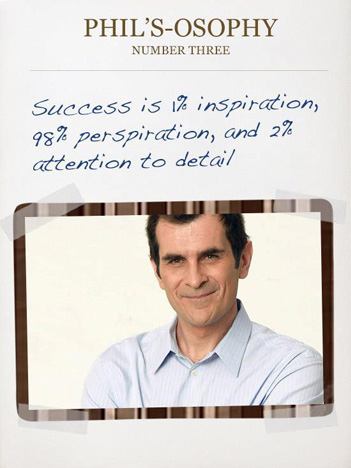
So, in my haste to get this idea to you in time for school starting this fall, I’m writing this without my example to show you. In lieu of that, we’ll just have to take a look at a few of Phil’s pages:

Phil's-osophy_8

Phil's-osophy_3

Phil's-osophy_2

And a few more of my favorites:

The most amazing things that can happen to a human being will happen to you if you just lower your expectations.

Take a lesson from parakeets: If you’re ever feeling lonely, eat in a front of a mirror.

Watch a sunrise at least once a day.

If you’re ever in a jam, a crayon scrunched up under your nose makes a good pretend mustache.

Never be afraid to reach for the stars because even if you fall, you’ll always be wearing a Parentchute™.

IDEA 59: MAKE A KID ART PILLOW

Kid_Art_Butterfly_2

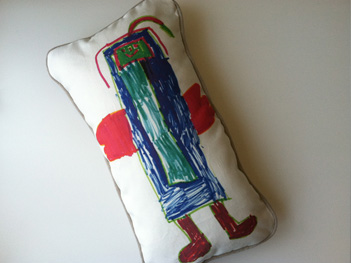
Anyone who has been keeping track of the Never-Ending-List-Of-Very-BellaPamella-Ideas knows that I love a great idea for using kid art. If you have kids, this art resource is abundant, and every once in a while you score a piece that is absolutely priceless. This fantastic idea will add to the other terrific ways to put kid art to use.

You may have already discovered this wonderful site set up to let you print your own fabric, called Spoonflower.

This site allows you to design as small as one yard of fabric and they will print it for you! I tried this once and was completely hooked. Then one day I realized, this was a perfect way to produce an amazing keepsake of my children’s art!

You need a scanner so you can scan your child’s art. Save it as a jpeg, and follow the instructions on the Spoonflower website to make sure your scan is the proper size. You can choose from a variety of fabric types, but for these pillows I selected Linen-Cotton Canvas.

One yard of the linen-cotton Canvas is 56″ wide, so I was able to fit several pieces of art in my one yard.


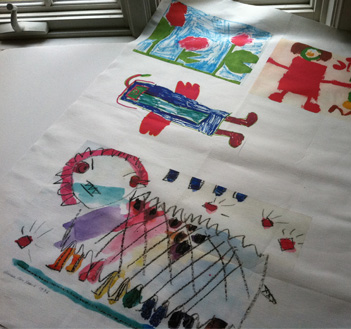
Kid_Art_Fabric

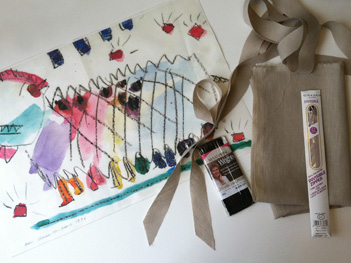
Upper right is my young daughter’s “self portrait”. Then, counterclockwise, there’s some beautiful pink flowers, an angel (or is it a butterfly?) and a Chinese New Year dragon parade. And this is only half the yard.

You could also “repeat” the art and it will automatically fill the yardage. This would be perfect for curtains or bedding.

From the fabric store, I bought some simple linen in a neutral color for the backing and piping. Whatever you buy, get enough for the pillow back and to cover the store bought piping, or you can use the ready made Wright’s piping if it comes in a color that works.

Kid_Art_Materials_2

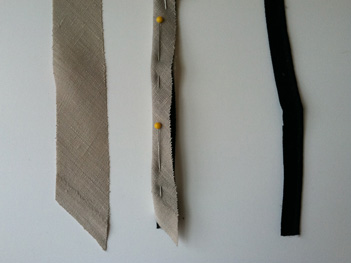
To cover piping, cut strips of your fabric on the diagonal (use a 45 degree triangle if you have one. If not, fold a piece of paper in a triangle. If you bring two consecutive edges together you’ll get a 45 degree angle. You only need this as a guide to get you started on the right angle).

Kid_Art_Piping

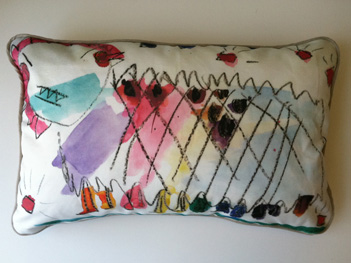
You don’t have to use piping on your pillow, you can just sew the front and back together, right sides together, and turn it inside out, stuff, and stitch the remaining edge closed. But I like to add piping and a zipper. Choose the method that closest matches your sewing prowess. The point is not necessarily the fanciness of the sewing, but the sweetness of your child’s artwork, now on a huggable pillow.

Kid_Art_Pillow

And I’m sure I don’t have to say how incredible a grandparent gift this would make. OK, now get going! I’ve given you plenty of time to get this done by next Christmas!

IDEA 54: MAKE A POSTCARD DIARY

Postcard_memoir_1

This sweet and very BellaPamella idea came from my dear friend April, with whom I have shared virtually every aspect of raising our collective children.

It’s no secret the family vacation is one of my favorite subjects. And the older my kids get, the more I treasure those special trips. So here’s a way to create a lasting memory of the trip, and keep the kids entertained all at the same time.

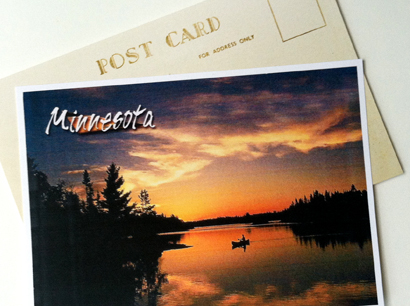
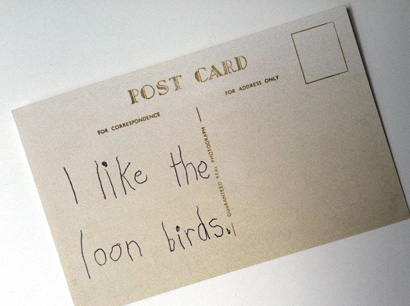
Next time you take a trip with your family, each stop you make, allow the kids to pick out a postcard. On the back of the postcard have them write their thoughts. It really doesn’t matter if it’s a gas station in the middle of Kansas or a wild animal preserve in Australia, your child will have an opinion about it that may surprise you.

Postcard_child

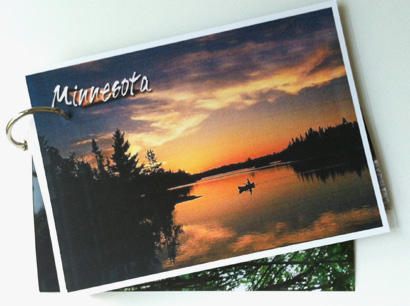
Along the way, or when you return, punch the cards with a paper punch and slide them all onto a binder ring (available at any drugstore, or of course, office supply).

Postcard_bookVoila! The perfect memoir of your trip, seen through the eyes of your children. (And yes, it’s okay for you to add your own thoughts on postcards too). Happy travels!

IDEA 43: MAKE A TIMELESS CAPSULE

Transfer_Video_3

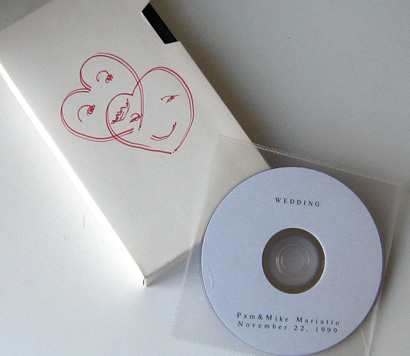
Is there a VHS videotape of your wedding somewhere in a box in your attic? How about some “Super-8” film reels from when you were a kid? If your house is typical, you have a few of these treasures, and you have no idea where they are.

Lately I’ve been noticing the shops offering to transfer my stuff to a current medium. And it got me thinking. How many of these things do I really have? I’m not about to transfer all the cartoons my kids used to watch, but I have only one wedding video. I have another cassette containing my fifteen minutes of fame (in my 30’s) on a local TV show. And a small hand-full of other things.

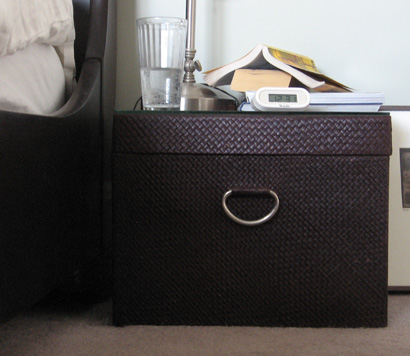
I decided it was time to collect and transfer these few precious things. But here’s the key: I won’t be putting them back in a box in the attic. I chose a basket/box with a lid that I also use as a bedside table. In here I’ve stashed the originals and the transferred DVDs. When the next new technology comes along I will have everything in one spot, hiding in “plain sight” so to speak, under a piece of glass that protects the lid of my bedside basket. In addition to this I’m keeping a file on my external hard drive, but that’s getting a bit technical, isn’t it?

You can choose any box or container you like. Maybe you’d prefer an interesting old box on the living room coffee table. But the point is to have something you keep out, not stash away in the attic. That way, you can add things as you collect them and you’ll actually be able to find them when the new media switches again. And you know it will!

Bedside_Basket

BELLAPAMELLA_BRIDE